|
This article will guide you on how to export data read by Yanhua ACDP. The steps for the Android system are as follows:
Open the ACDP App and update the ACDP software to version 3.0.118 or above. 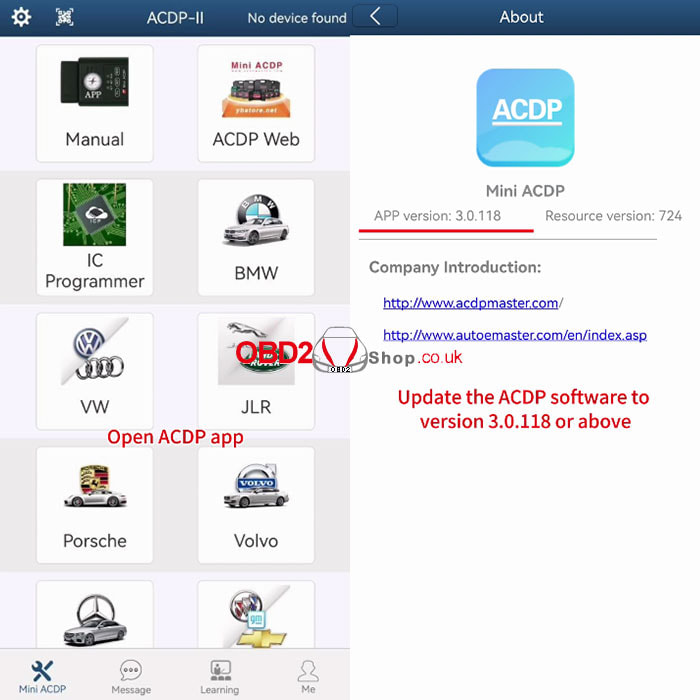
Click [Me]>>[My files], and click on the icon in the upper right corner.
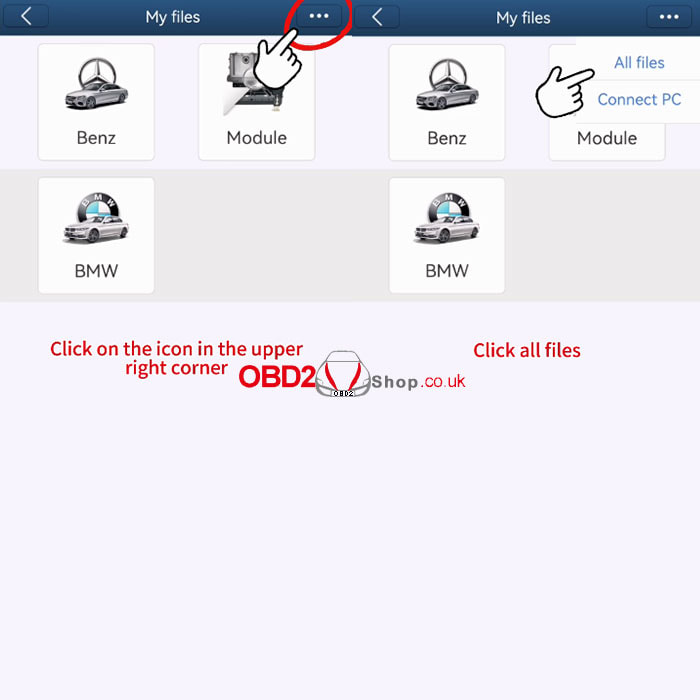
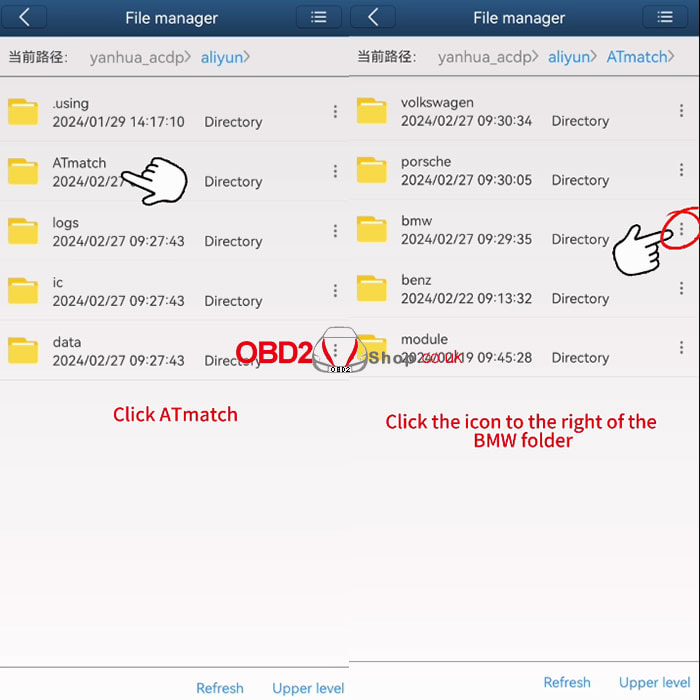
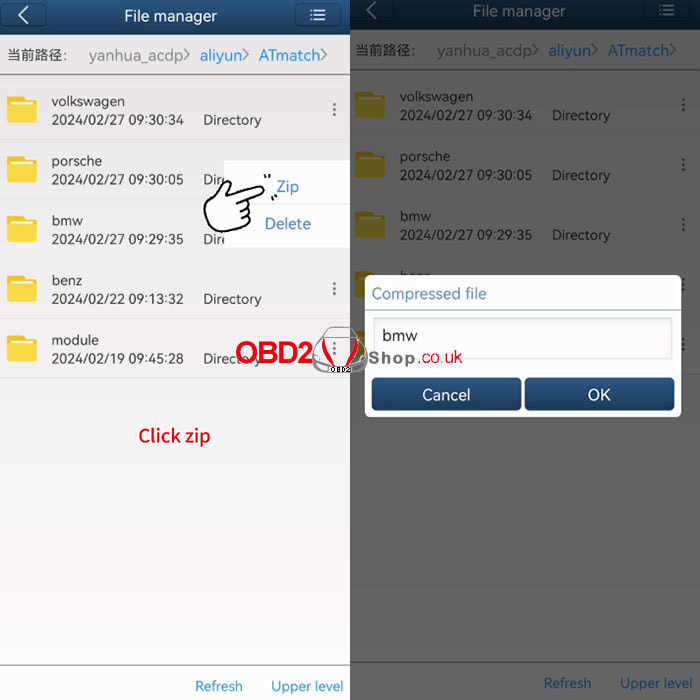
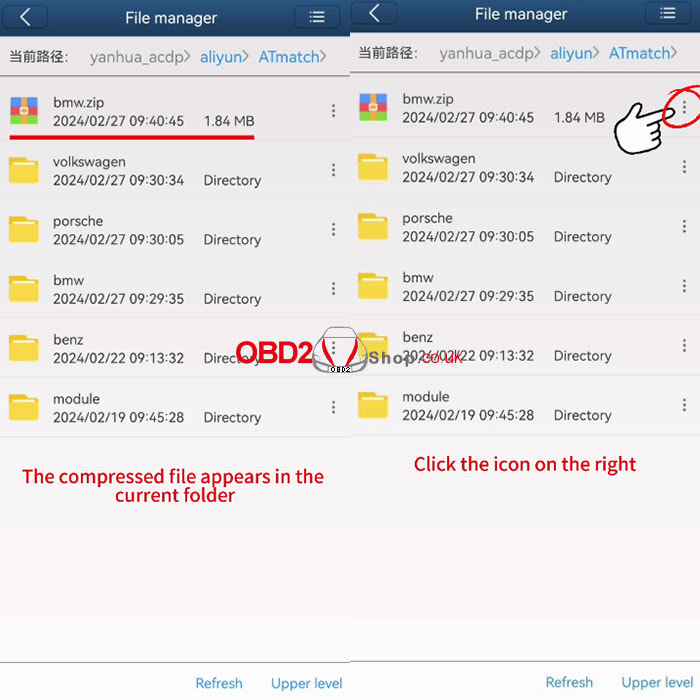
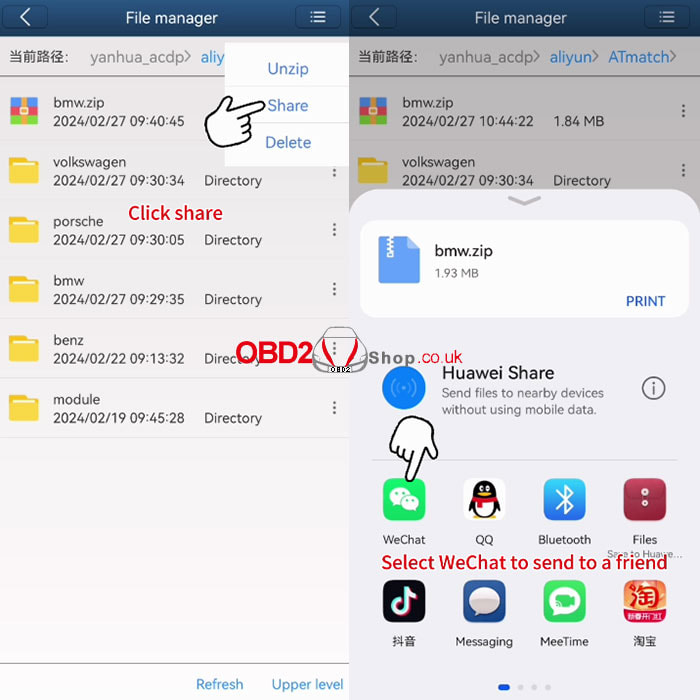
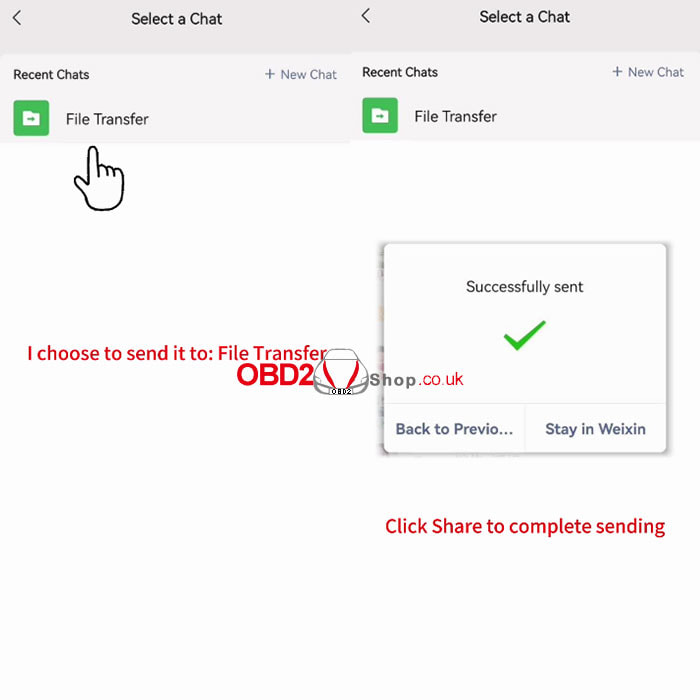
Click [All files]>>[ATmatch] Here we take exporting the BMW folder as an example. Click the icon to the right of the BMW folder, click [Zip], then click"OK" to continue. The compressed file appears in the current folder, click the icon on the right, then click [Share], and we use WeChat as an example, click "Share" to complete the sending. 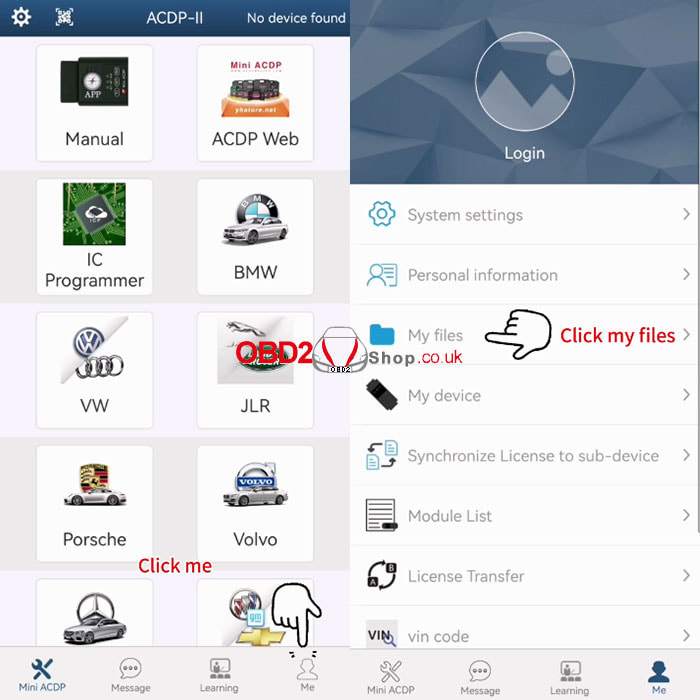
For more details please see the video:
0 Comments
We usually have encountered this situation in the maintenance of vehicles: vehicle tire pressure alarm does not display tire value as shown in the picture. Today I'll introduce the device Launch X431 CRT5011E + LTR-01 RF Sensor that can do car tire pressure. Initial Setup 1) Hold down the power button for 3s while using it. 2) Open X431 CRT5011E, go to the Home screen to select "Set Up". 3) After entering, modify the pressure unit & language for your own use. How to reset TPMS sensors? The faulty vehicle was a 2017 Porsche Macan. The instrument's left rear tire pressure displays an abnormal alarm. Open X431 CRT5011E, Tire Pressure System >> Porsche >> Macan >> 2014/01-2022/12(433MHz) >> Check Sensor Trigger against the valve nozzle as shown. You can see the other 3 sensors are normal, the left rear tire pressure sensor is abnormal. 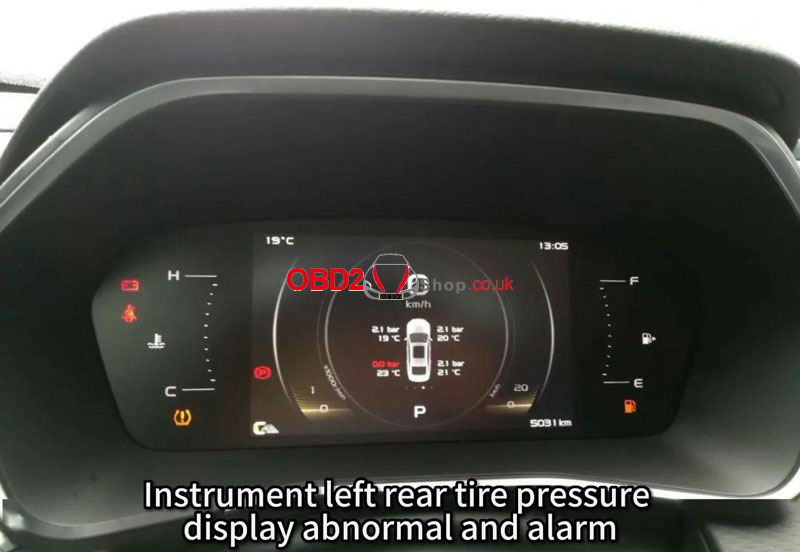 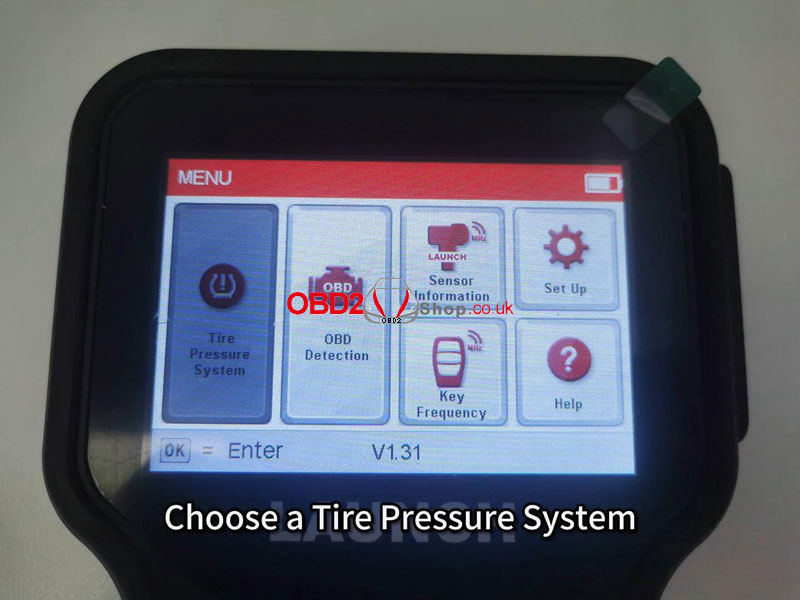 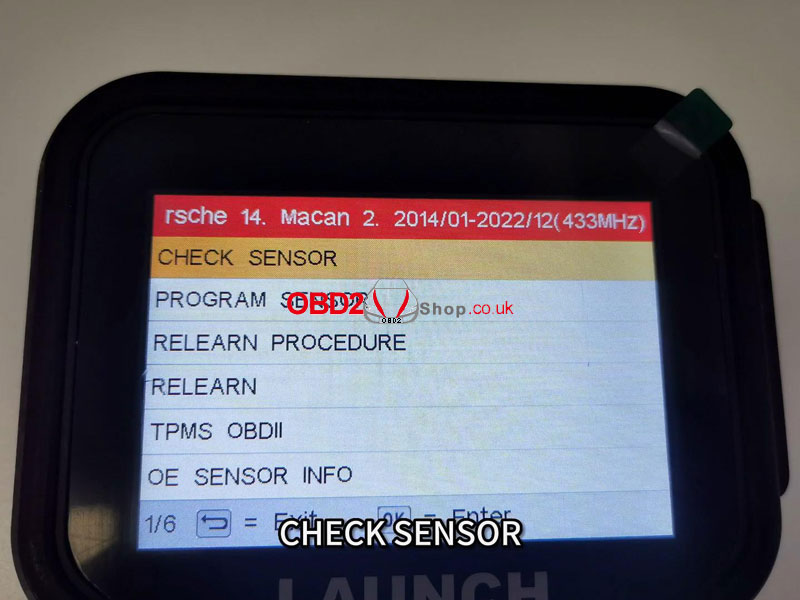 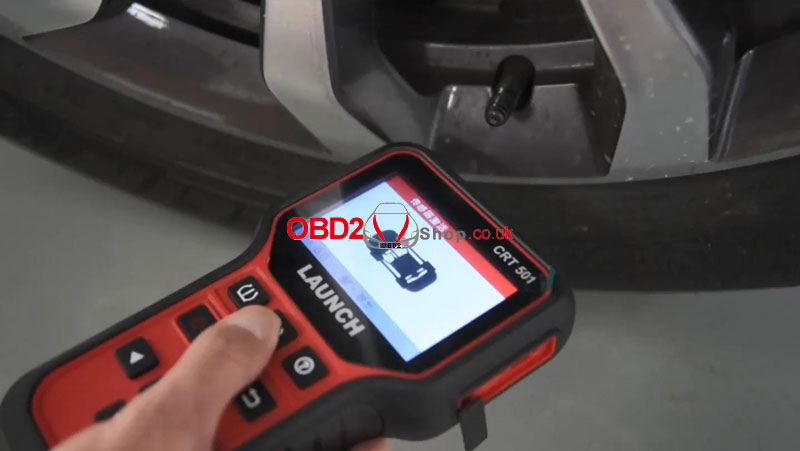 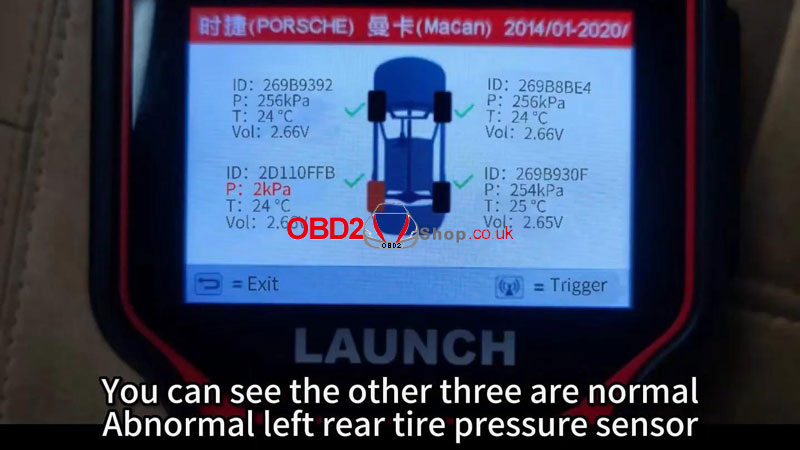 Method 1 Use the Launch LTR-01 RF Sensor to replace the damaged tire pressure sensor. Program Sensor >> Manual Input/ copy ID by OBD 1) Write the left rear sensor ID of the original car into the tire pressure sensor under Launch. You can see the message of programming success. 2) Follow the tire pressure sensor installation instructions to put a new sensor in the left rear tire of the car. Select "Check Sensor" on the function screen. 3) Then trigger 4 tire pressure sensors against the valve ports. The left rear has been successfully replaced by the new Launch tire pressure sensor. 4) Clear the trouble code. The vehicle instrument tire pressure monitoring system has returned to normal. 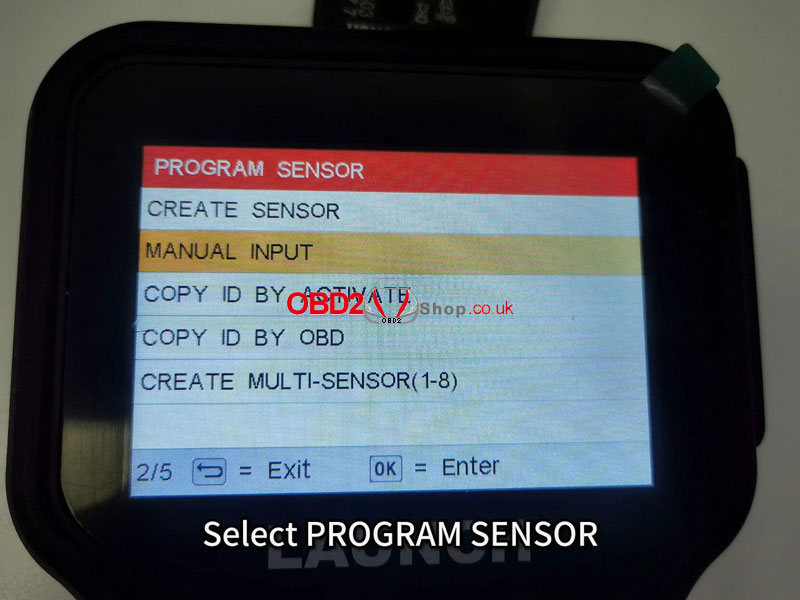 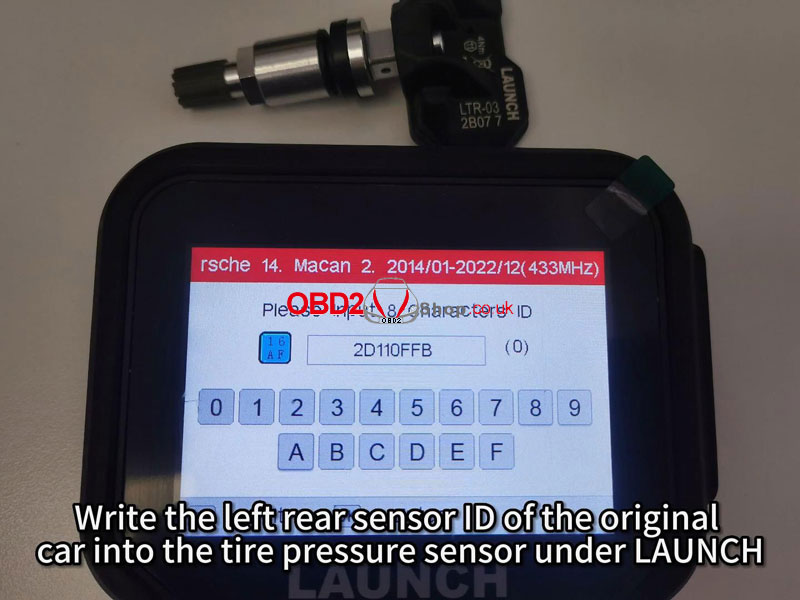 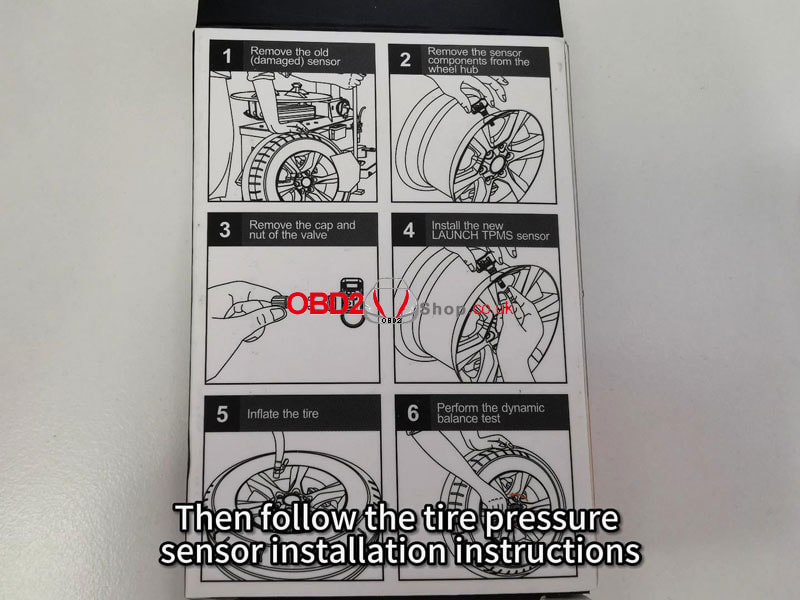 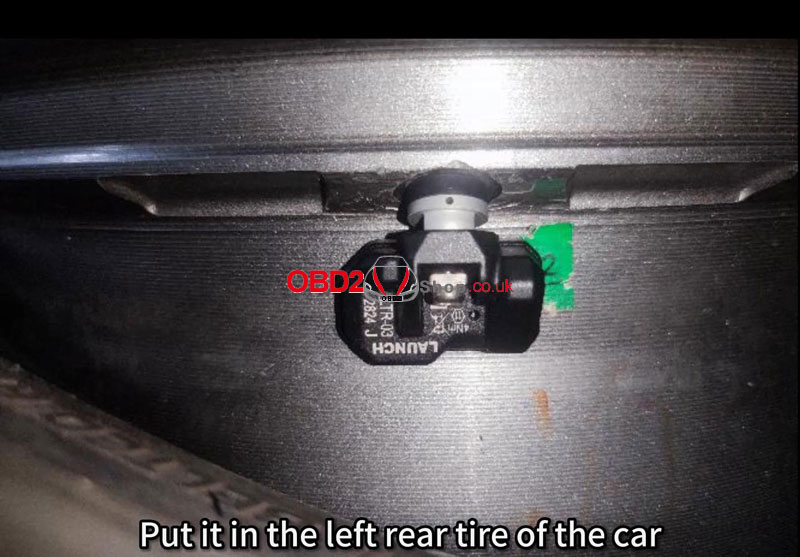 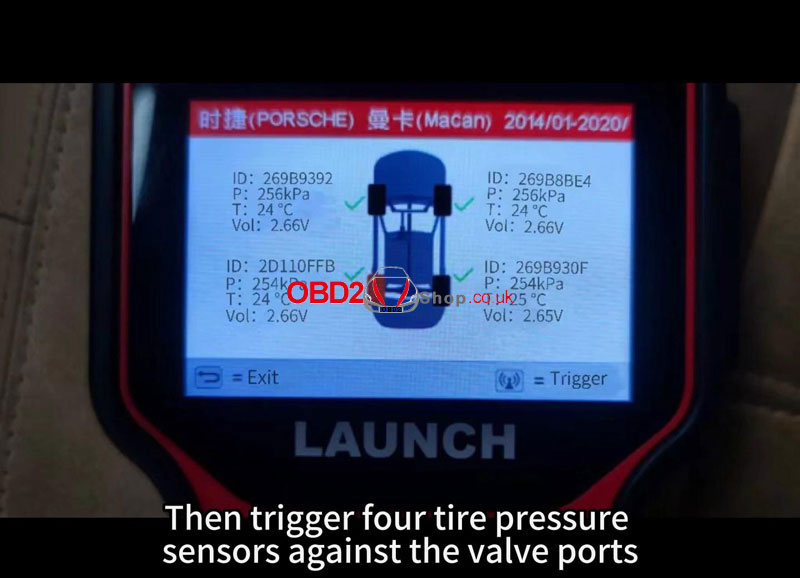 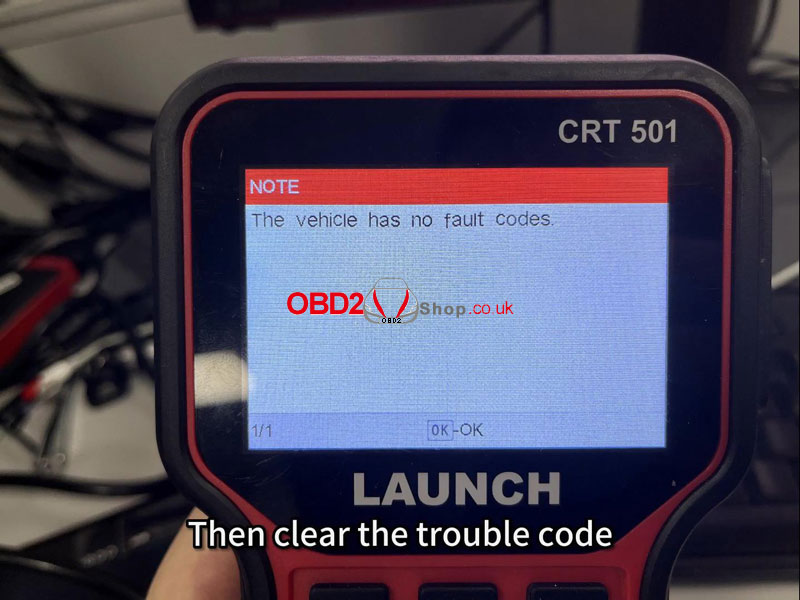 Method 2 Of course, you can also replace the original tire pressure sensor directly. This tire pressure sensor in Turi is ID D2319C3E. 1) Select "Check Sensor" on the function screen. 2) Trigger 4 tire pressure sensors against the valve port. You can see that the left rear tire pressure sensor is the new ID. 3) Return to select "Relearn >> OBD Relearn". 4) Take out the OBDII diagnostic main line according to the prompts, and connect the vehicle OBDII diagnostic socket to the 5011E device. Then continue, it'll indicate success in learning. The vehicle instrument tire pressure monitoring system has returned to normal. 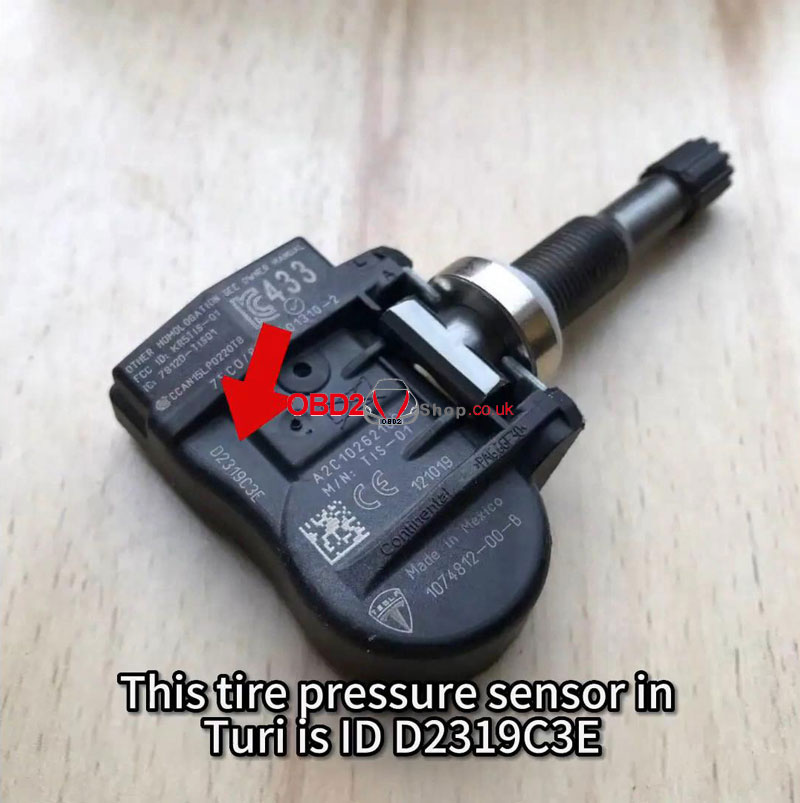 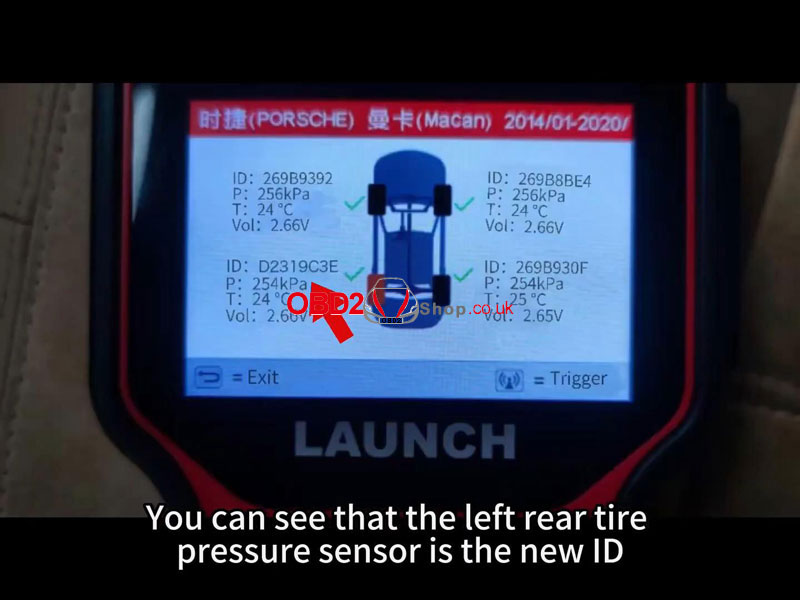 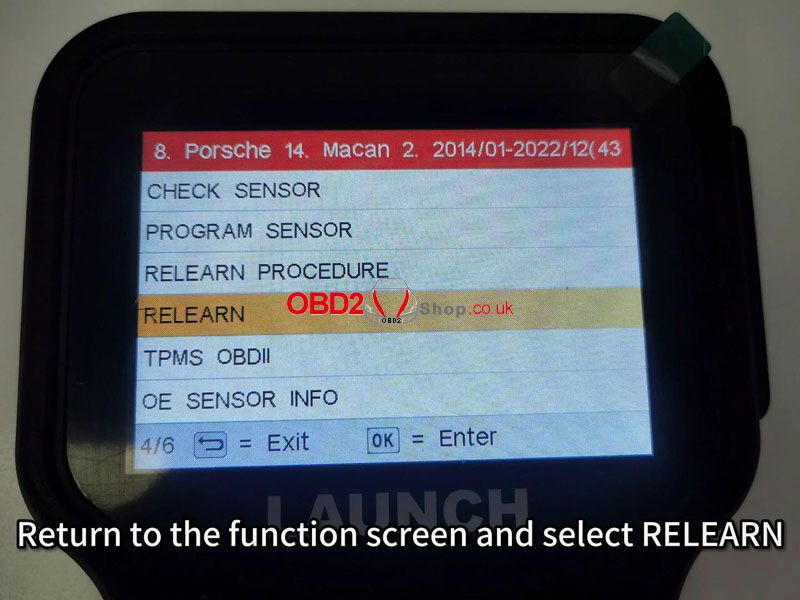 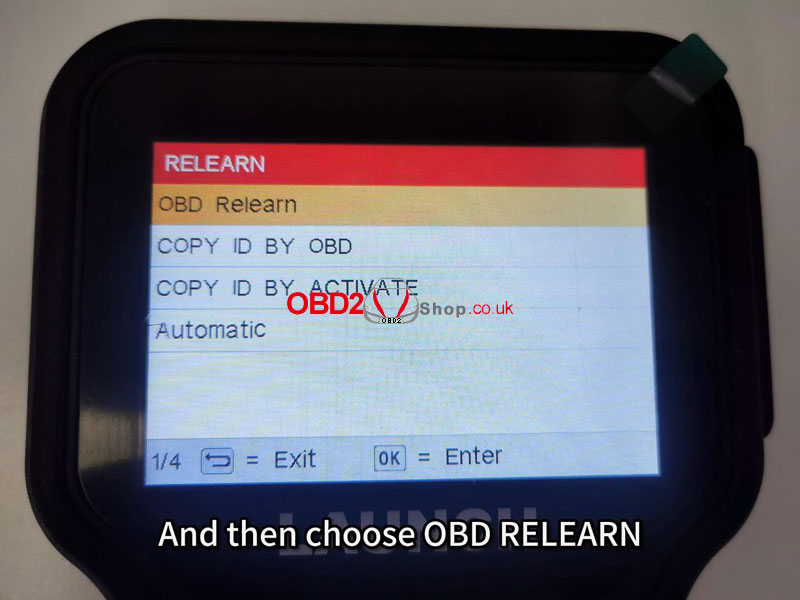 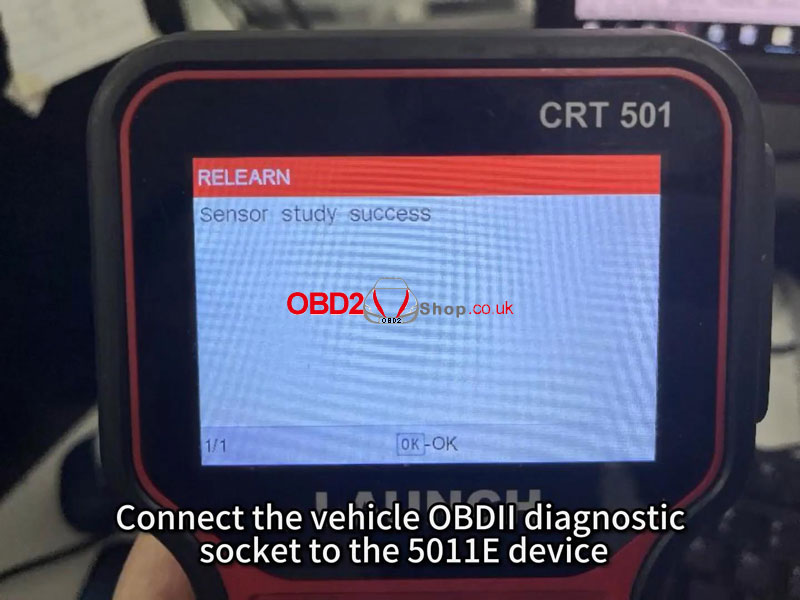 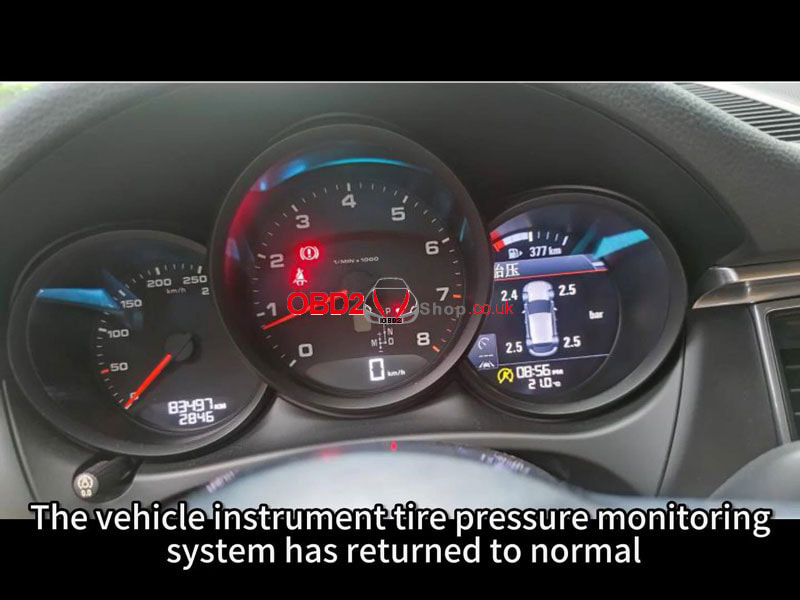
This post will guide you on how to do the Benz 271 DME clone via Yanhua Mini ACDP and Module 18.
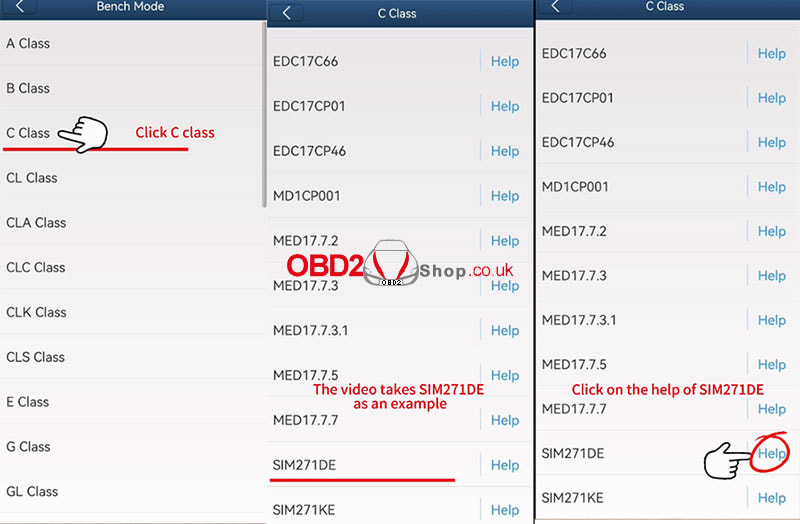
Power on the ACDP, open the ACDP app and confirm in the upper right corner that the ACDP device is connected. Click [Benz]>>[DME Clone]>>[Bench Mode]>>[C Class], then we click on the "Help" of SIM271DE. 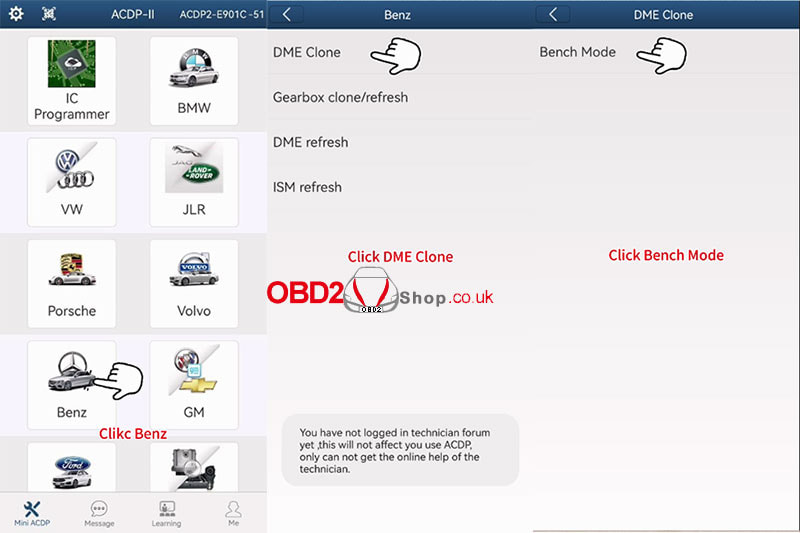
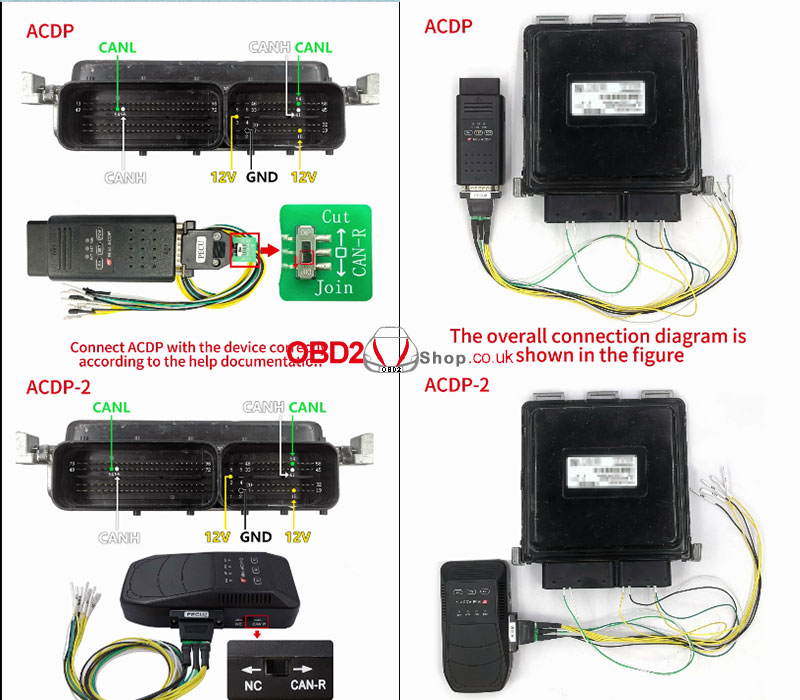
Connect ACDP with the device correctly according to the help documentation, the overall connection diagram is shown in the figure.
Then we click [SIM271DE] to do the DME clone.
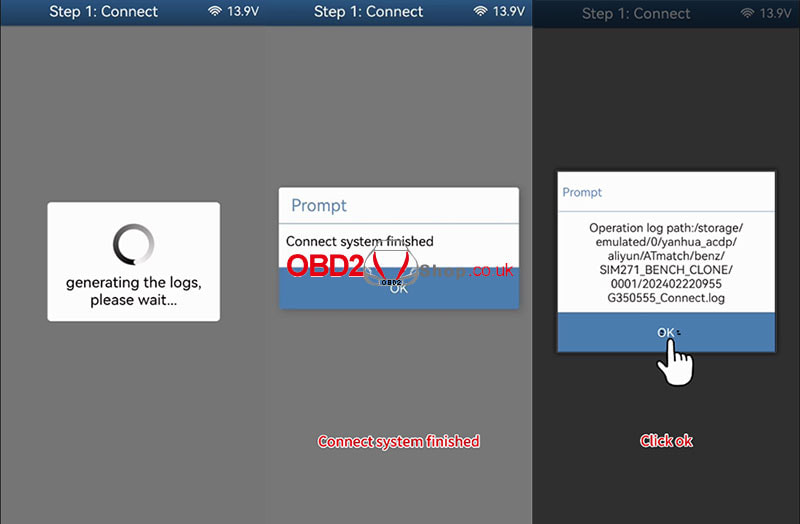
Step 1: Connect Click [Connect] Prompt: Please use the ACDP standard power adapter (voltage+ 12V, current>=2.5A). Click "OK" to continue. Prompt: Please connect ACDP with the DME, ensure a stable network connection, and DO NOT pull out the device while it working. Click "Continue". Confirm the read system information, and click"Continue". Confirm the system information and save a screenshot, click "OK" The connection system is finished. 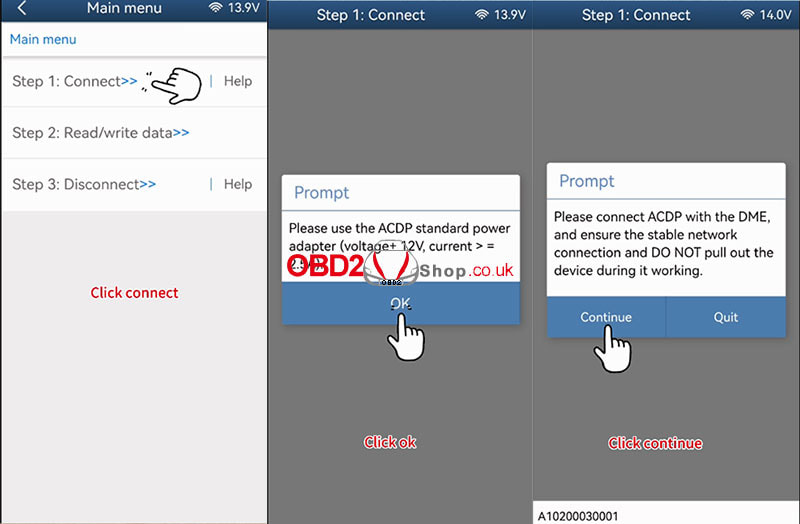

Step 2: Read/write data
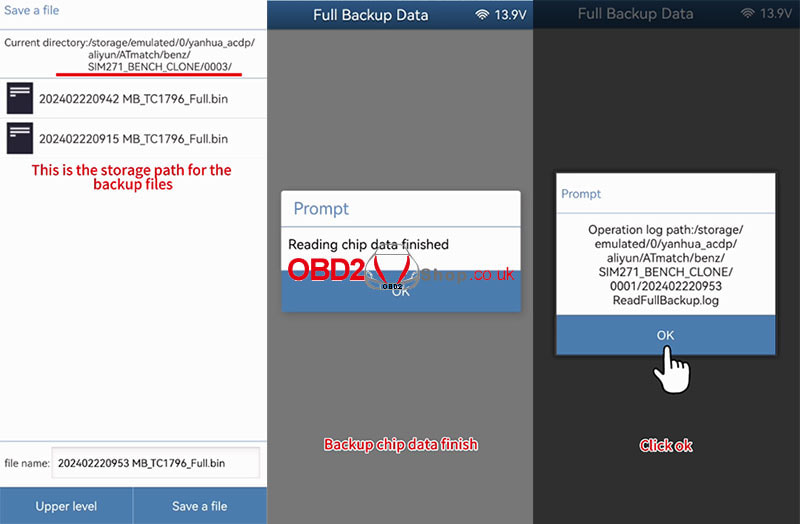
Click [Read/write data]>>[Full Backup Date] Prompt: Please use the ACDP standard power adapter (voltage+ 12V, current>=2.5A). Click "OK" to continue. Prompt: Please connect ACDP with the DME, ensure a stable network connection, and DO NOT pull out the device while it working. Click "Continue". Reading chip data, please wait... Prompt: Please save chip data Click "OK" to continue. This is the storage path for the backup files, confirm and click [Save a file]. Reading chip data finished. Click the icon on the top left corner to go back to the previous step. 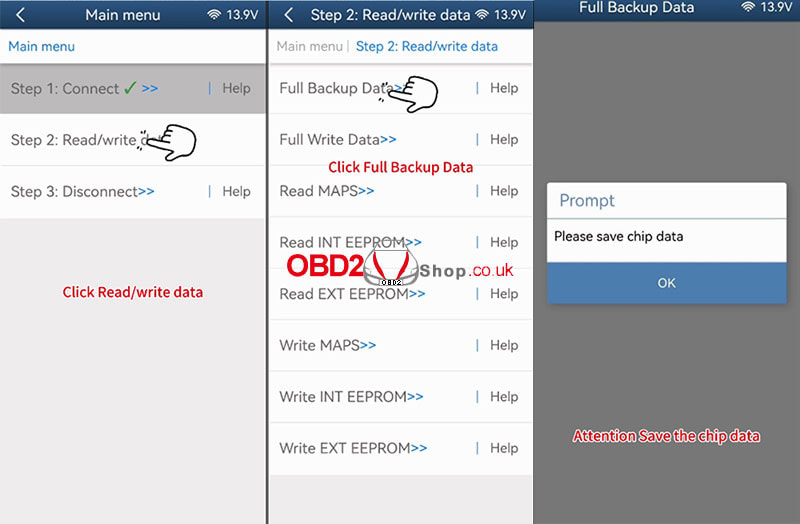
Step 3: Disconnect
Click [Disconnect] Prompt: Please use the ACDP standard power adapter (voltage+ 12V, current>=2.5A). Click "OK" to continue. Prompt: Please connect ACDP with the DME, ensure a stable network connection, and DO NOT pull out the device while it working. Click "Continue". Disconnect finished. 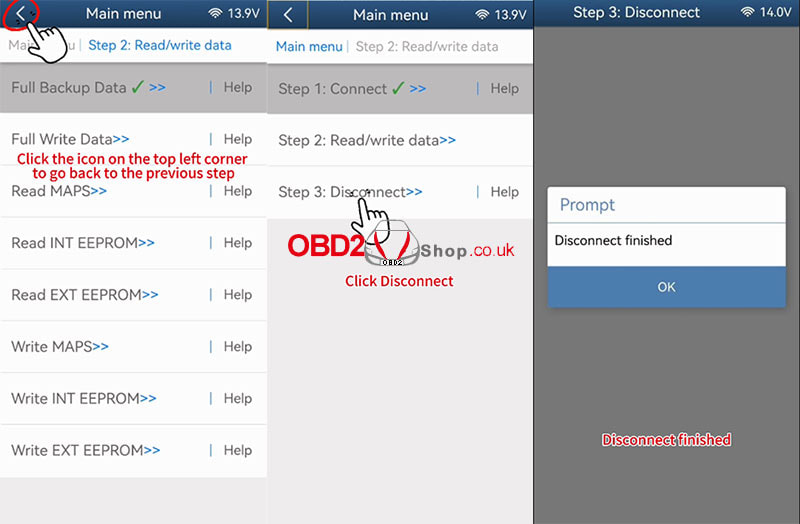
Connect another 271 DME, preparing to write the original files.
Step 1: Connect Click [Connect] Prompt: Please connect ACDP with the DME, ensure a stable network connection, and DO NOT pull out the device while it working. Click "Continue". Confirm the read system information, and click "Continue". Confirm the system information and save a screenshot, click "OK" to continue. The connection system is finished. 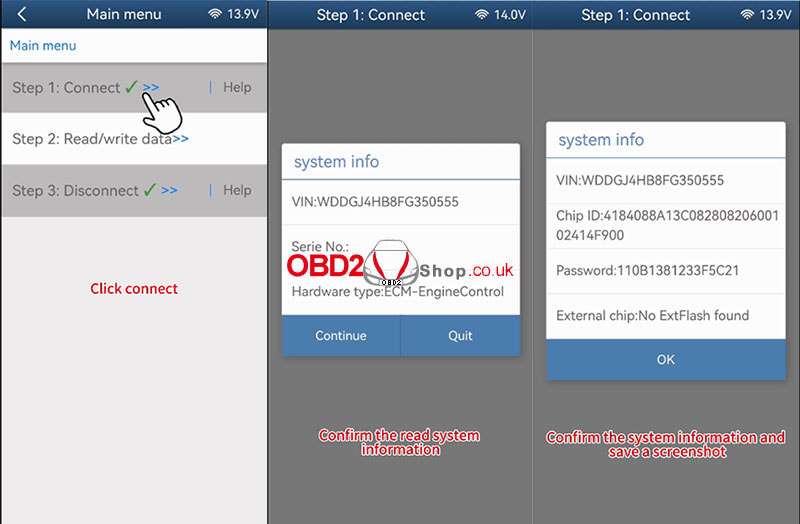
Step 2: Read/write data
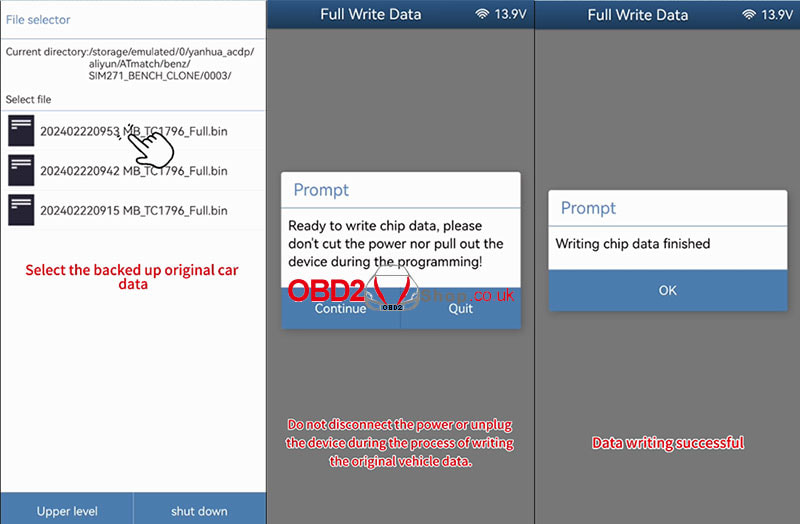
Click [Read/write data]>>[Full Write Data] Prompt: Please use the ACDP standard power adapter (voltage+ 12V, current>=2.5A). Click "OK" to continue. Prompt: Please connect ACDP with the DME, ensure a stable network connection, and DO NOT pull out the device while it working. Click "Continue". Prompt: Please select chip data. Click "OK" to continue. Select the backed-up original car data. Prompt: Ready to write chip data, please don't cut the power nor pull out the device during the programming! Click "Continue". Writing chip data, please wait... Writing chip data finished. Click the icon on the top left corner to go back to the previous step. 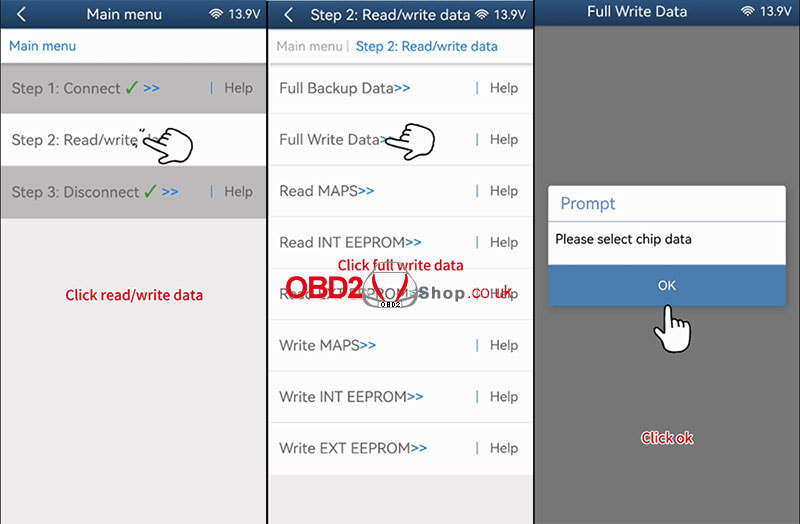
Step 3: Disconnect
Click [Disconnect] Click [Read/write data]>>[Full Write Data] Prompt: Please use the ACDP standard power adapter (voltage+ 12V, current>=2.5A). Click "OK" to continue. Prompt: Please connect ACDP with the DME, ensure a stable network connection, and DO NOT pull out the device while it working. Click "Continue". Disconnecting the system, please wait... Disconnect finished. 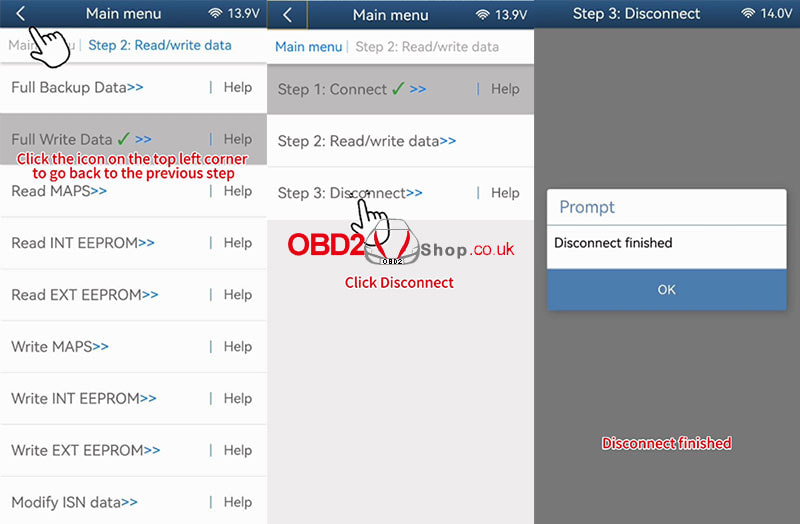
Video guides:
What are the differences between Launch X431 CRP123X, CRP129X, CRP919X & CRP919X BT diagnostic tools? Here we've compared them in price, hardware configuration, and software features in detail, hoping to help a lot. Comparison Table: 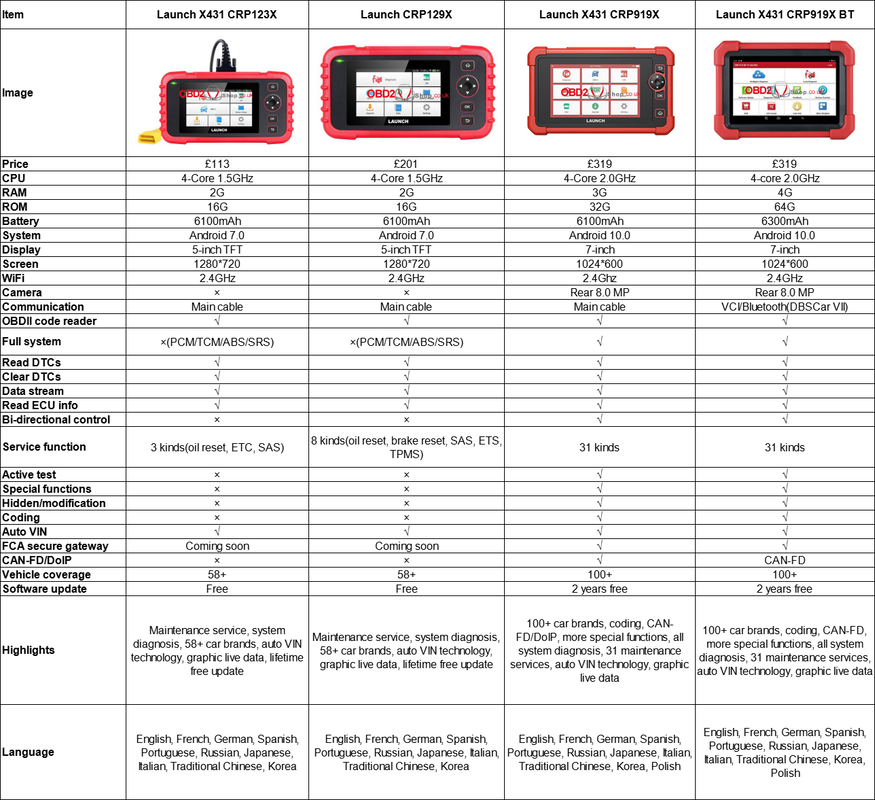 Differences
1. CRP123X is the cheapest while CRP919X/CRP919X BT are the most valuable. 2. X431 CRP919X/CRP919X BT supports more service functions(31 kinds) and vehicle brands(100+) than others. 3. X431 CRP919X/CRP919X BT supports full system diagnosis, bi-directional control, active test, hidden/modification, coding, and FCA secure gateway while other tools cannot. 4. Only CRP919X BT supports wireless connection via Bluetooth. 5. Only CRP919 can support CAN-FD/DoIP meanwhile. Conclusion In general, Launch CRP123X is the most affordable for beginners. Launch CRP919X/CRP919X BT are coming with better hardware and more diagnostic features for experienced mechanics. Customers can select according to their actual budget and functional needs. www.obd2shop.co.uk In this article, we'll delve into the key differences between Launch X431 V+, X431 Pro5, and X431 PAD VII, focusing on hardware specifications, main functions, and online programming support. 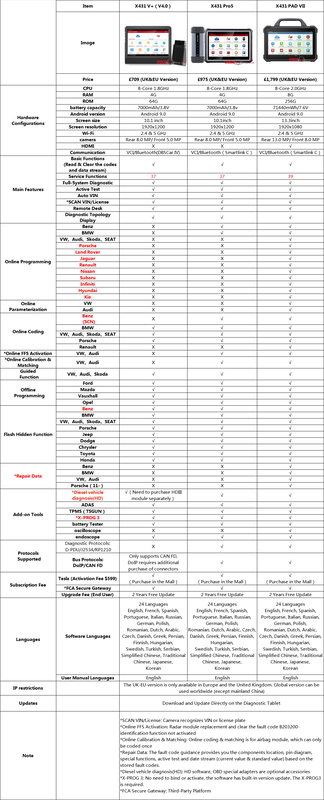 In conclusion, while the X431 V+ and Pro5 offer robust diagnostic capabilities, the X431 PAD VII emerges as the flagship model with its superior hardware upgrades, expanded functionality, and comprehensive support for online programming and coding across various vehicle makes. Whether it's enhanced communication, additional service functions, or comprehensive online programming support, the Launch X431 PAD VII sets a new standard for automotive diagnostics.
www.obd2shop.co.uk
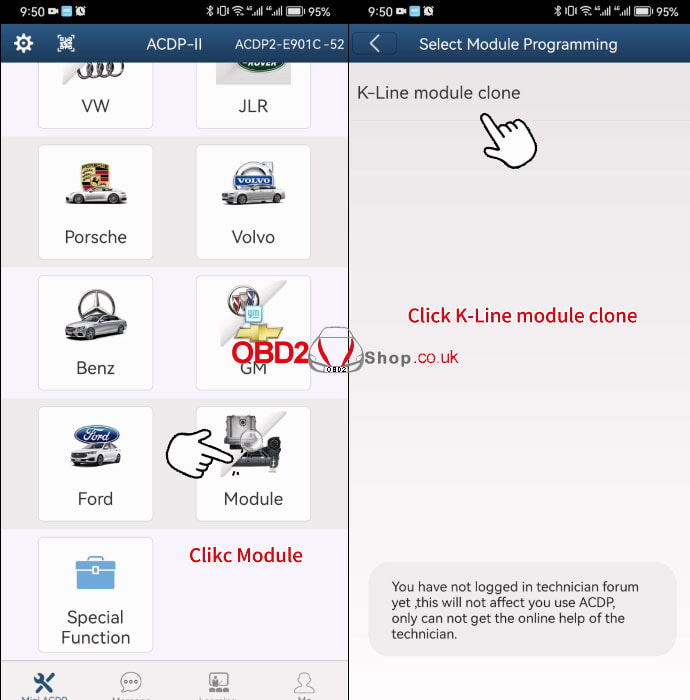
This post will guide you on how to use Yanhua Mini ACDP and its' Module 32: K-line Module Clone to do an Audi 6HP gearbox clone.
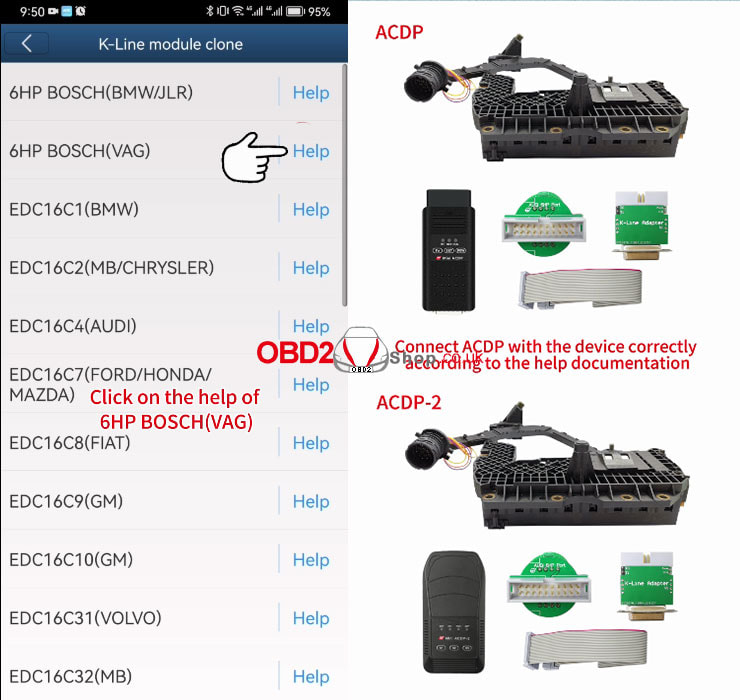
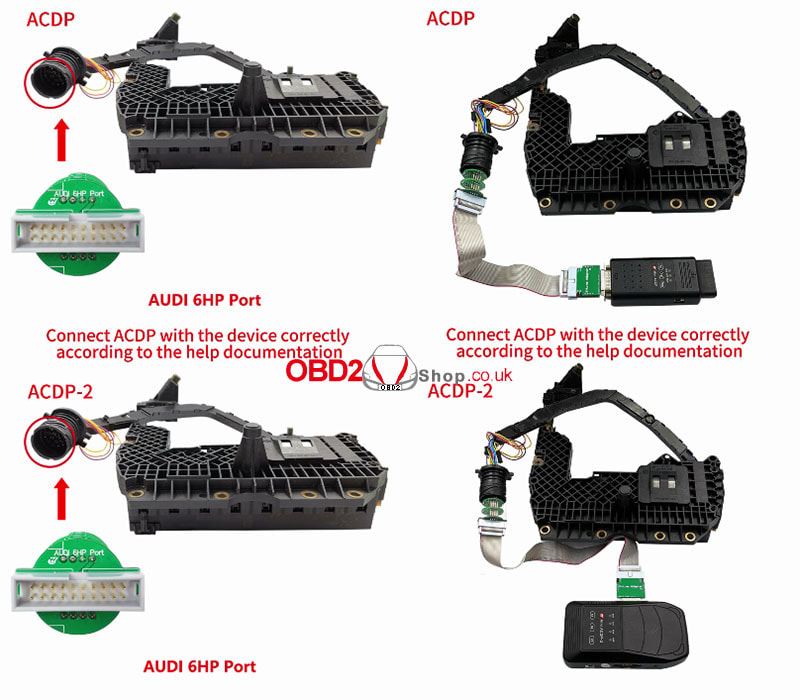
Power on the ACDP Open the ACDP app, and confirm in the upper right corner that the ACDP device is connected. Click Module, click K-Line module clone, and click on the help of 6HP BOSCH(VAG) Connect ACDP with the device correctly according to the help documentation, the overall connection diagram is shown in the figure. 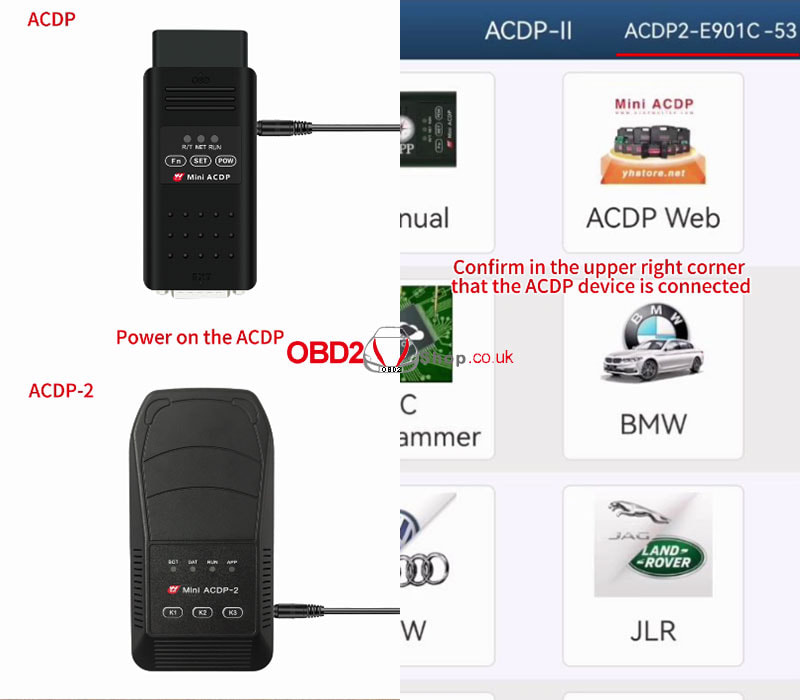
Step 1. Identify
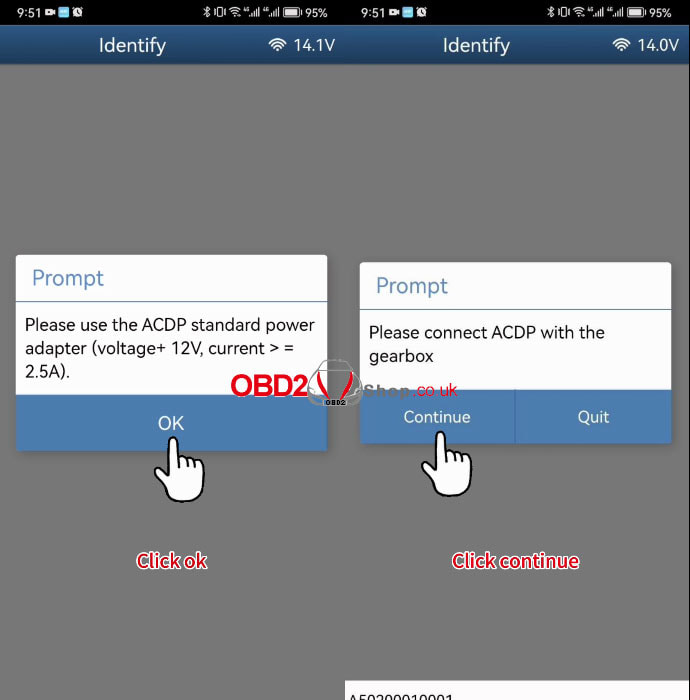
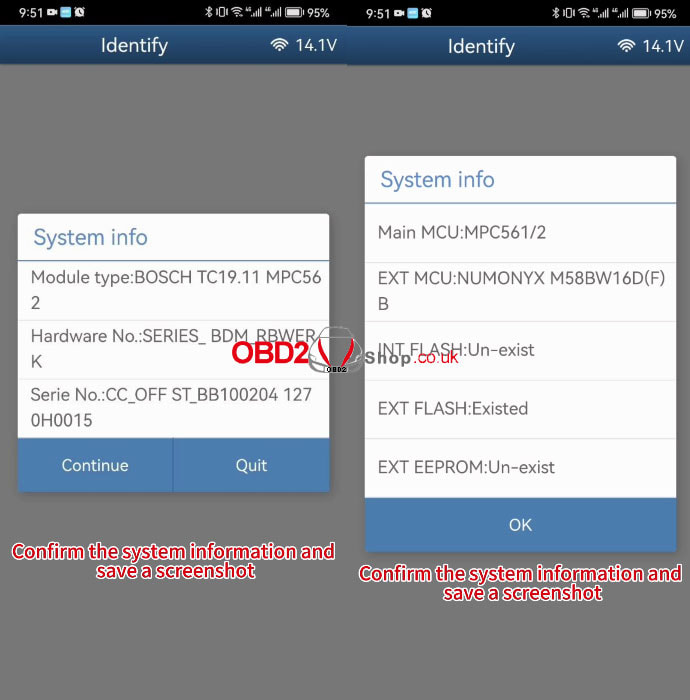
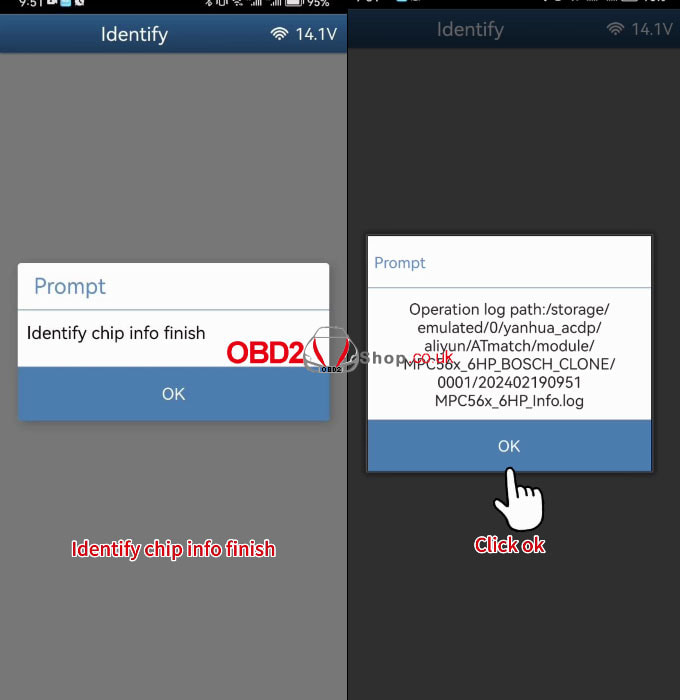
Click [6HP BOSCH(VAG)]>>[Identify] Prompt: Please use the ACDP standard power adapter (voltage+ 12V, current >=2.5A). Click "OK" to continue. Prompt: Please connect ACDP with the gearbox Click "Continue". Confirm the system information and save a screenshot. Prompt: Identify chip info and finish Click "OK" to continue. Prompt: Operation log path:/storgae/emulated/0/yanhua_acdp/aliyun/Atmatch/module/MPC56x_6HP_BOSCH_CLONE/0001/202402190951 MPC56x_6HP_info.log Click "OK" to continue. 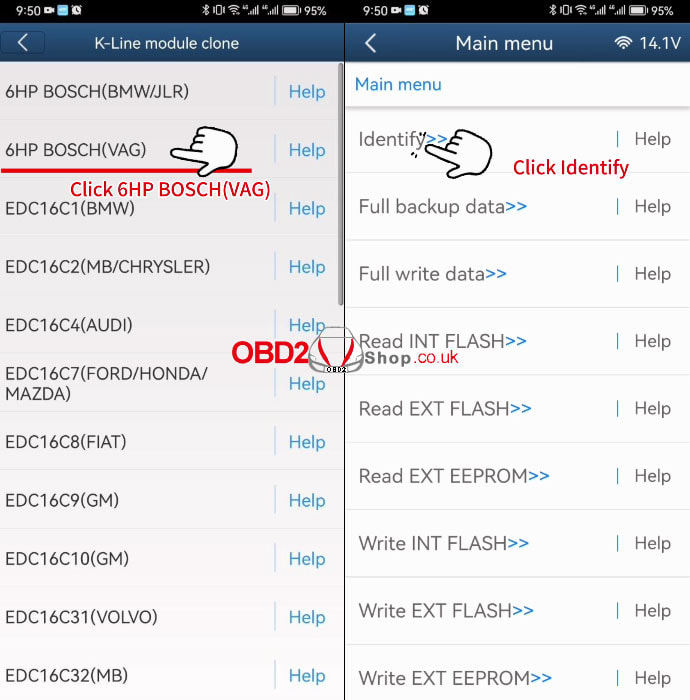
Step 2. Full backup data
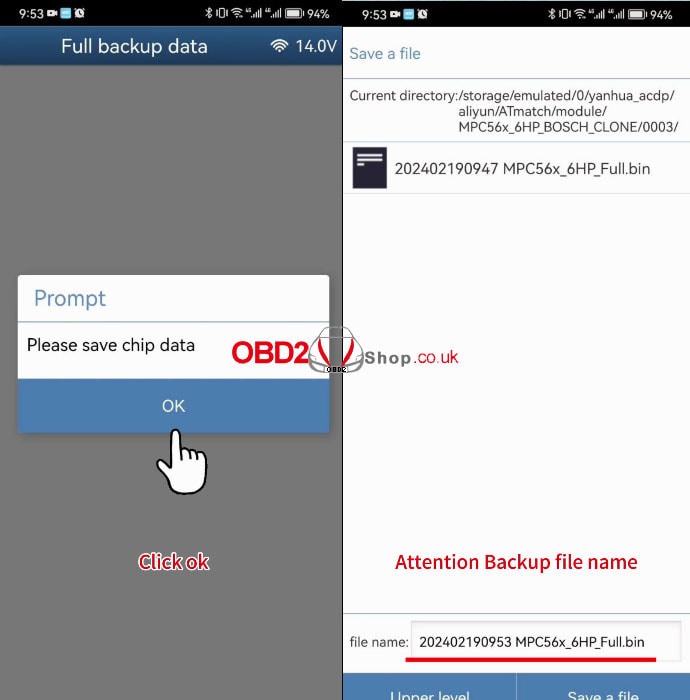
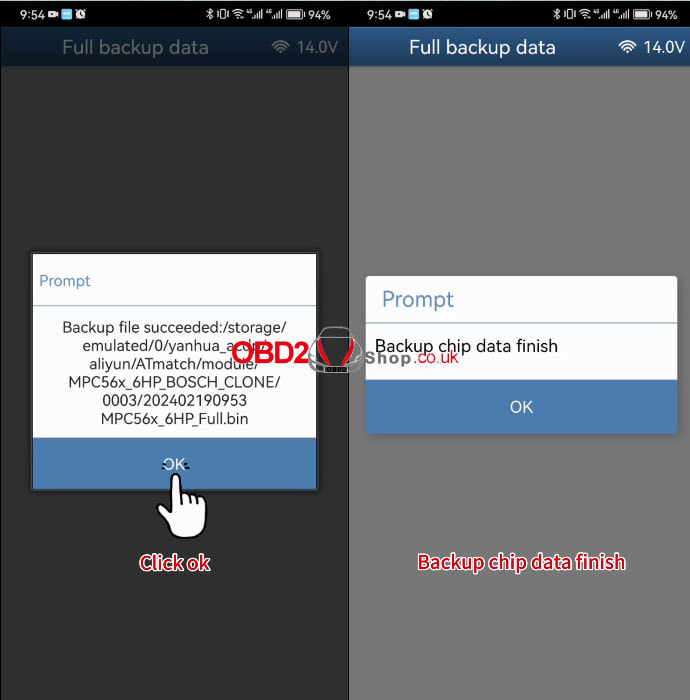
Click [Full backup data] Prompt: Please use the ACDP standard power adapter (voltage+ 12V, current >=2.5A). Click "OK" to continue. Prompt: Please connect ACDP with the gearbox Click "Continue". Confirm the system information and save a screenshot. Click "Continue". Reading chip data, please wait... Prompt: Please save chip data Click "OK" to continue. This is the storage path for the backup files, confirm the backup file name, then click "Save a file". Prompt: Backup file succeeded: /storage/emulated/0/yanhua_acdp_aliyun/ATmatch/module/MPC56x_6HP_BOSCH_CLONE/0003/202402190953 MPC56x_6HP_Full.bin Click "OK" to continue. Prompt: Backup chip data finish Click "OK" to continue. Prompt: Operation log path: /storgae/emulated/0/yanhua_acdp/aliyun/Atmatch/module/MPC56x_6HP_BOSCH_CLONE/0001/202402190954 MPC5x_6HP_RFull.log 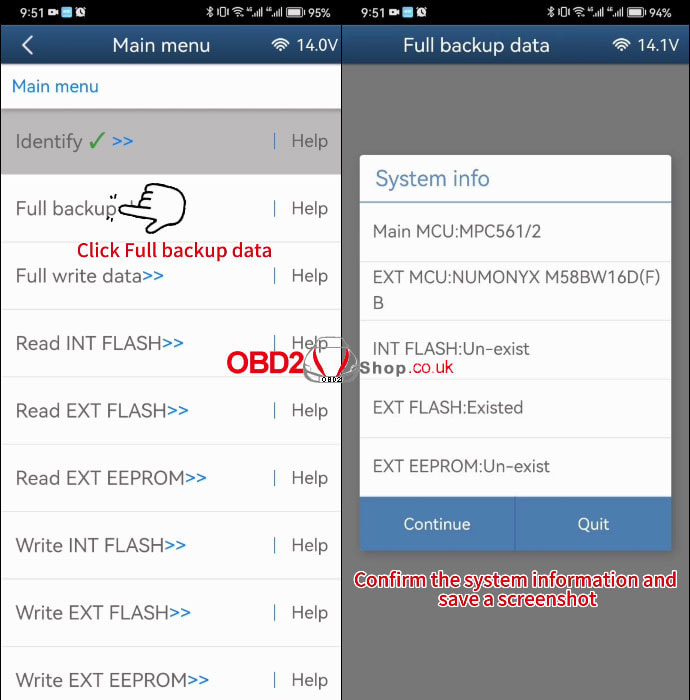
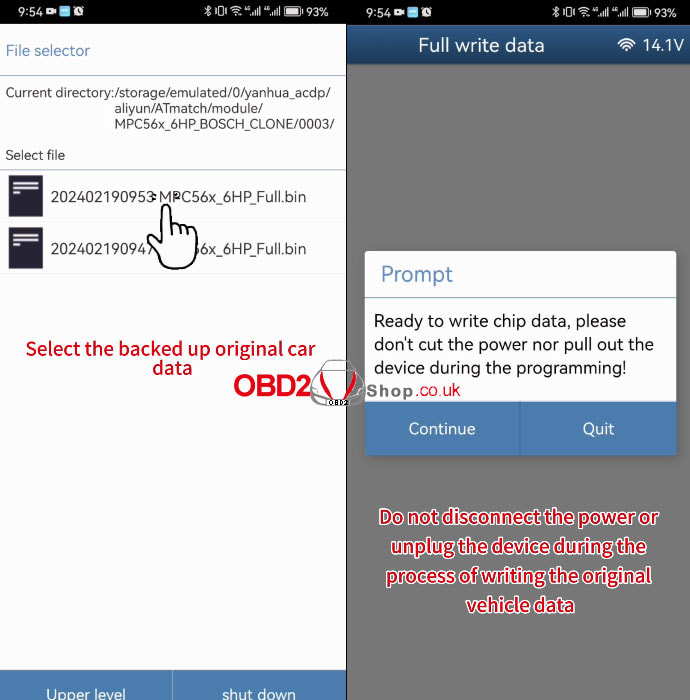
Then we connect another 6HP gearbox, preparing to write the original files.
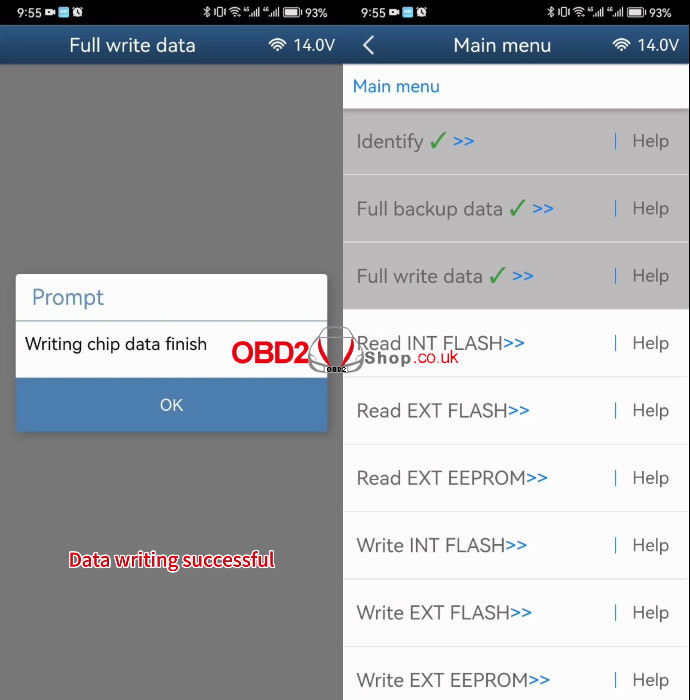
Step 3. Full write data Prompt: Please use the ACDP standard power adapter (voltage+ 12V, current >=2.5A). Click "OK" to continue. Prompt: Please connect ACDP with the gearbox Click "Continue". Confirm the system information and save a screenshot. Prompt: Please select chip data Select the backed-up original car data Prompt: Ready to write chip data, please don't cut the power nor pull out the device during the programming! Click "Continue". Writing chip data, please wait... Writing chip data successfully! 
Video guides:
This is a tutorial on how to use Launch X431 IMMO PLUS/ X431 IMMO Elite to add Hyundai smart keys by OBD. Follow the steps below to learn.  IMMO >> Hyundai >> Immobilizer System Detection >> Smart Key Unit >> Special Function Smart Key Code Saving. [Condition] Ignition off. Insert key to teach and press the OK button. 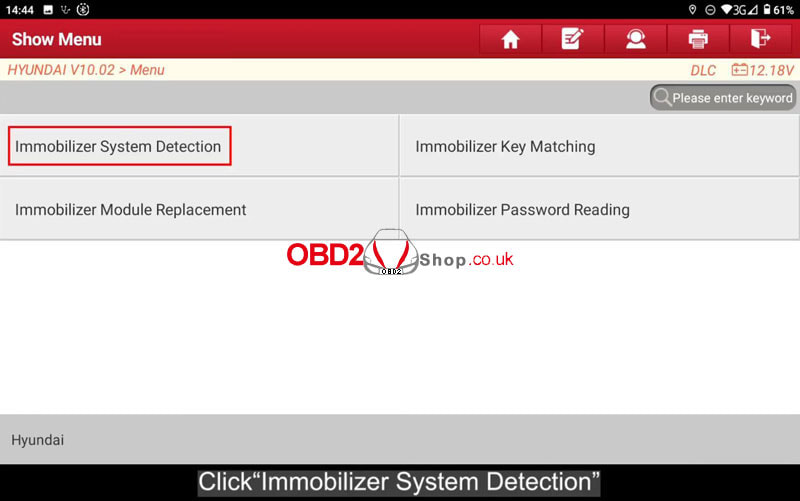 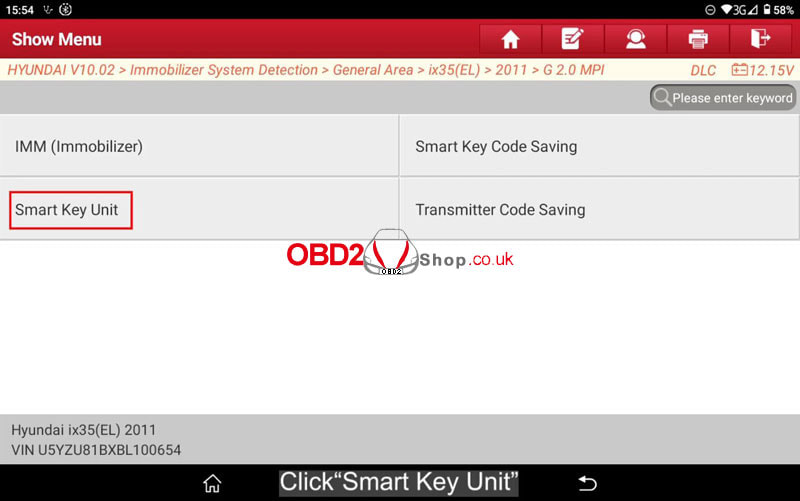 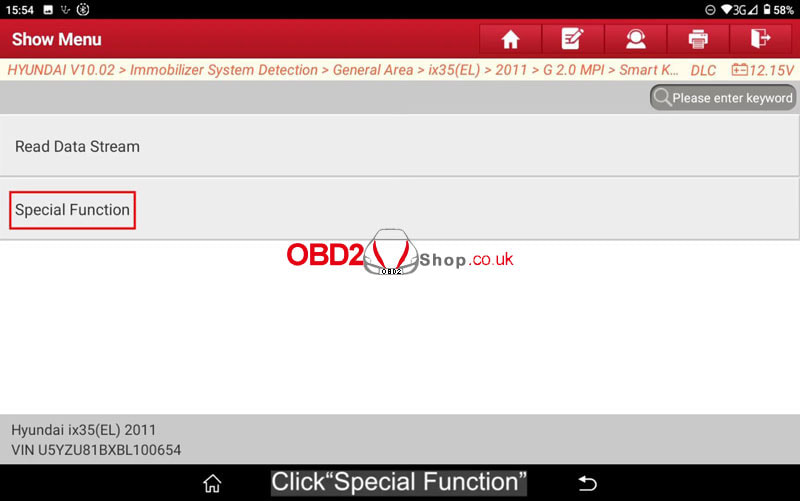 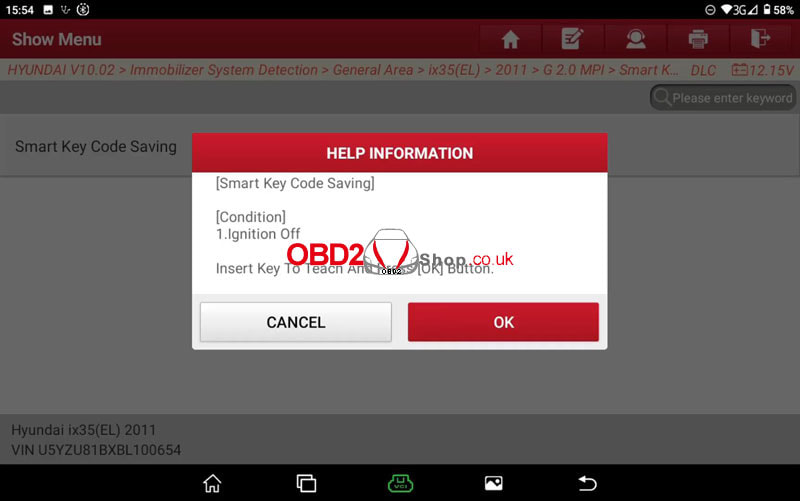 Input >> Input 6 PIN code and press the OK button. Are you sure? OK [Teaching] 1st key teaching Continue? OK 1st key teaching completed! 2nd key teaching continue? OK Press the OK button before removing the key. Insert the 2nd key to teach and press the OK button. [Smart key code saving] 2nd key teaching completed! Smart key teaching completed! Number of taught FOB keys: 255. This is using X431 IMMO PLUS to program Hyundai key matching successfully. 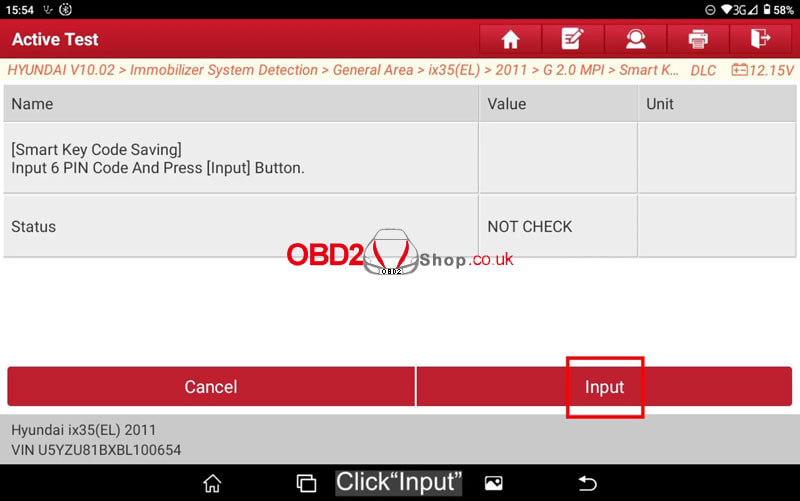   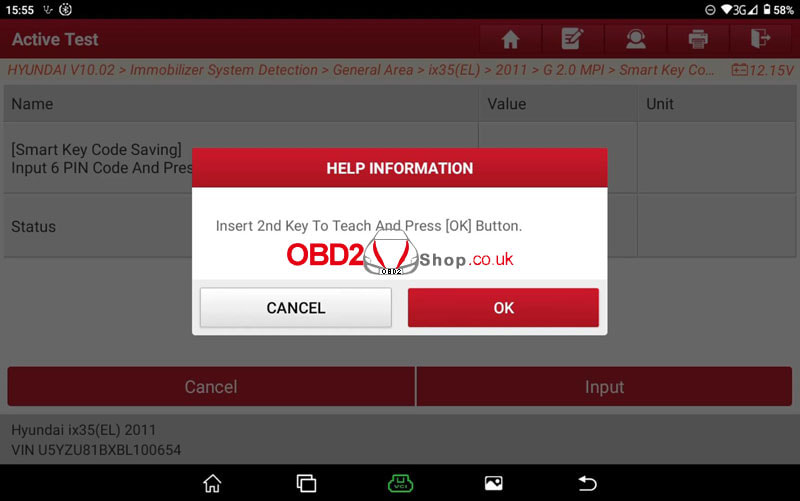 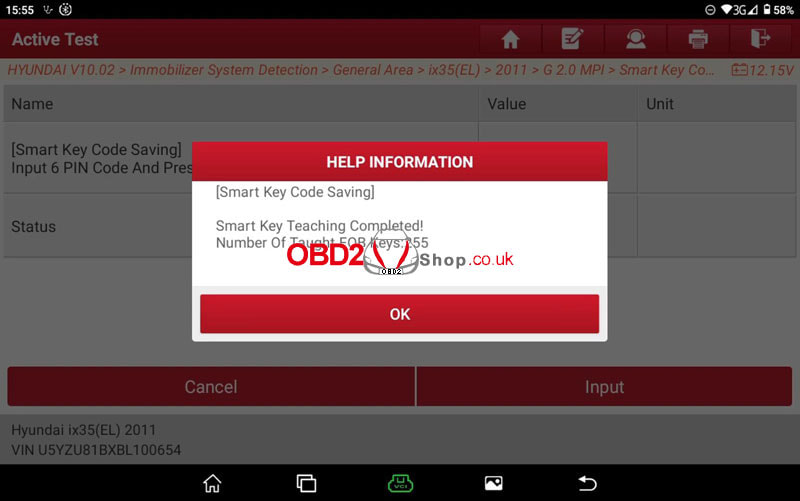
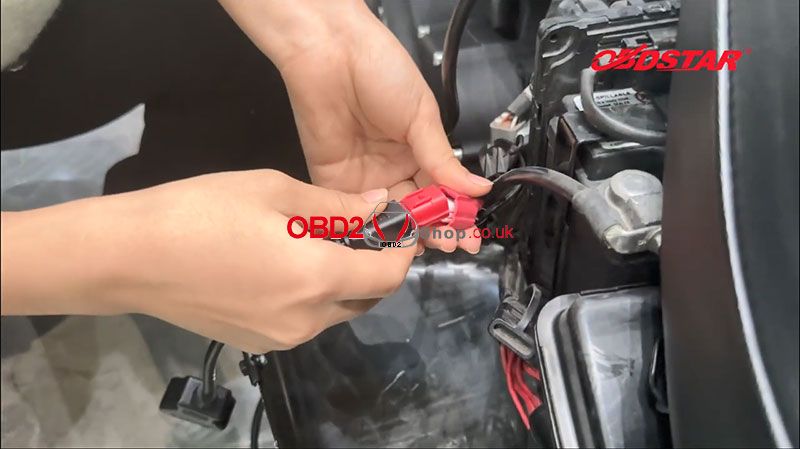
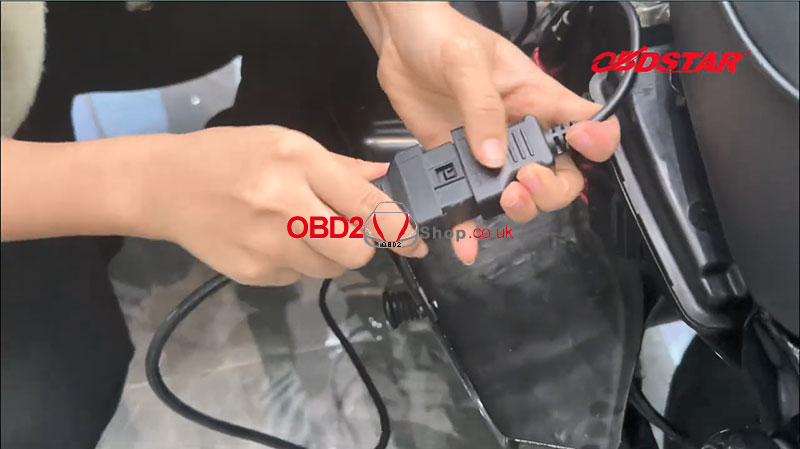
This post will guide you on how to use the OBDSTAR MS80 Motorcycle Diagnostic Tool to read PIN for Harley Davidson.
The Tools we need: MS80 Main cable M041 M002 Spare Battery 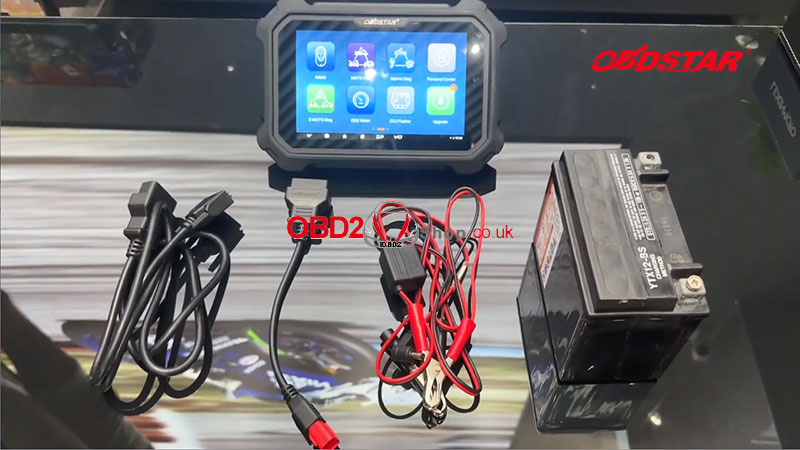
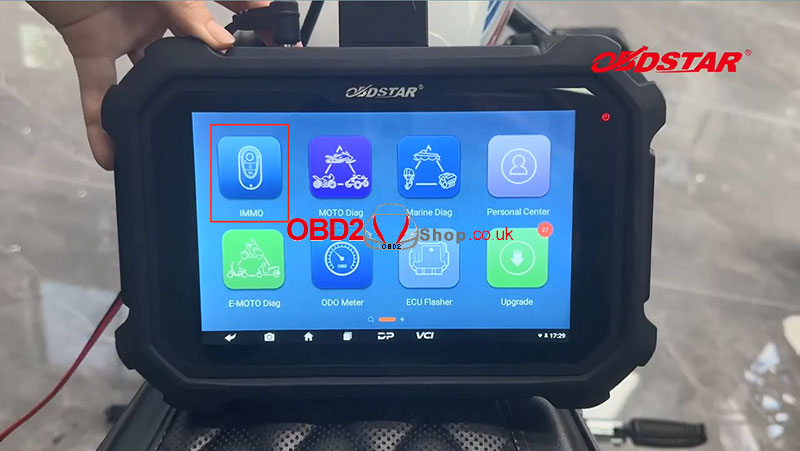
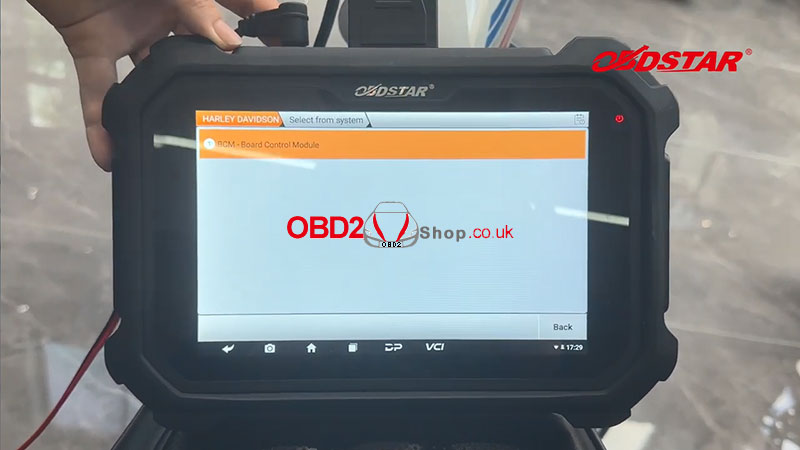
Click [IMMO]>>[Americas]>>[HARLEY DAVIDSON]>>[HARLEY DAVIDSON V40.30]>>[BCM - Board Control Module]
"Could not read VIN number.
Press [OK] to continue to enter the system or press [Cancel] to end the system." 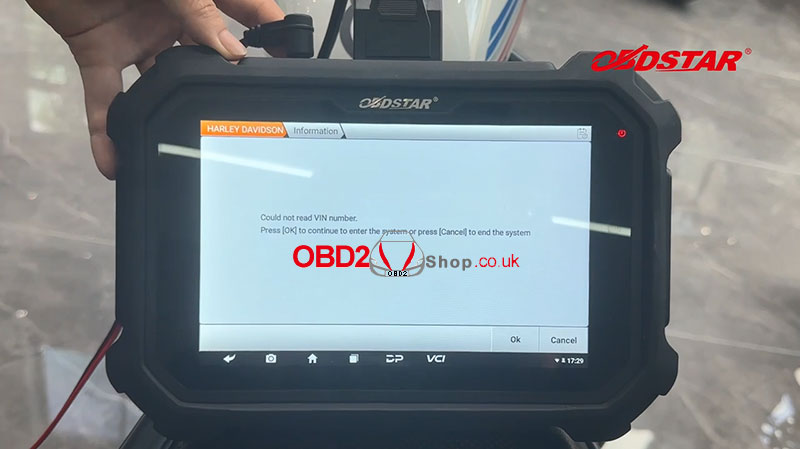
Here we choose [OK] to continue.
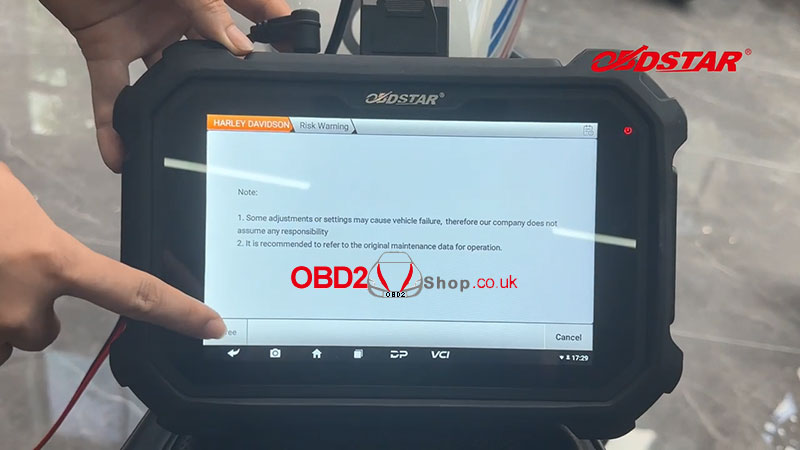
Click [Special Function], and read the notes carefully. "Note: 1. Some adjustments or settings may cause vehicle failure, therefore our company does not assume any responsibility. 2. It is recommended to refer to the original maintenance data for operation." 
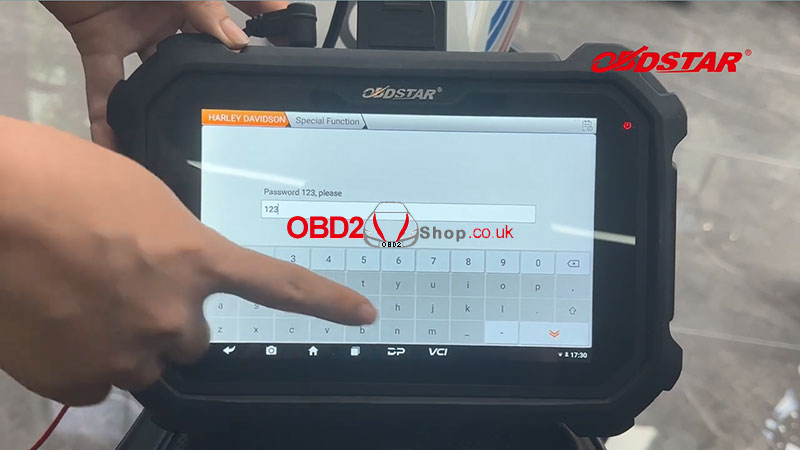
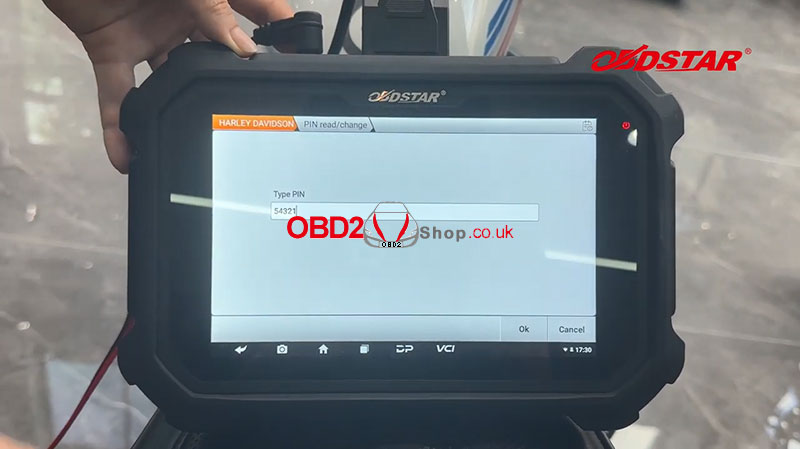
Click "Agree" enter the password, and click [PIN read/change], then press [OK] to continue.

Read PIN successfully.
Video guides:
Lonsdor K518 PRO can program a car made of BMW X2, the BDC system key adding. Here we have 2 keys, one is the original key and the other is a new key. Let's have a try today.  Plug K518 PRO into the car OBD port. Enter into IMMO(program) >> BMW >> FEM/BDC program, OBD Step1. Read Key Data We can see this car has already 1/2/3/4, several keys. Read data successfully. It means this car has been pre-processed already. But if another car you met, has not pre-processed well, you have to do this part of the work first. 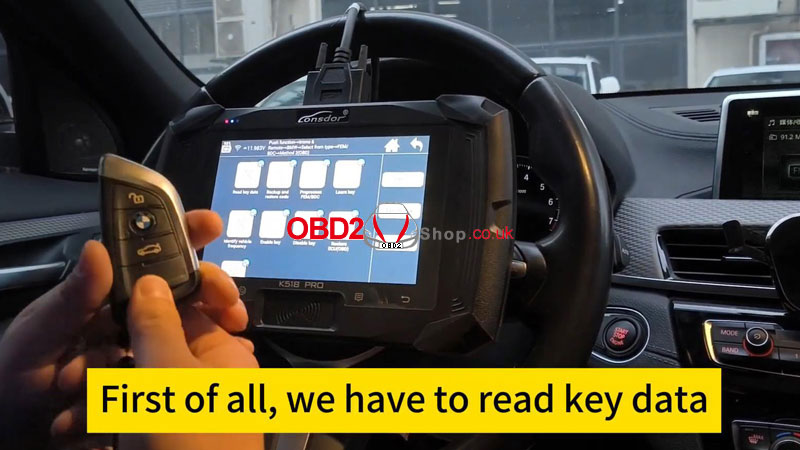 Step2. Backup & Restore Code Backup code, processing... Do you have a programmed working key? I have an original one, press OK. Communication... For this part, we have to make sure the battery voltage is NO lower than 13V. Read data... about 10 minutes. Please put a working car key into the car induction coil. By this screenshot here, you'd better take a photo of this screen page to remember the ECU ISN number. 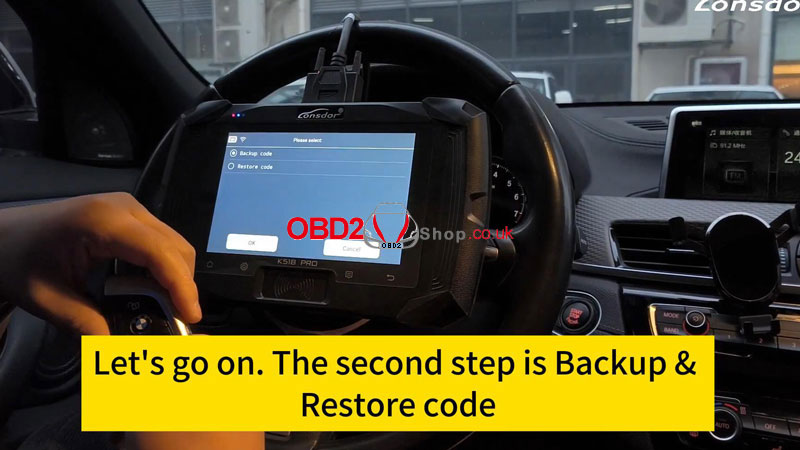 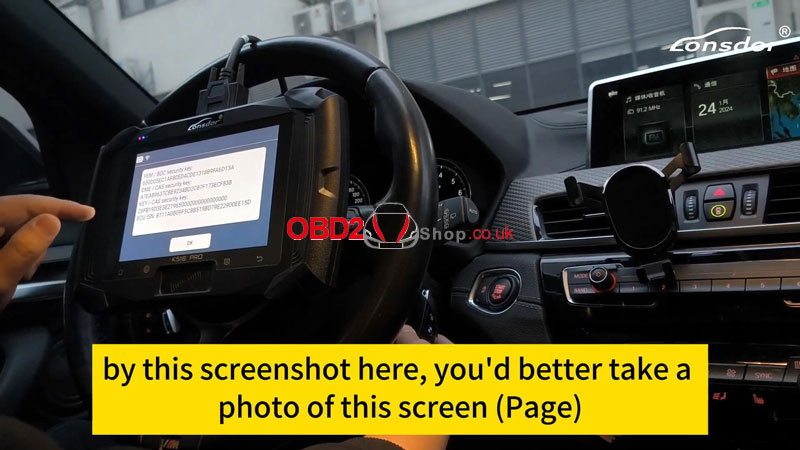 Step3. Learn Key Learn after processing >> Load the SK file to learn key >> Select a key location Follow the prompts to put the new key in the car induction coil. Hold the new key closer to the ignition coil, and long press the Start button for 10s... Key learning successful! Let's try the new key. Lock and unlock can work, it can smoothly start the car. Done. 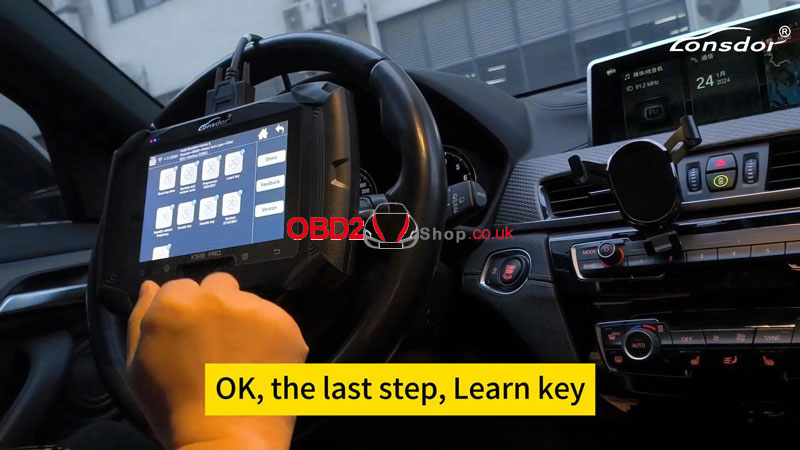 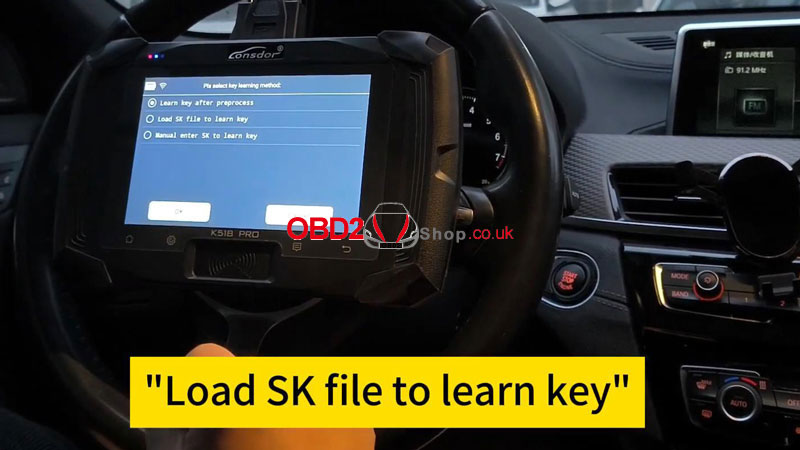  This post shows you how to use Autel KM100 to add an ID4D 67/68 transponder key for Lexus RX350 2004. First, we select "IMMO", then enter "Lexus" in the search bar, select "Lexus", then select "Manual selection">>"Europe">>"RX350">>"Blade Key", select "Yes" to continue. 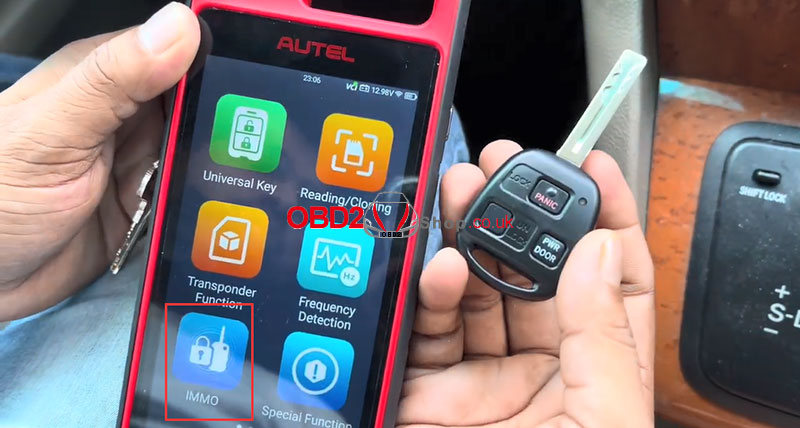 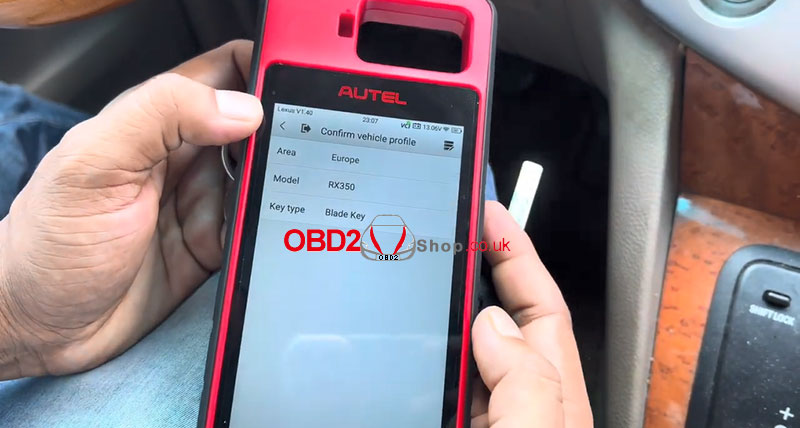 Select "Hot function">>"Immobilizer(4D 67/68)">>"Key learning(guided)" Step 1: Master Key Verification Insert the learned master key and turn the ignition on. 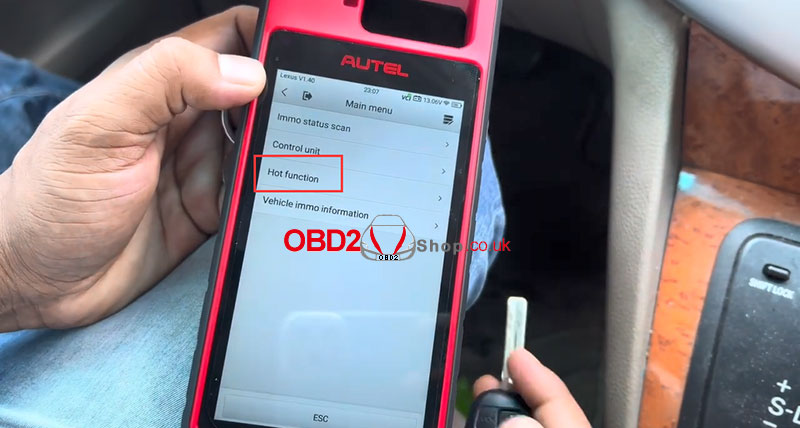 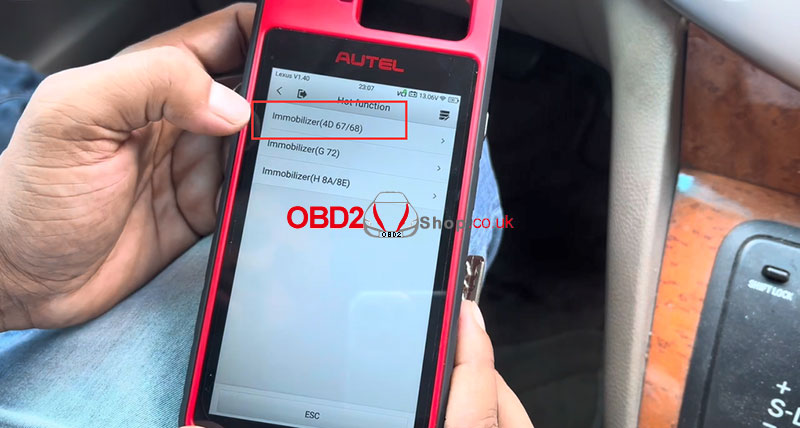 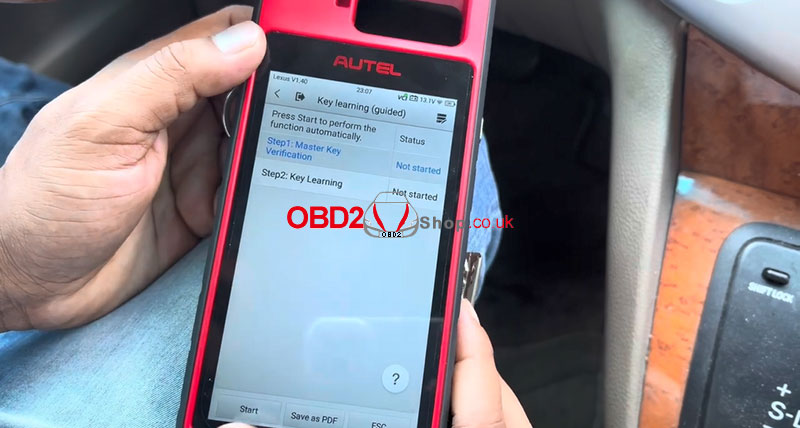 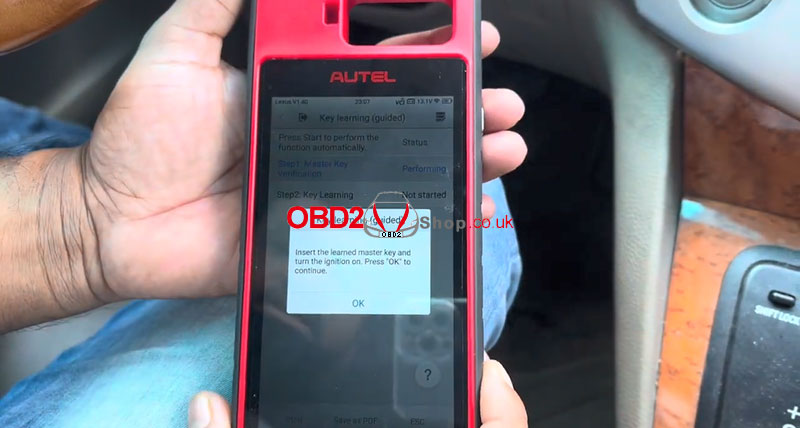 Step 2: Key learning Remove the key, insert the key to be learned into the ignition lock(Just insert the key in the off position and do not turn on it to the position!). Wait for about 75s... 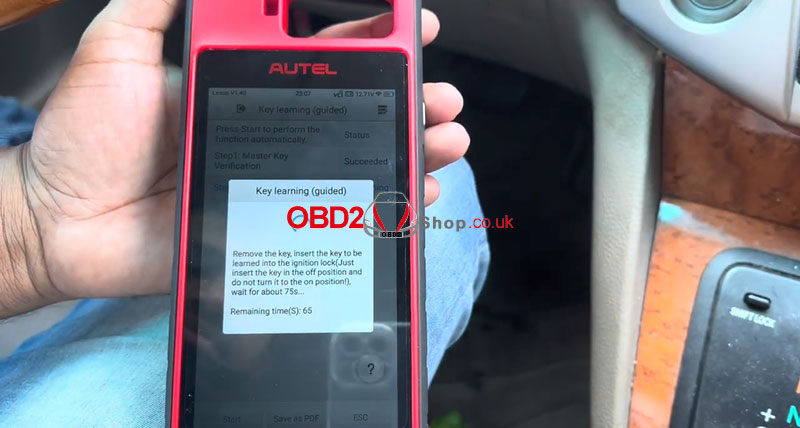 Key learning succeeded. 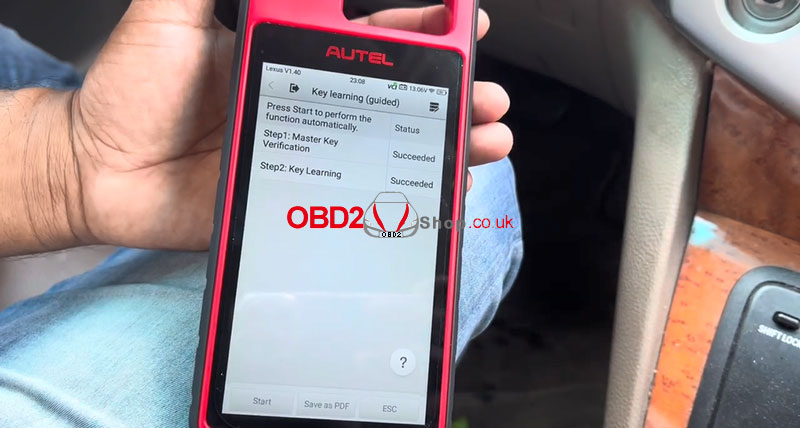 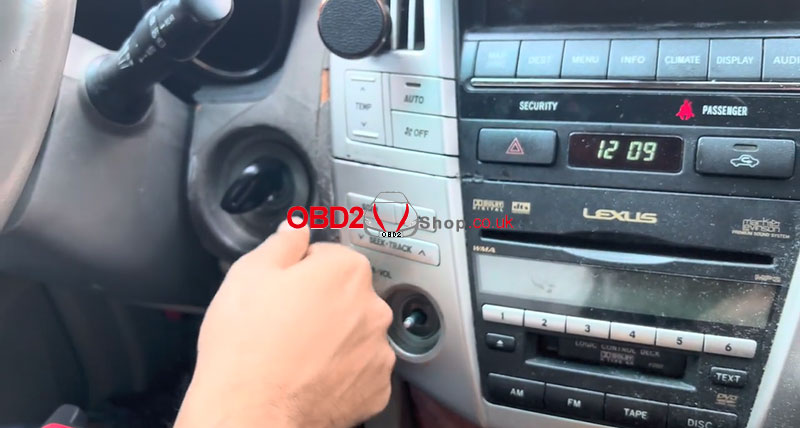 Now we will show you how to program the remote.
Step 1. Keep the door open, insert the original key into the ignition, and remove it, do this twice. Step 2. Close the door and open it, then close the door again and open it. Step 3. Insert the original key into the ignition and take it out, close the door and open, close the door, and open again. Step 4. Insert the original key into the ignition, close the door, and turn the ignition on and off. Next, we press the lock and unlock buttons on the original key at the same time, and press the lock button. Then we do the same thing on the new key. At this point all the programming is finished, now we can check that the remote control works and that everything is ok. Thanks for watching and for more specific operation details, please refer to M K Locksmith’s YouTube channel. www.obd2shop.co.uk |
