|
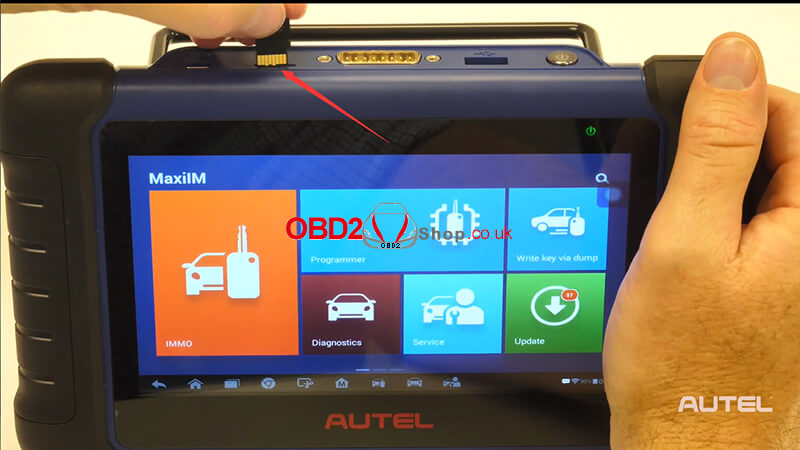
What should you do when your Autel MaxiIM IM508 runs out of space?
1. Clean up the music or picture. 2. Delete the app client does not use. 3. Reset the tablet. The specific operation of the above three methods can refer to the following article: (Solution) Autel IM508/IM608 stuck during update In this article, we will introduce to you in detail how to install extra storage for Autel IM508. We recommend a maximum of 32 gigabytes for optimal performance, make sure it is a micro SDXC with UHS-1. 
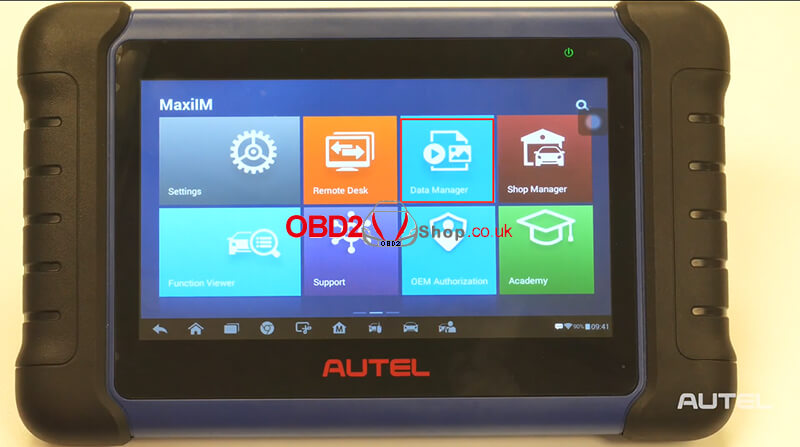
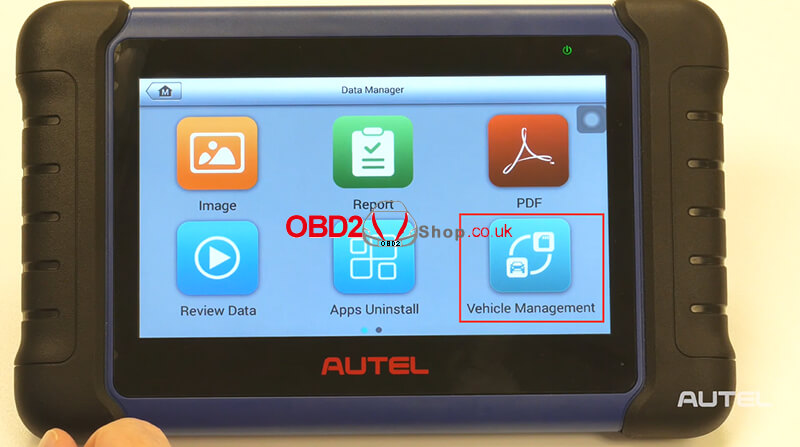
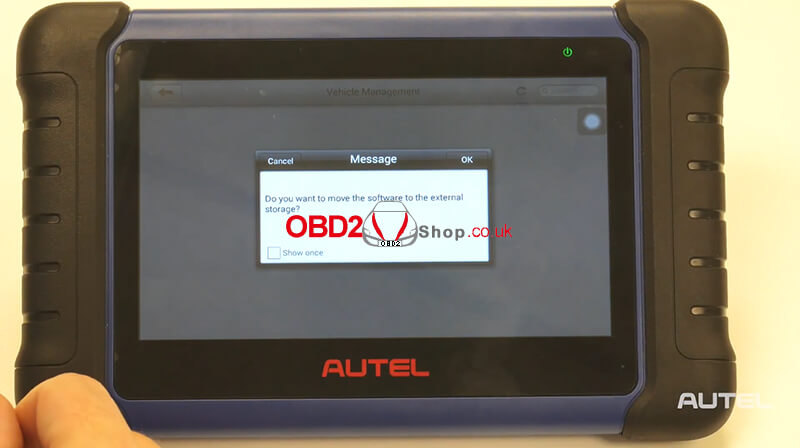
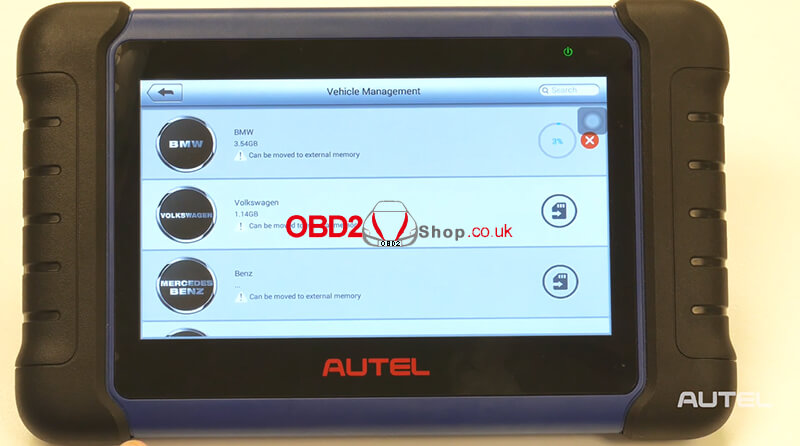
After installing the SD card, you need to go to the "Data Manager", then "Vehicle Management".
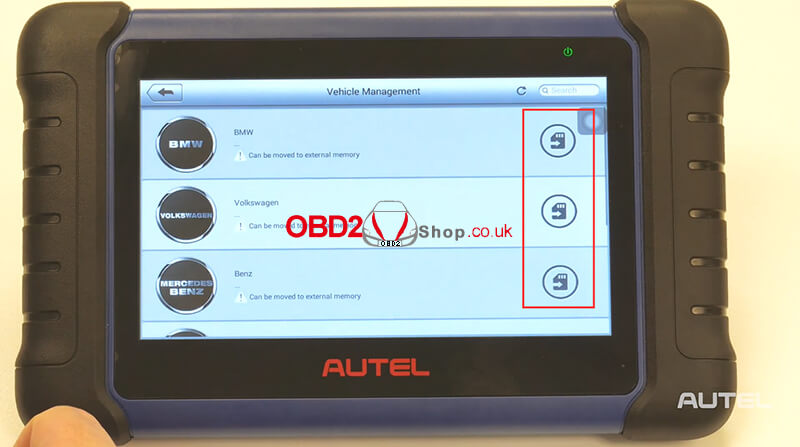
Now one by one select these brands and move them to the new storage you created with your SD card.
After this is complete, return to the MaxiIM main screen then choose "Update".
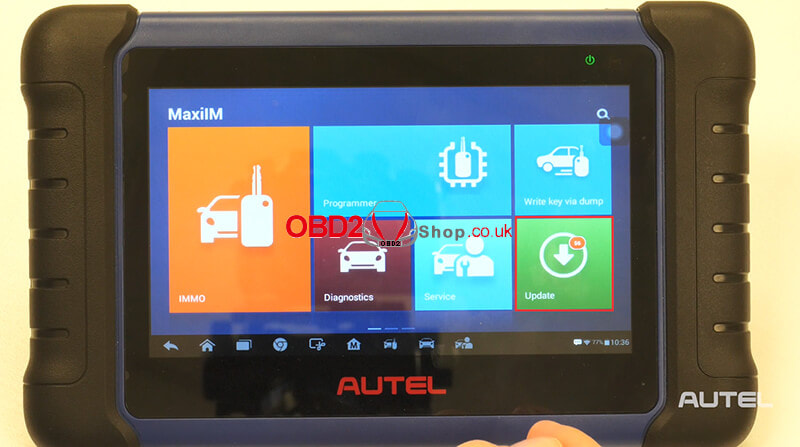
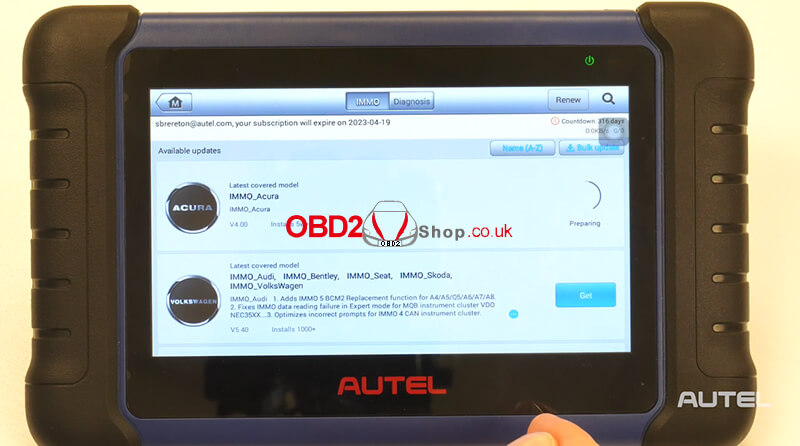
Done!
You can also watch the video for the tutorial:
0 Comments
This post will show you how to use the CGDI CG100 tool to do mileage repair for Volvo S80L. Note: This tutorial was created by CGDI Technical Support and this is a share from a customer. 1. Check the car information (car type and car year). Got the car information from VIN-- Volvo S80L.   2. Check the current mileage. Better take a picture to record, we can see the current mileage is 160886 KM.  3. Remove the dashboard and check the chip number. The kilometers are stored in chip: 9S12H256 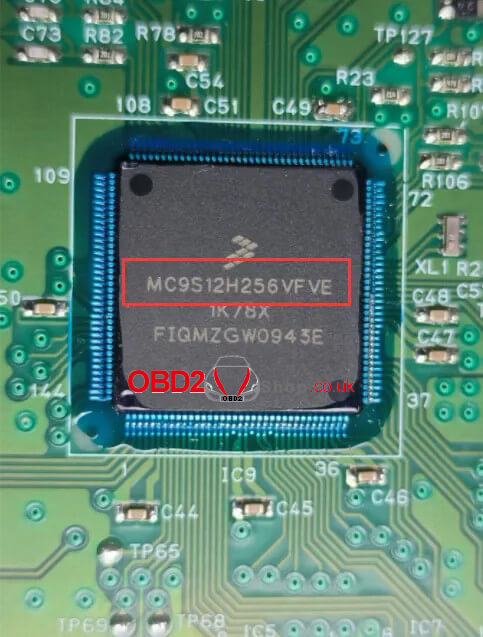 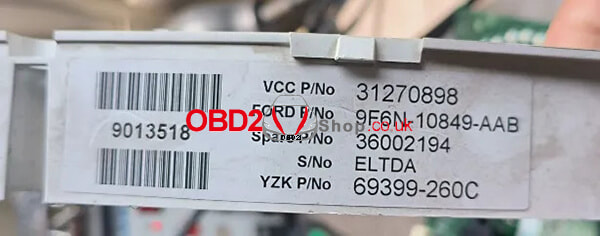 4. Connect CG100 software --> Programmer --> 9S12H256 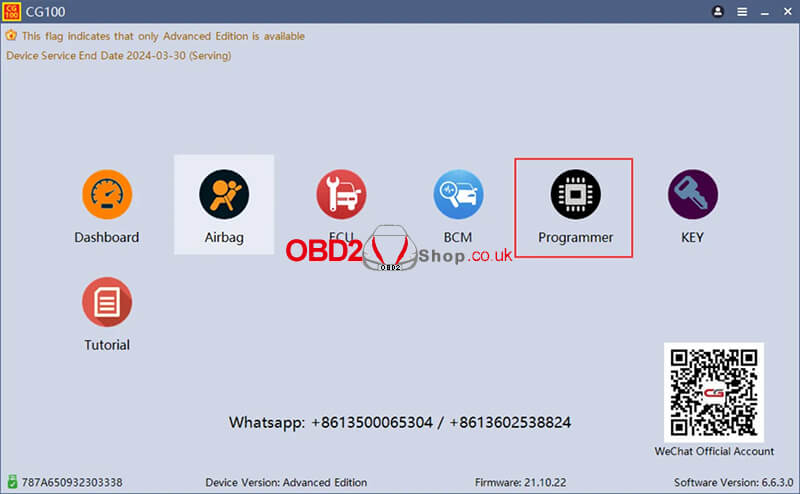 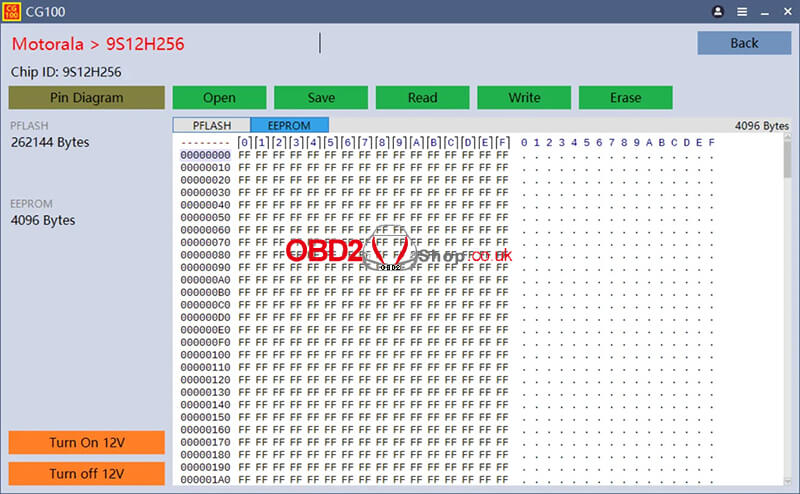 5. Connect the wires according to the diagram. 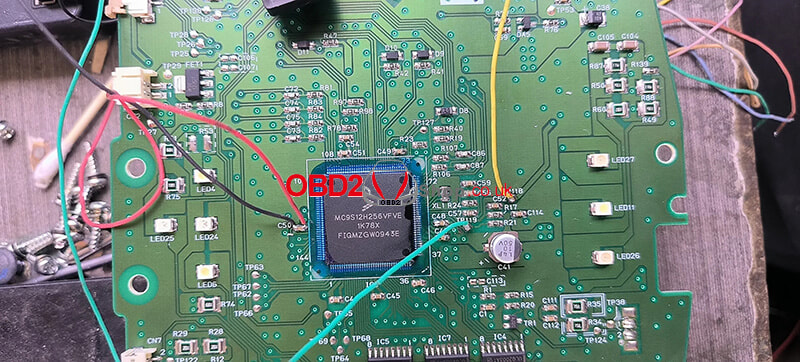 6. Read the data (check the km if the same as shown).  7. Write your target mileage of 100910 KM and wait for the software to change. 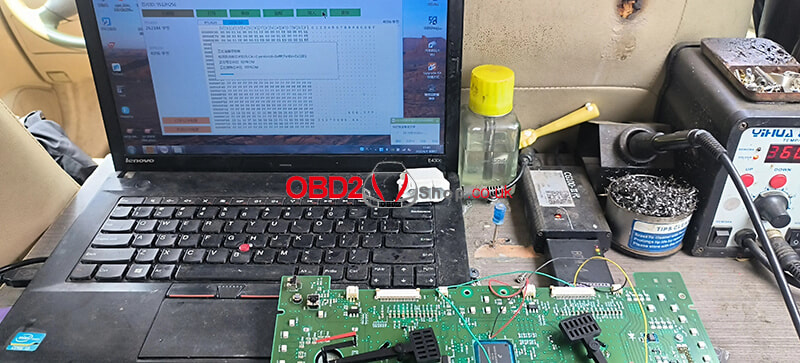 8. Put the dashboard back in the car and everything is ok. 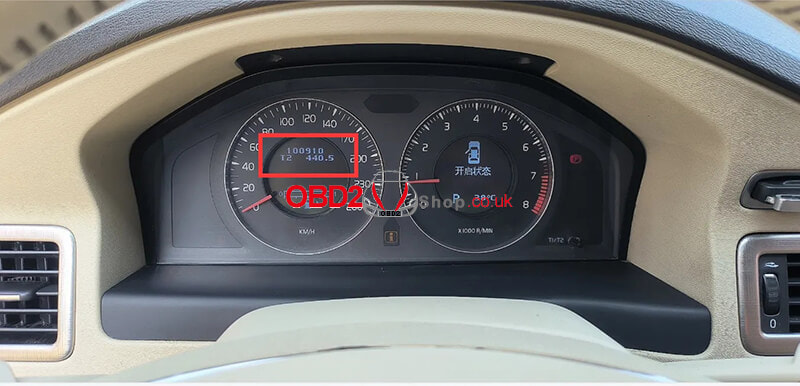 You may be interested in:
How to activate CGDI CG100X Programmer Mileage repair for Mercedes GLC 2017 via CGDI CG100X For more technical services, please follow https://www.obd2shop.co.uk/service/ A major free upgrade on OBDSTAR P50 is coming soon - Battery Reset Upgrade V30.06. Added Audi BMS 8R0915233, and 8R0915591 crash record erase and repair by bench. No disassembly, no risk to save your time and cost! In Audi A6, A8, and Q5 hybrids, the hybrid battery management unit(BMS) disconnects and logs a P1609 fault code when a crash occurs: (!!! Crash shut-down activated!!!), resulting in the vehicle not starting. At present, only a few auto electronic repair professionals through the brush firmware or open the cover through the programmer to repair. This way is high fees, risky, and only supports some models. Thus, OBDSTAR releases a free upgrade P50 battery module repair function again! OBDSTAR P50 supports the BMS crash record(P1609) repair function by bench for the 8R0915233 and 8R0915591 parts. No need to disassemble and read the chip, and no risk and difficulty, which can save a lot of maintenance costs.  The throttle body is one of those parts that can give you a lot of driveability issues when it's dirty or if it's going bad. So I'm going to do an active test on the 2017 Honda Accord that you can use on the electronic throttle body with Xtool D7. I've previously done it with Autel MK808Z before. Connect D7 to car OBD. Diagnosis >> HONDA >> 16PIN Connector >> USA >> System Selection >> Engine(ENG) >> Actuation Test >> Electronic Throttle Control Unit Test >> Electronic Throttle Control Unit Test 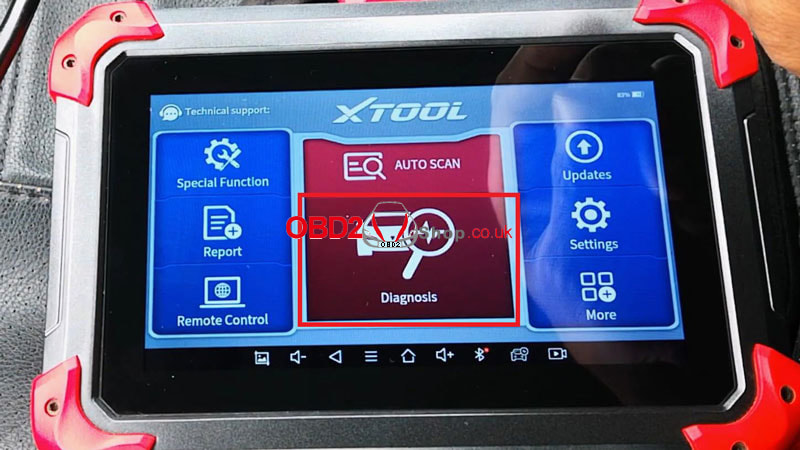 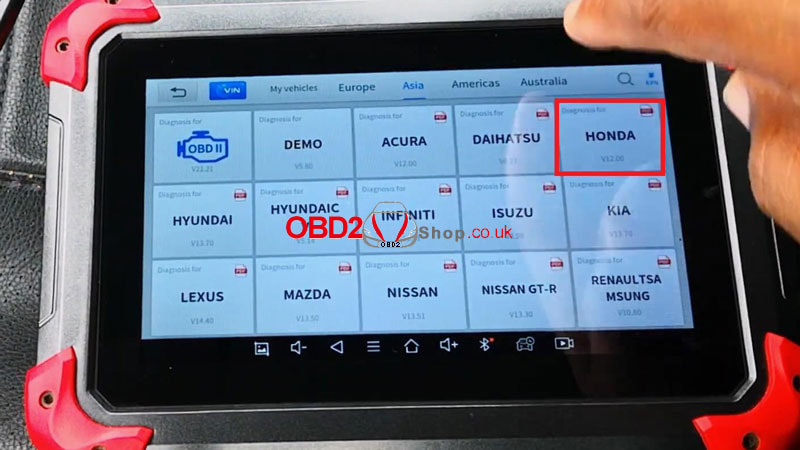  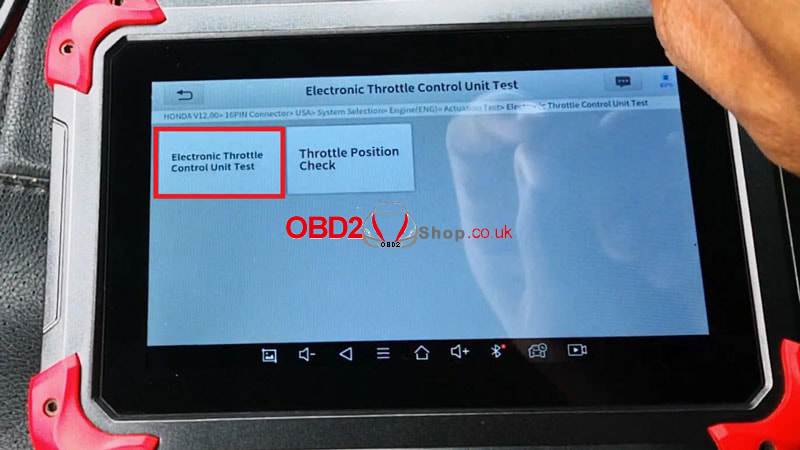 The throttle valve and relay are automatically activated. Click "Yes" to continue. Testing now... Throttle Actuator Control Relay Command State: normal -> off -> normal Command Status Of Relays: open -> close -> open Turn off the ignition switch. Turn on the ignition switch. The test is completed. Throttle Actuator Control Relay Normal system. The next test is the activation of the throttle valve. 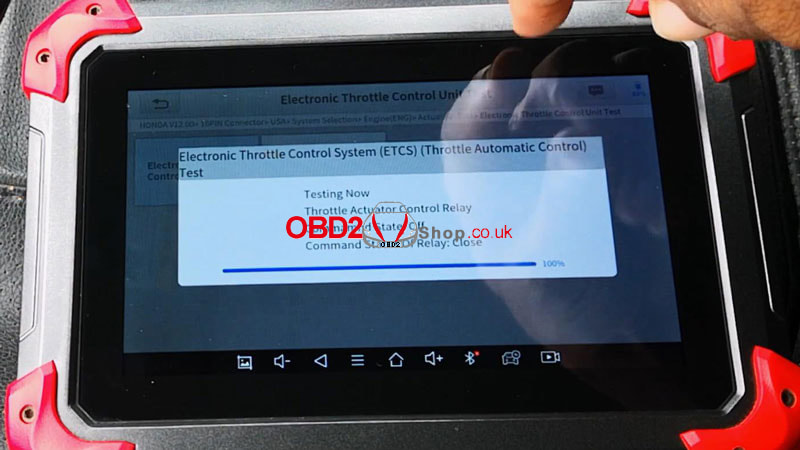 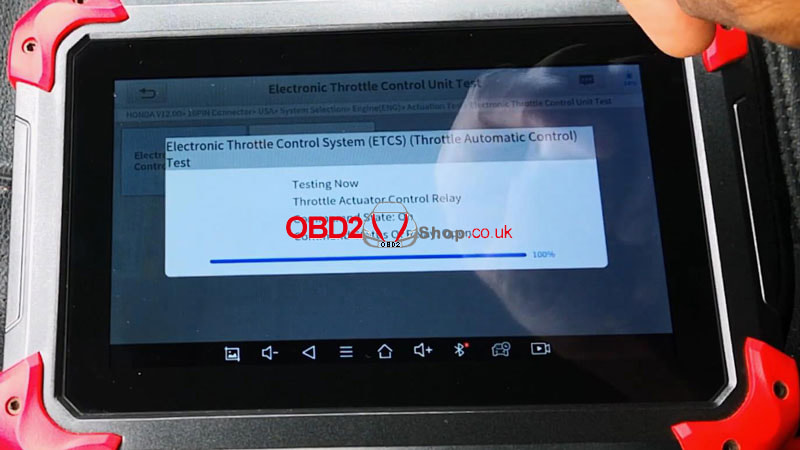 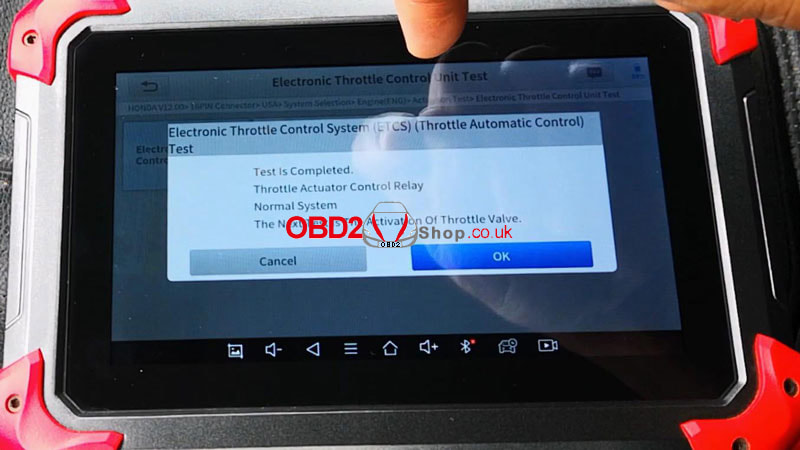 The next part is going to test the degree of correlation, between the opening angle commanded by the ECU and the actual response of the actuator in the throttle body. Click "OK" to start testing. The test is completed. Normal system. Compared to my Autel, it was way faster on the Xtool. Actually, D7 has upgraded to the new version Xtool D8/ D9 as well. The ECU commanded that the butterfly plate open by 2.5 degrees, and the actuator responded by opening by 2.4 degrees. In this other frame, 20 degrees was commanded, and the actual was spot on. If there were wide variations between the commanded and the actual, the test would fail. The first thing you want to do is to clean the throttle body. Maybe there's some carbon restricting the movement of the butterfly plate. If that fails, it might be the motor itself that is actually worn and would need to be replaced. 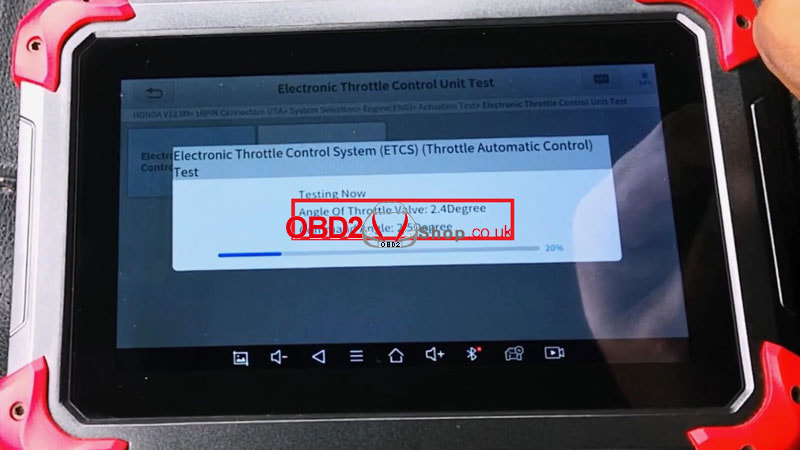  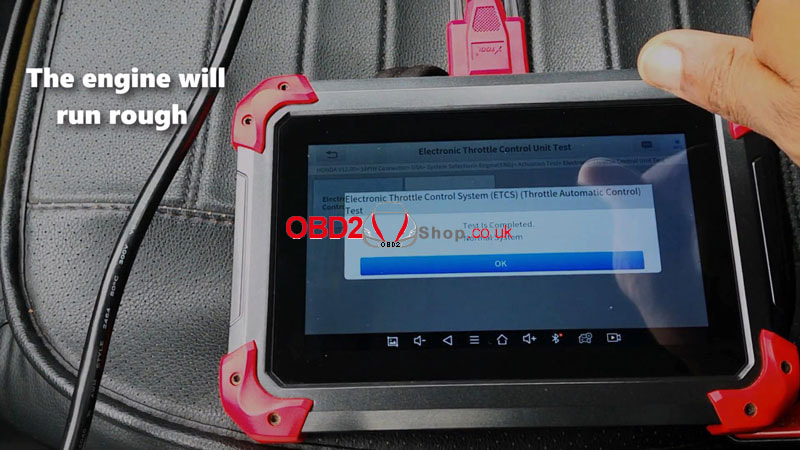 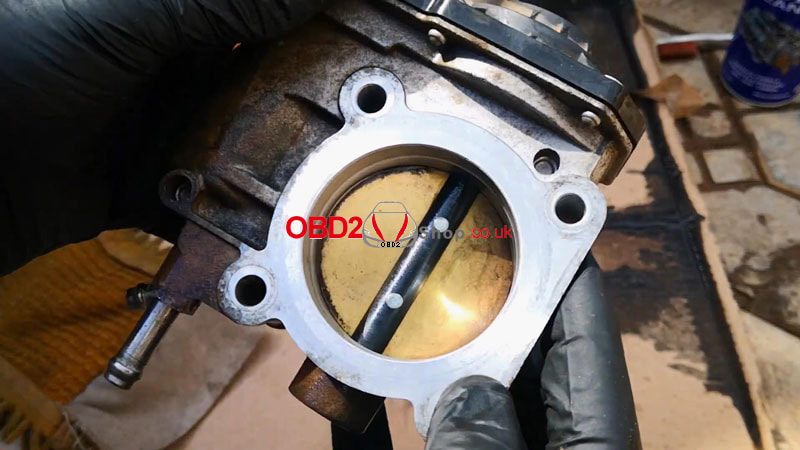
This post will guide you on how to update Super ICOM Pro N3+ firmware.
Upgrade file free download: https://mega.nz/file/xnoilRaS#AhYeUW231K_vl9mMnLVGWwJZnWLGSsi4v2L3CEk-5Mo Here comes the steps: Step 1. Connect the Super ICOM Pro N3+ to the computer with a USB cable and power it on with a 12V power adapter. Step 2. Open http://169.524.92.36:60080/ with IE browser, enter user name: root and password: NZY11502. 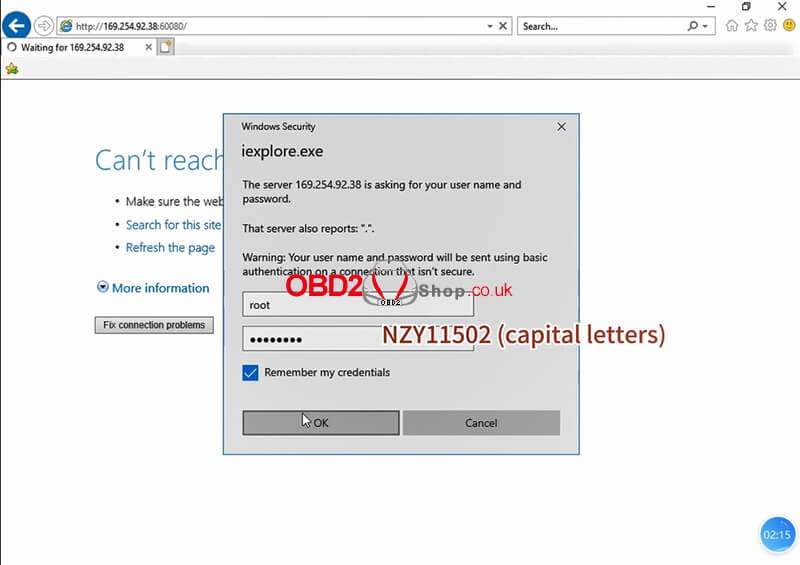
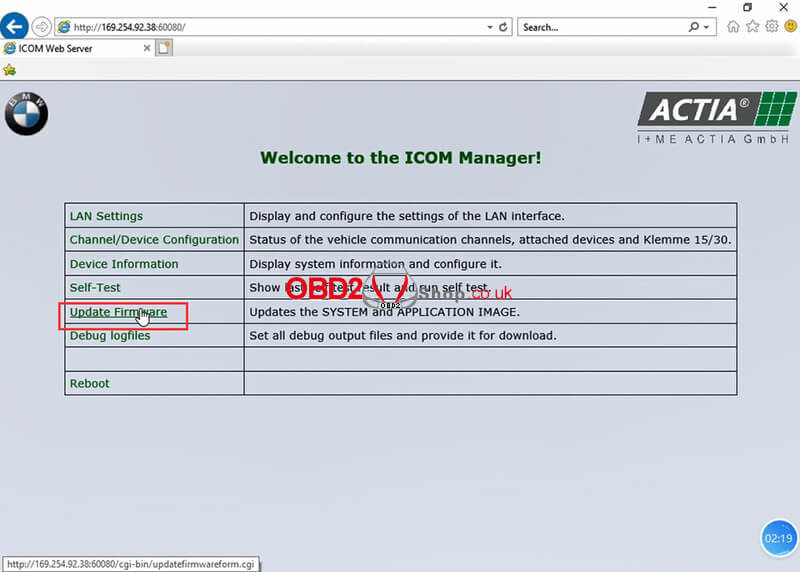
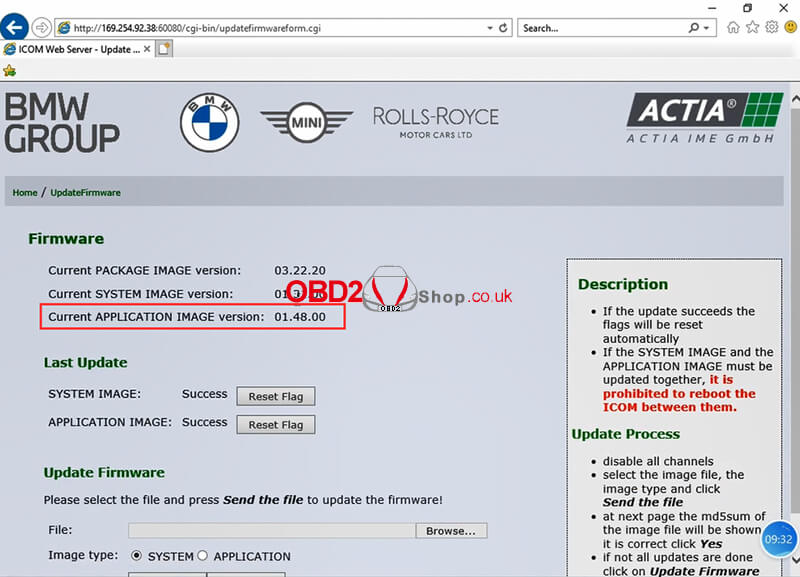
Step 3. Click "Update firmware" and you will see the version information of ICOM firmware.
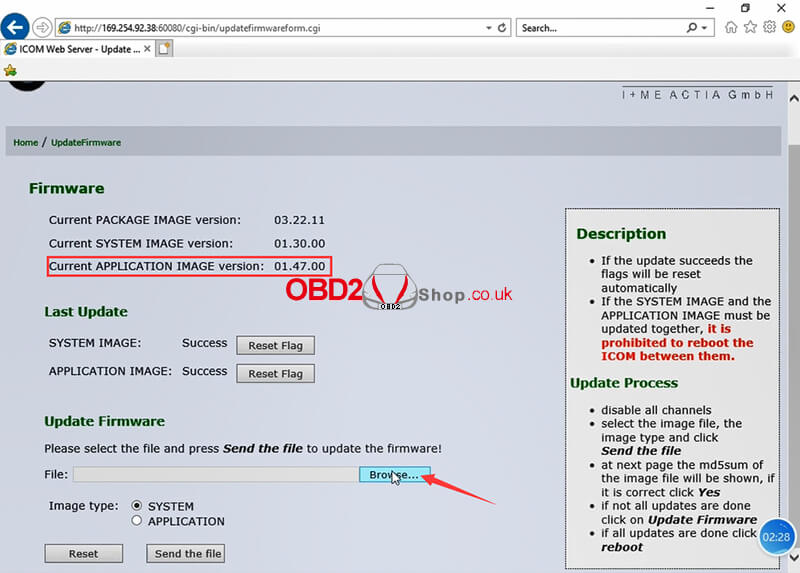
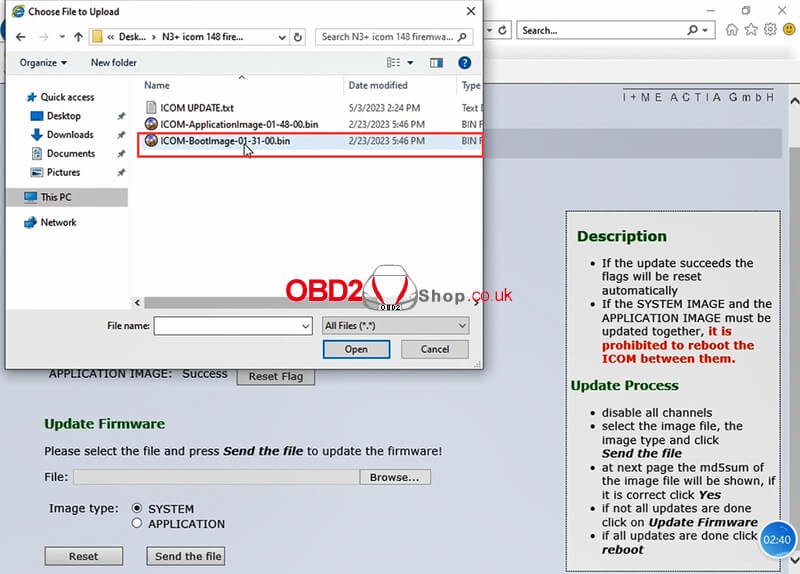
Step 4. In the "Update Firmware", click on "Browse" and select the file "ICOM-Bootimage-01-31-00 .bin", set the image type to the system, and click "Send the file".
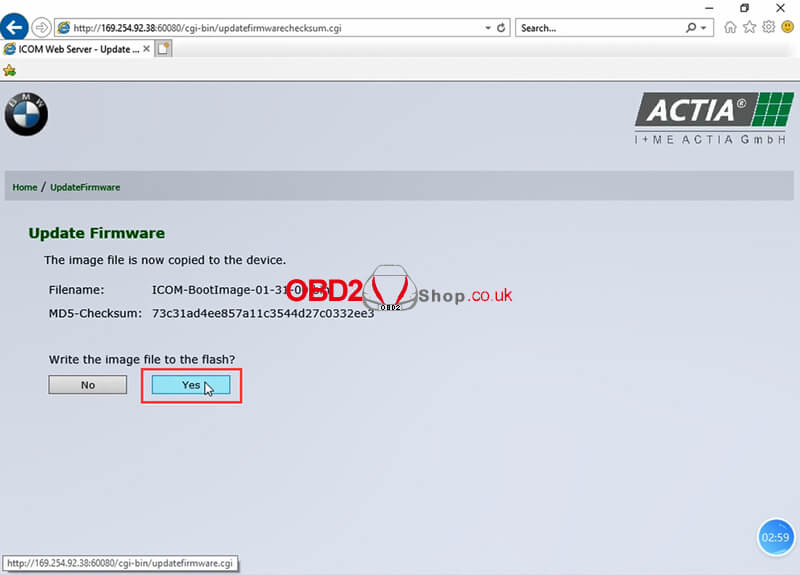
Step 5. It says "Write the image file to the flash?", click "Yes" and the ICOM light will turn red.
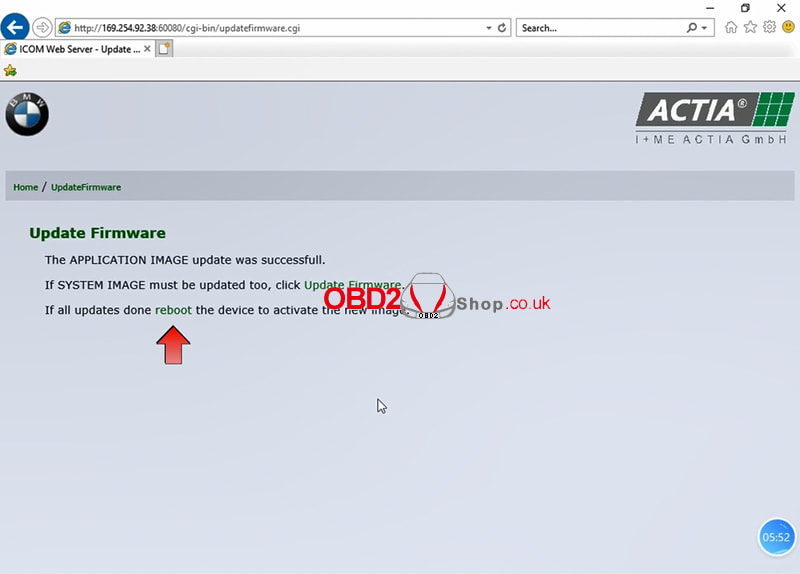
Step 6. When it prompts "the system image updates was successful", click "update firmware".
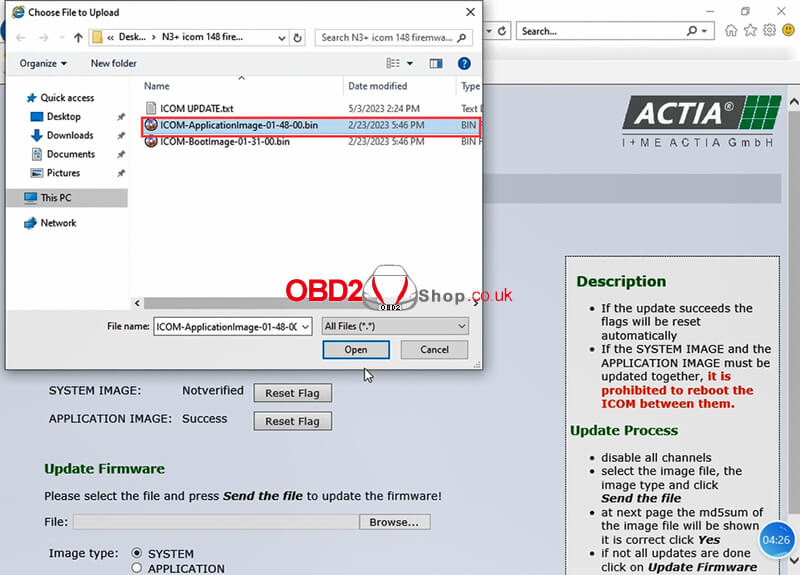
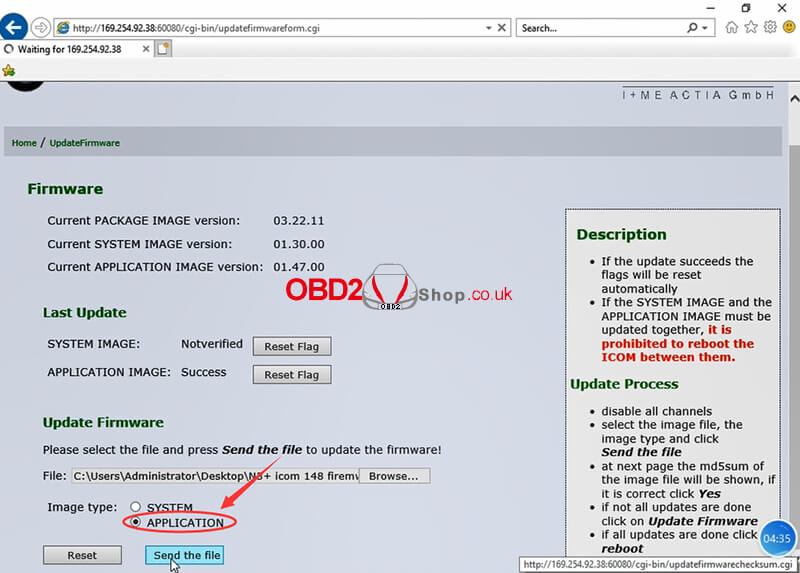
Step 7. Select "ICOM-Applicationimage-01-48-00.bin", set the image type to application, and click "Send the file". The file will take a few minutes. 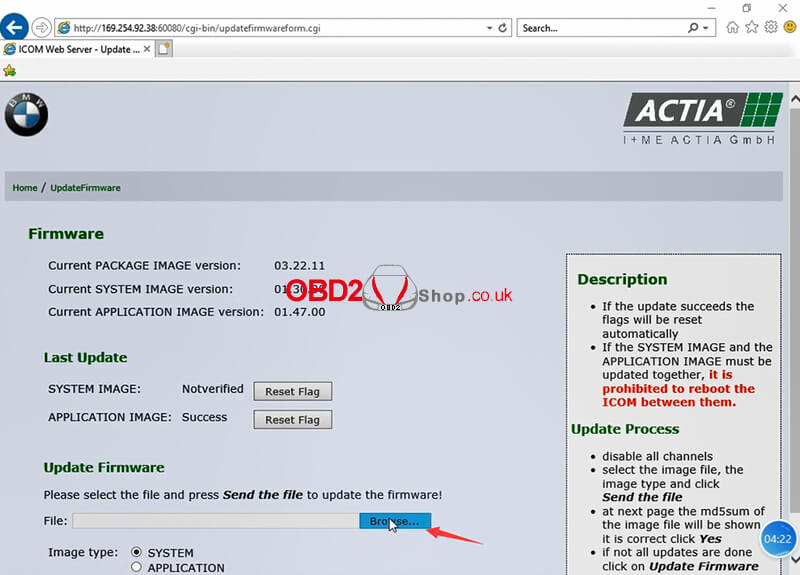
Step 8. It says "Write the image file to the flash?", click "Yes" and the light of ICOM will turn red for the second time.

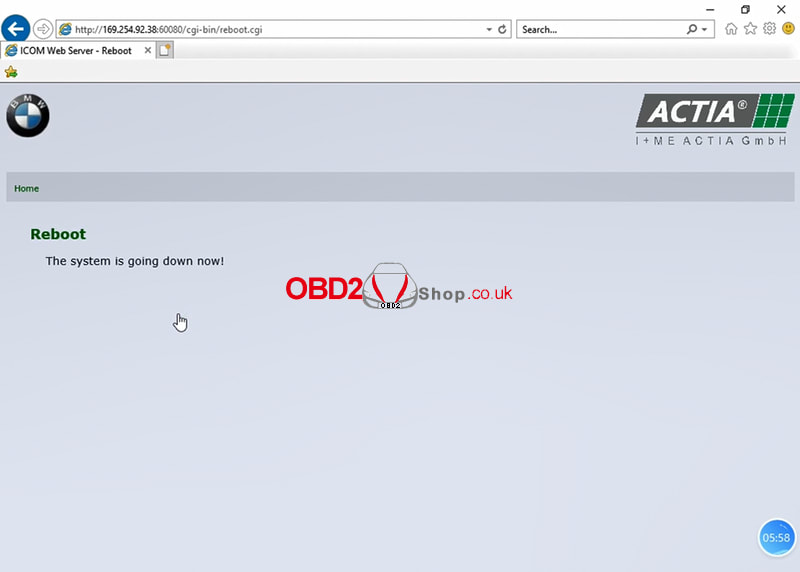
Step 9. When it is all right, click "reboot".
Step 10. The system is going down now! Click "Home" in the upper left corner to return, and you can see the version has been upgraded to 01.48.00.
For more detailed steps, please refer to the video:
This is a tutorial on using Launch X431 IMMO Plus to program BMW CAS3+ key adding by OBD. The procedure also applies to X431 IMMO Elite.  Procedure 1. Backup Key Info IMMO >> BMW Connect the diagnostic connector and X431 IMMO Plus Programmer at the same time. Press "OK". Anti-theft key matching >> CAS3/CAS3+ IMMO >> Key operation >> Key data operation >> Backup key data Use the function to backup CAS key data. Remarks: it is suggested that the CAS original key data should be backed up with the function before key learning. Press "OK". Reading key data... please wait! Take the key out form the ignition switch! If the key is a smart one, please put it outside the vehicle. Please click "OK" directly if there is no key in the ignition switch. Press "Backup" to save the file. Key information backup successful!  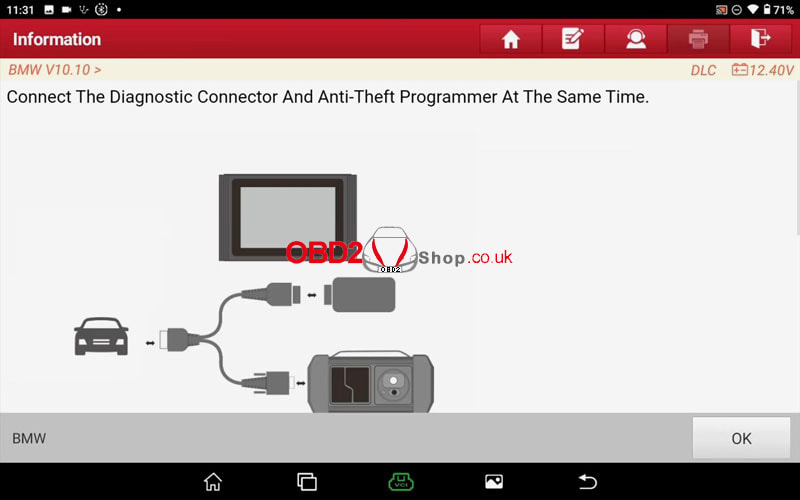 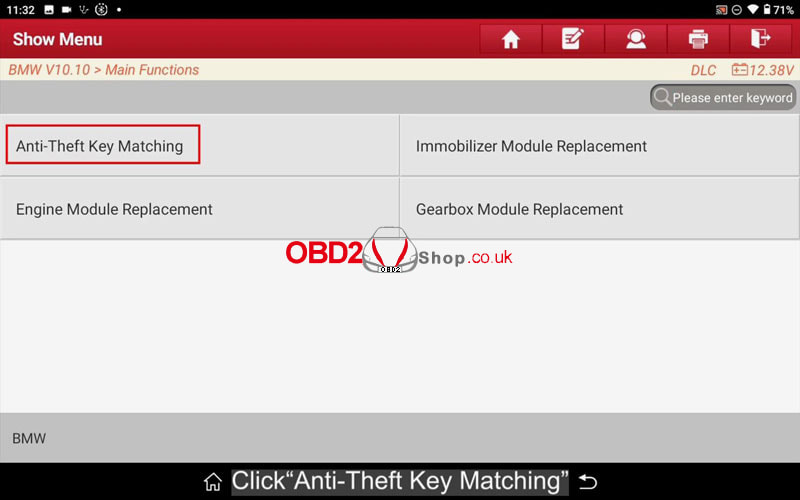 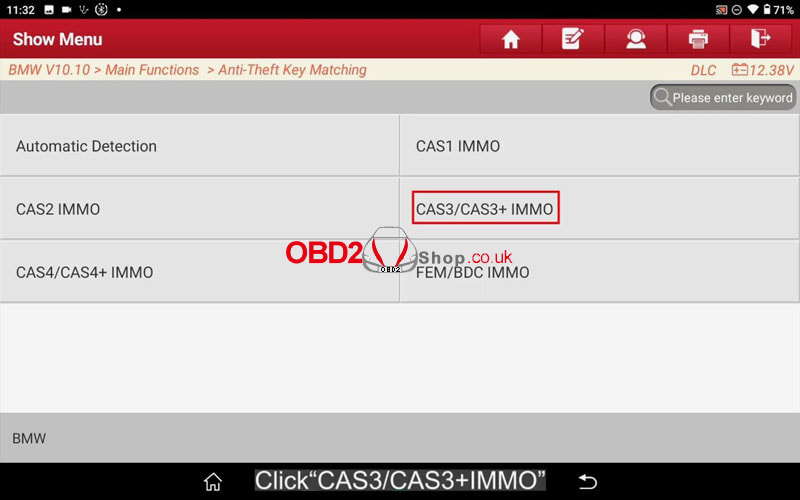 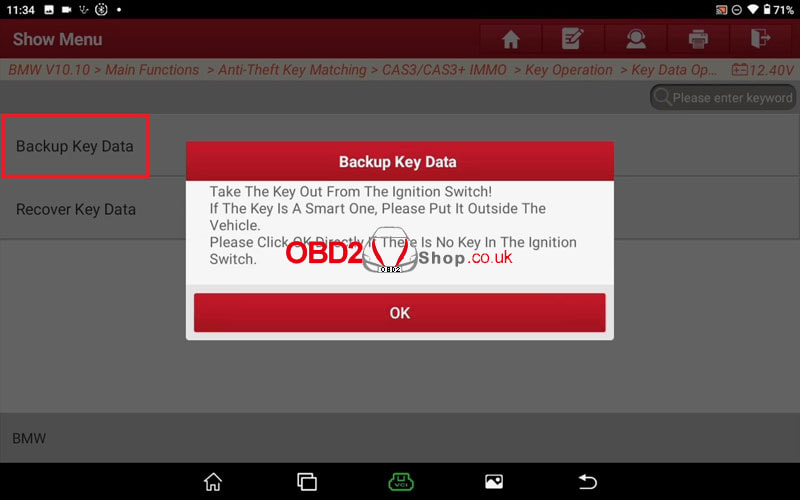 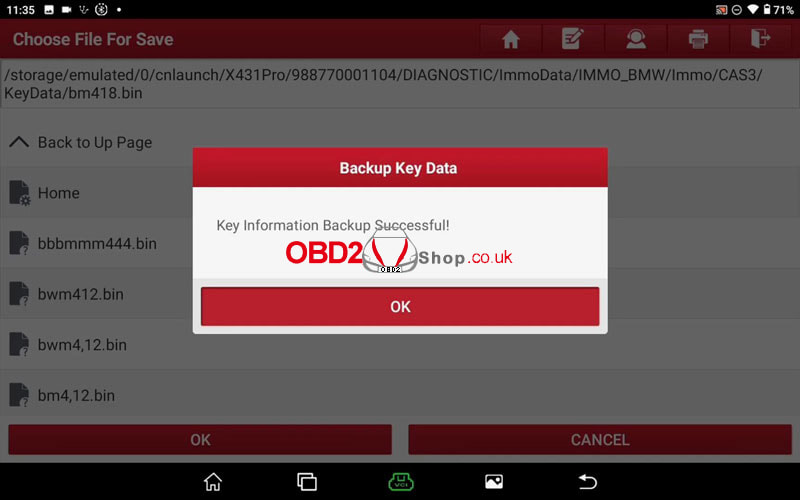 2. Add Key Press "Key learning". The current CAS type is an encrypted version. Are all keys lost? No Please insert a working key into the ignition switch and press the Start button! Take the key out from the ignition switch! If the key is a smart one, please put it outside the vehicle. Please click "OK" directly if there is no key in the ignition switch. Key data read successfully. Whether to save key data? No Select a free key location: Key 8 >> Key generated by the programmer Please put the new key to be learned into the X-Prog3 Programmer! Is the current key a smart one? No The dealer key is generated successfully. Please try to start the vehicle. If the newly generated key cannot start the vehicle, please execute DME synchronization or DLE synchronization function according to the situation. 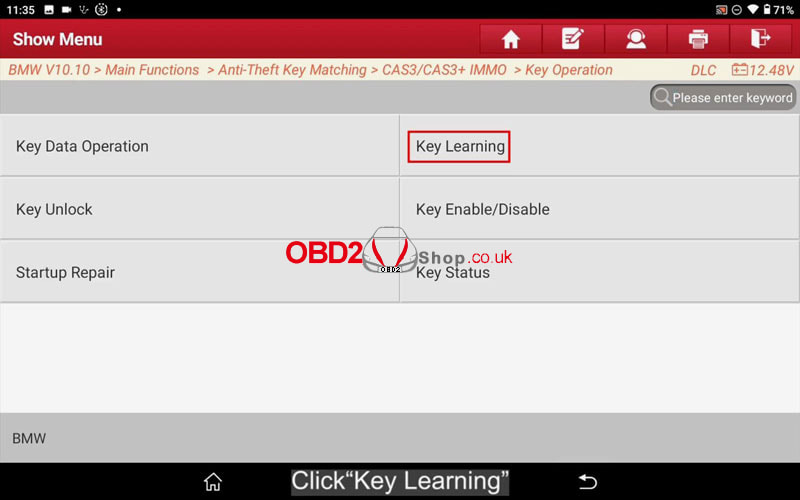 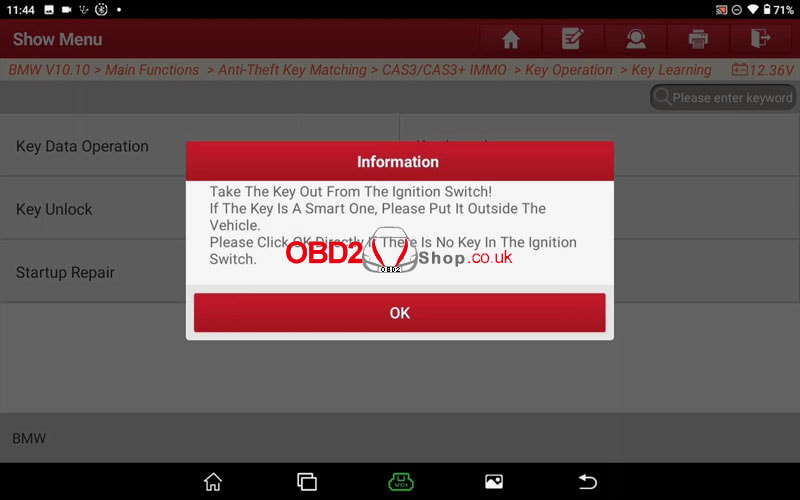 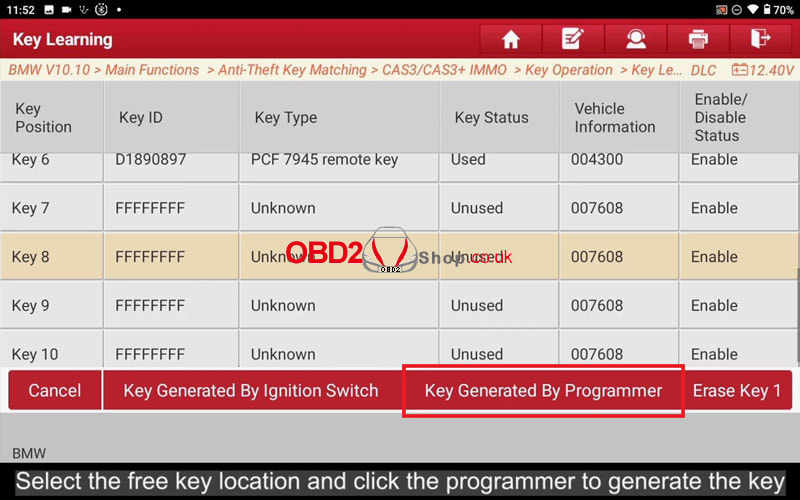 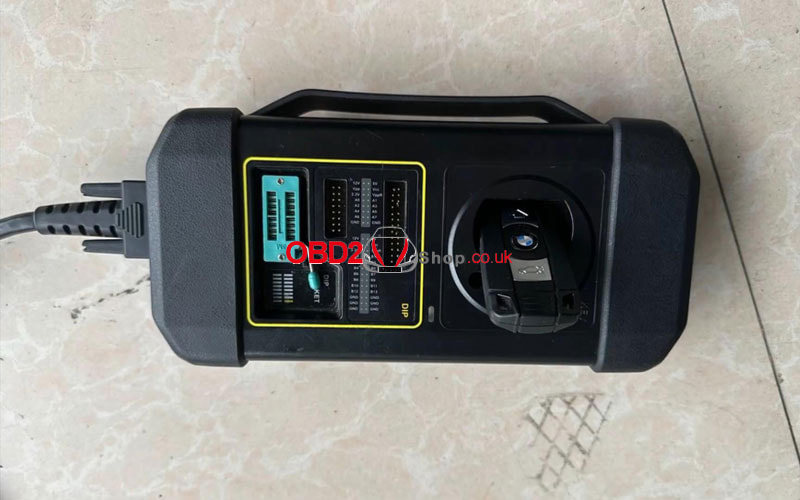 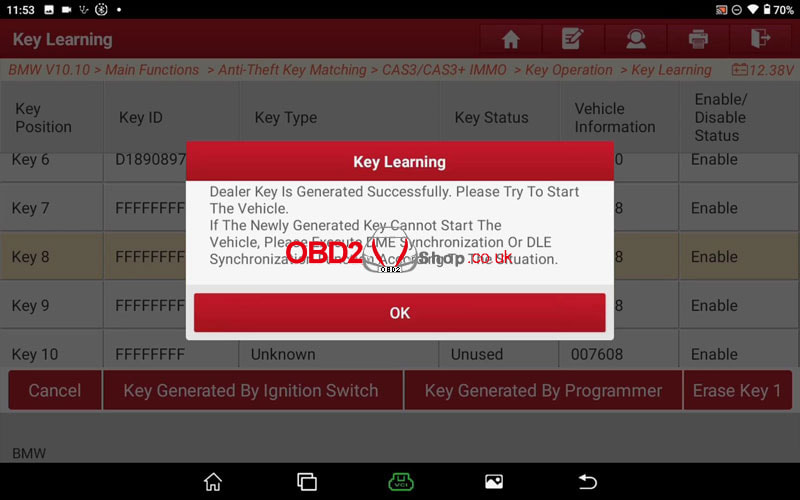 This article will guide you on how to use the Super ICOM pro N3+ bmw diagnostic tool. The communication interface between N3+ and the computer adopts wired + wireless mode. 1. USB Mode 1) Connect the N3+ to the power supply or connect the OBD to the vehicle. 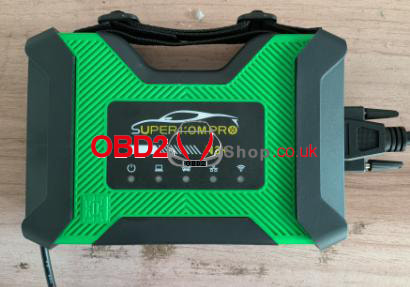 2) Use a USB cable to connect your N3+ to your computer. Note: For the first use, you need to configure a dedicated IP address ① Open the computer network configuration interface and find the "Realtek USB FE Family Controller "network. 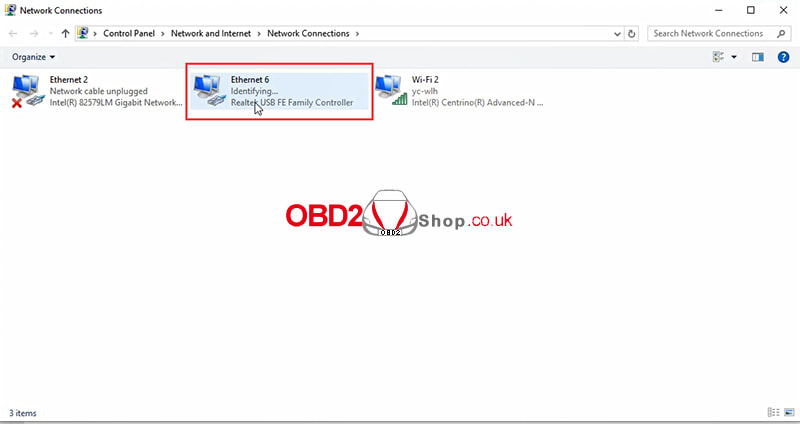 ② Click Properties, select TCP/IPV4, and set the IP address as shown below. ③ Click OK to complete the wired network setup. 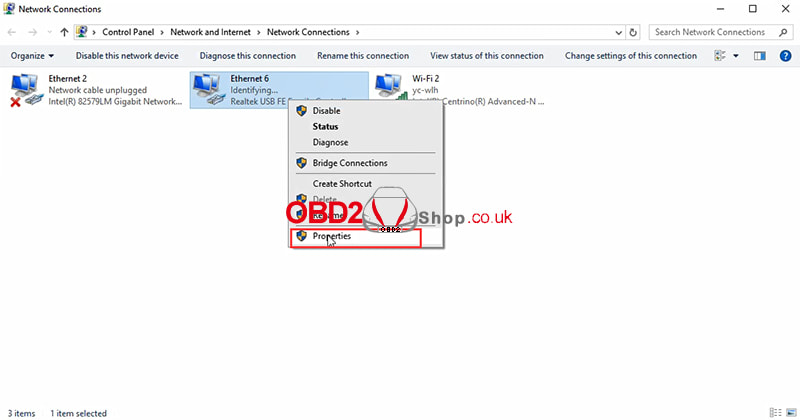  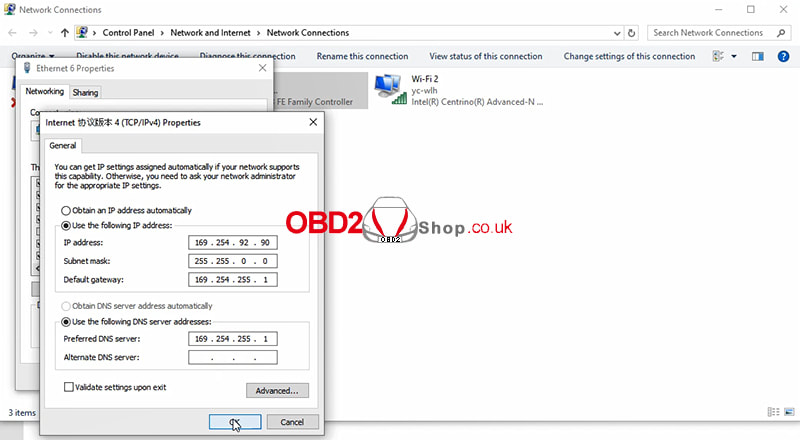 2. WIFI Mode Unplug the USB cable from the computer first, then you will find the SSID is N3+ ICOM-****, connect directly, and enter the password 123456789. Note: The cable must be unplugged to have wireless, one machine one number. 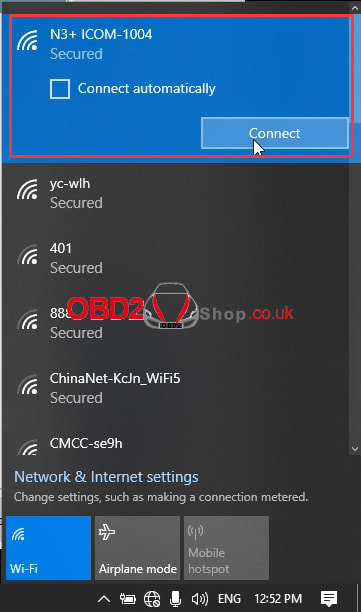 After completing the connection (wired or wireless), you can use the special inspection software to test.
For more information about Super ICOM pro N3+, please follow https://www.obd2shop.co.uk/wholesale/super-icom-pro-n3-plus-bmw-diagnostic-tool.html Super ICOM Pro N3+ BMW Diagnostic Tool is developed by optimizing and upgrading the advantages of BMW special inspection devices A1, A2, A3, and N3. Fully 100% compatible with the original BMW special inspection test software without any changes. Furthermore, N3+ has added J2534 and DOIP on the basis of BMW special inspection(N3+=BMW special inspection + J2534 + DOIP). As the upgraded version of N3, what's new & different? Let's take a look. 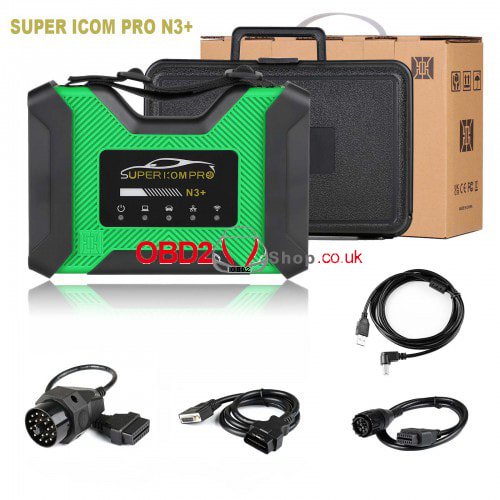 Super ICOM Pro N3+ vs. N3 Comparison 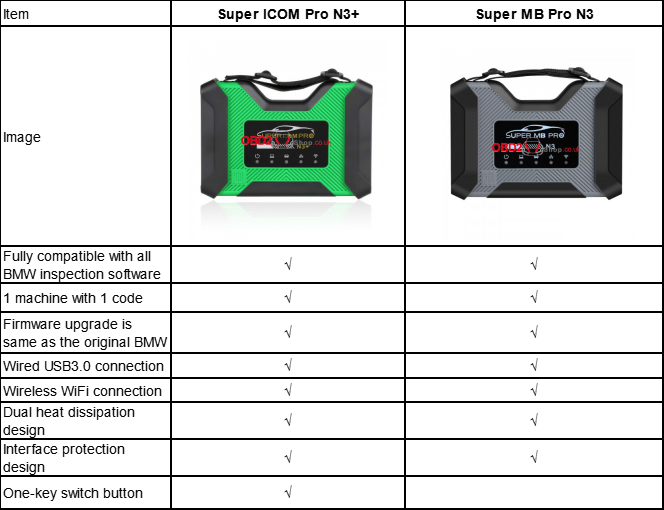 New Features 1. N3+ has added a one-key switch button to allow freely switch between the special inspection and J2534 software. 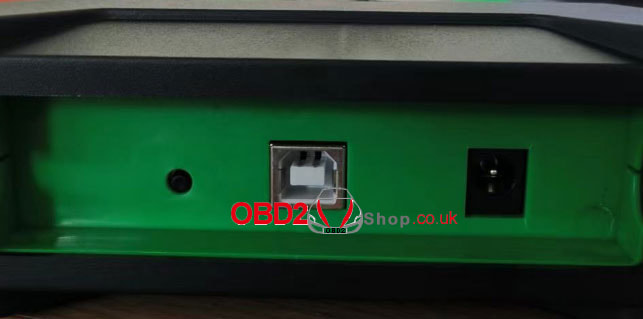 2. N3+ firmware has upgraded to the latest 147 version. Users can download it from the official website for further upgrades. 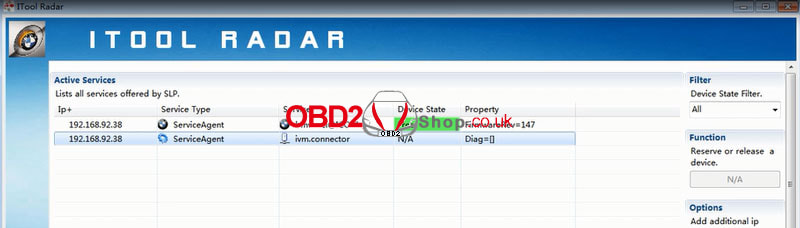 3. After N3+ one-key switch, users can read by the J2534 protocol. Compatible with OBD 6 and 14-pin CAN, 7-pin K-line communication. Eg. VW, Benz, and Toyota special inspection software with J2534 interface.
4. After N3+ one-key switch, DOIP network communication can be used to solve the problem that VW 5054 or Benz C4 cannot test a new car without DOIP. 5. After N3+ one-key switch, users can perform BMW hid and test features or test Benz, VW, and Land Rover(-2023) DOIP by WiFi connection. More convenient and faster. Order link: https://www.obd2shop.co.uk/wholesale/super-icom-pro-n3-plus-bmw-diagnostic-tool.html
This is an operation guide on using Yanhua Digimaster 3 + MEM ICP solder-free programming adapter for mileage correction. Read this article to learn how to do it.
Accessories MEM-ICP adapter 3M fixed piece Solder-free programming bracket 8PIN chip clip 14PIN cable Yanhua Digimaster III Odometer module Check the video to learn:
Installation
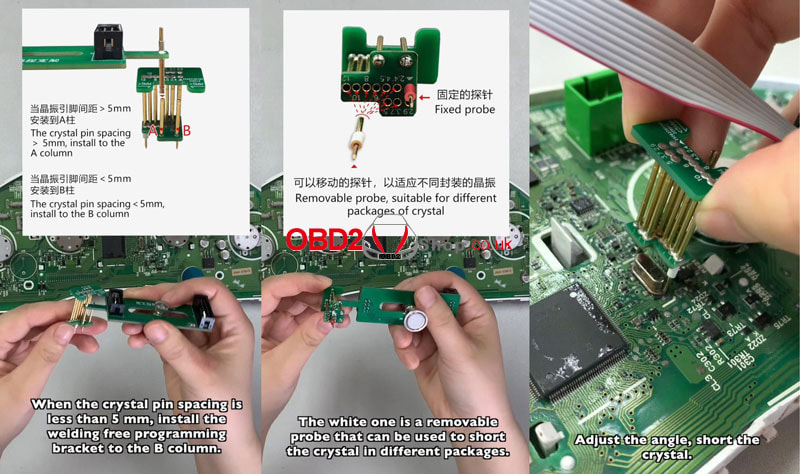
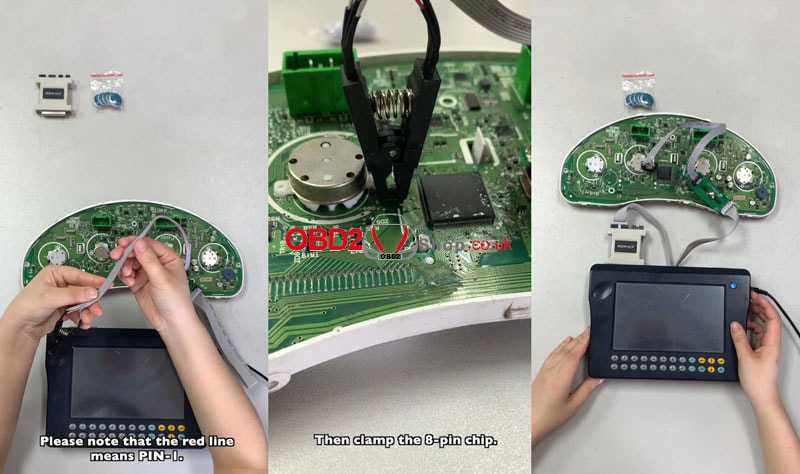
1. Confirm the location of the standard 8-pin EEPROM chip and crystal. Select an appropriate position to fix the 3M piece according to the crystal position and bracket length. 2. When crystal pin spacing is > 5mm, install the solder-free bracket to the A column. When crystal pin spacing is < 5mm, install the solder-free bracket to the B column(In this case, install it to the A column). The white probe is removable that can be used to short the crystal in different packages(In this case, adjusted it to 12). 3. Connect the 14PIN cable and 8PIN chip clip, and install a solder-free bracket. Adjust the angle, and shorten the crystal. Please note that the red line means PIN-I. Clamp the 8-pin chip, and connect the MEM-ICP adapter with the 14PIN cable. Then connect the adapter to Digimaster III. 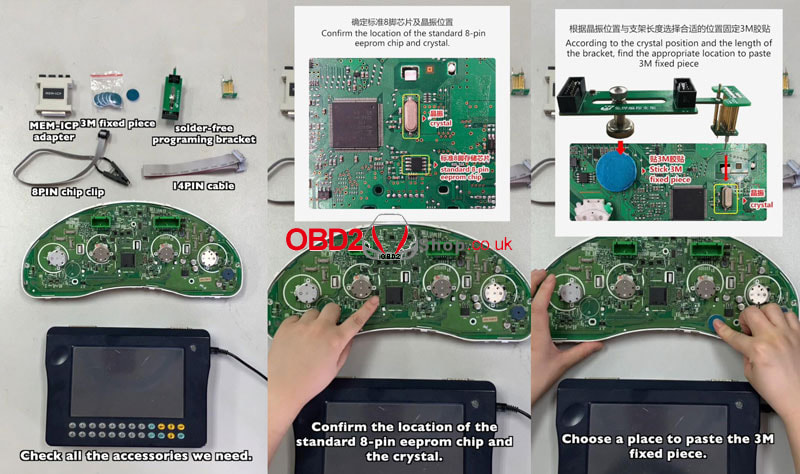
Operation
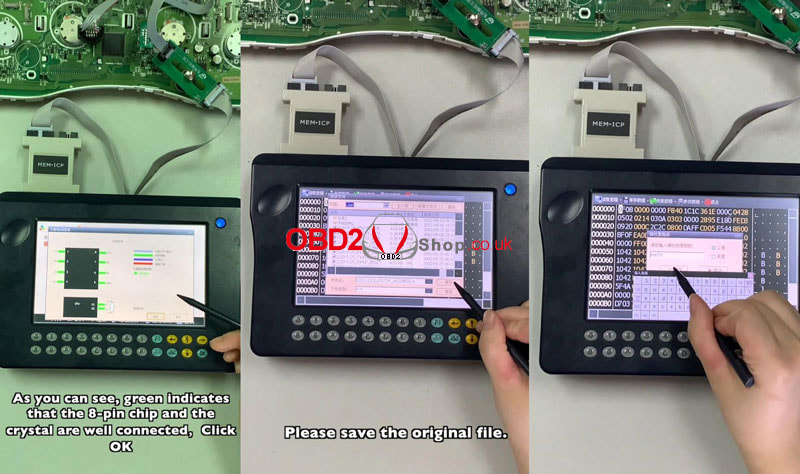
Select an option based on car and chip model: Instrument system >> Japan&Korea >> Subaru >> Outback >> 2006 >> Confirm chip model is 93C56, click Next >> MEM-ICP You can drop down the help image to guide the connection. As you can see, green indicates that the 8-pin chip and the crystal are well connected. Click "OK". Confirm the current mileage, and click "OK". Save the original file. Enter the new mileage, and click "OK". Write data success. 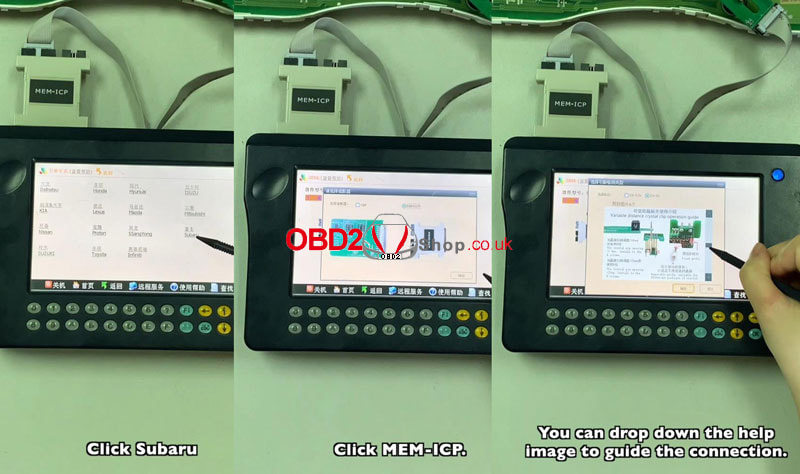
GODIAG GT107 + DSG Plus Gearbox Data Adapter can connect to Benz, BMW, and VAG ECU like DQ250, DQ200, VL381, VL300, DQ500, and DL501 for maintenance or diagnosis. Compare to the old version GT107 DSG, what's new and different? Let's take the comparison table for reference. 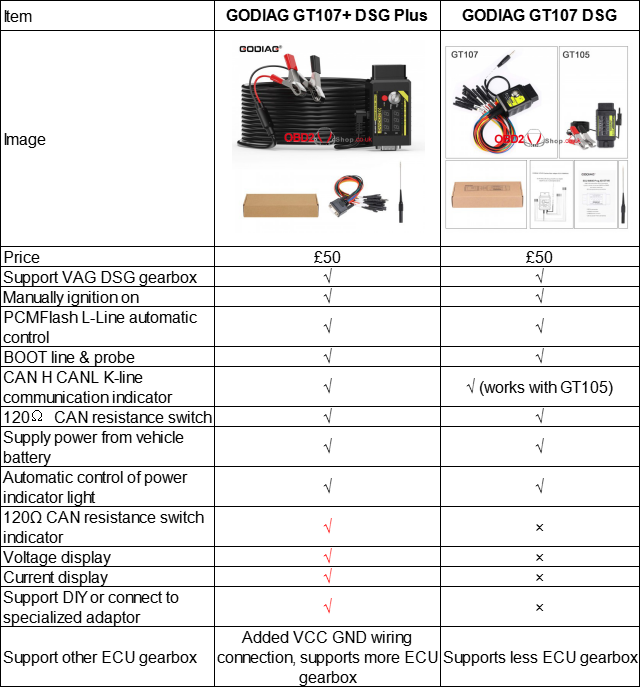 New Features 1. Added 120Ω CAN resistance switch indicator, voltage display and current display. 2. No need to work with GODIAG GT105 any more. 3. Added GND VCC port for BMW and Benz gearbox connection. 4. Supports disassembling and customising connectors for DIY development. 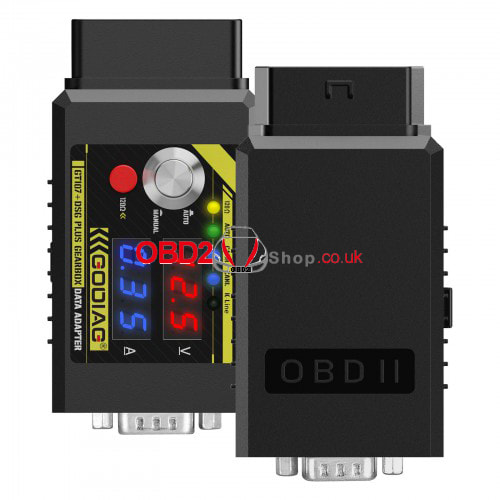 GT107+ DSG Plus is compatible with PCMFlash, FCMTuner and KessV2 diagnostic software to repair the DSG gearbox ECU. Order link:
https://www.obd2shop.co.uk/wholesale/godiag-gt107-dsg-plus-gearbox-data-adapter.html |
