|
How to use Launch X-431 PAD VII to program BMW ECU? This is programming the 2018 BMW 530LI xDrive G38 EPS as instructed. Local diagnose >> BMW >> OK >> Automatically Search >> 5 Series >> 5'_G38 >> Coding/Program >> Program >> Read tips, OK >> Automatic Programming Confirming the transport mode... (Some MILs have been lighted which is a normal phenomenon) Operation Tips Local programming backup information detected: 1. Quickly press the last configuration to access. 2. If the hardware changes, press "No" to calculate the new configuration information. 3. If the vehicle command changes, press "No" to calculate the new configuration information. 4. If the programming indicated the hardware is mismatched, press "No" to calculate the new configuration information. 5. For any uncertainty, press "No" to calculate the new configuration information. Whether to quickly load the last configuration information? Press "No". 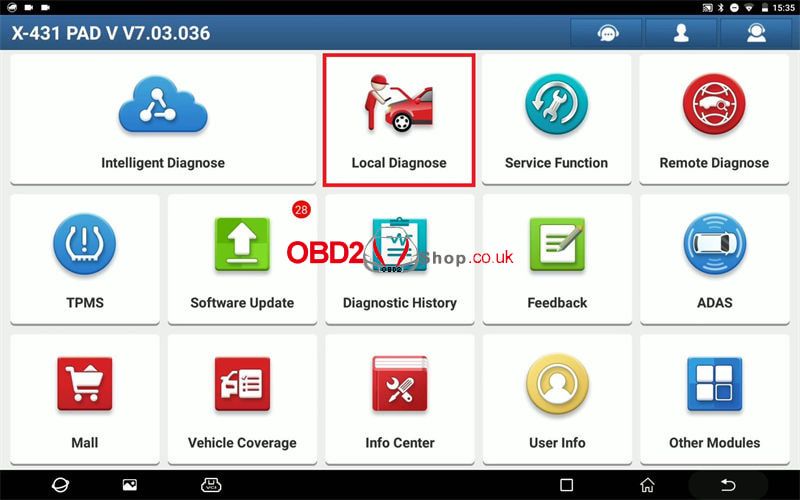 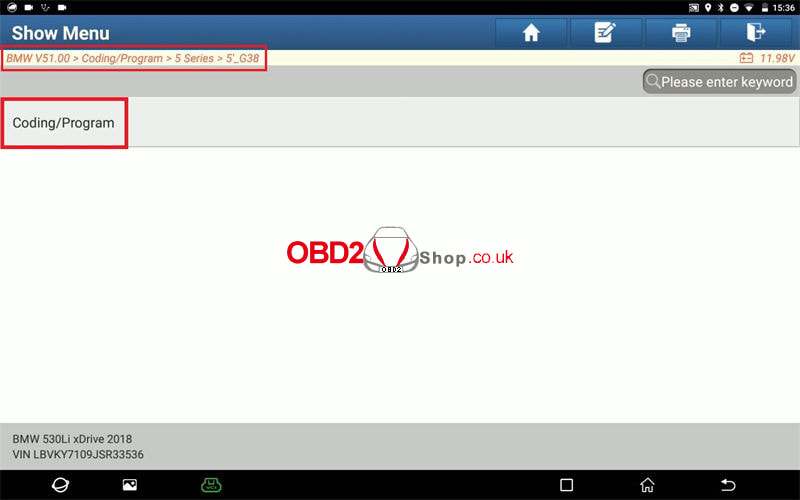 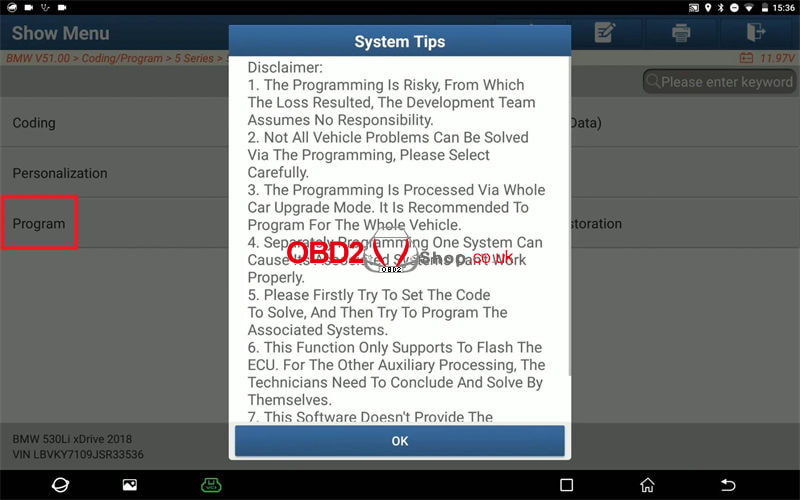 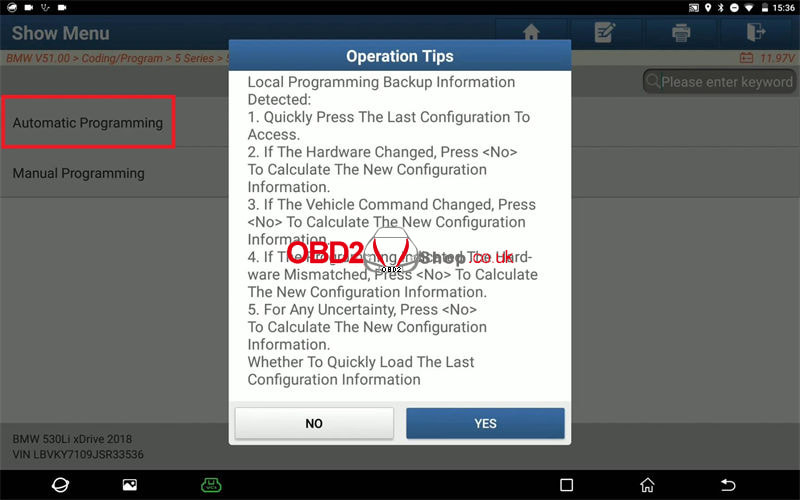 Succeeded to get the other vehicle information... Next >> EPS(Electronic Power Steering) >> OK >> Program >> Select files(asterisk means it must be selected) >> Next Please confirm the vehicle conditions: 1. The vehicle is connected to an external power supply or the vehicle power supply can support the steady discharge for at least 1 hour. 2. The vehicle voltage can be stable for at least 13V. 3. Ignition on(engine not start). 4. Switch off all electricity-consuming equipment, eg. air conditioner. Press "Yes". 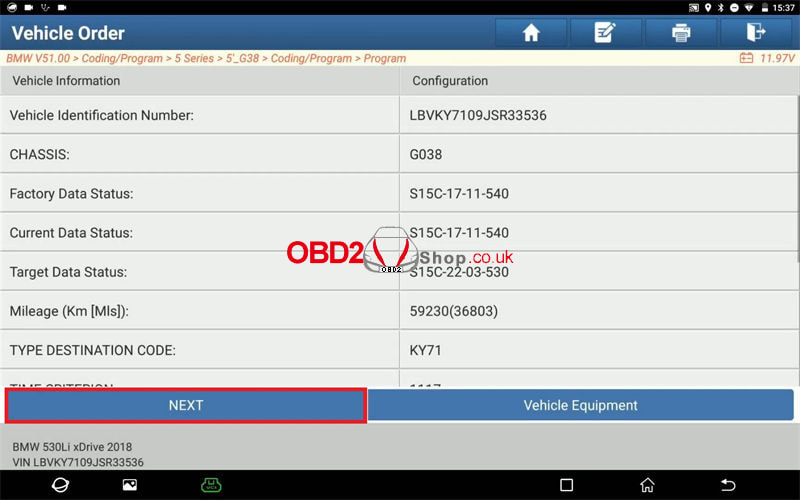 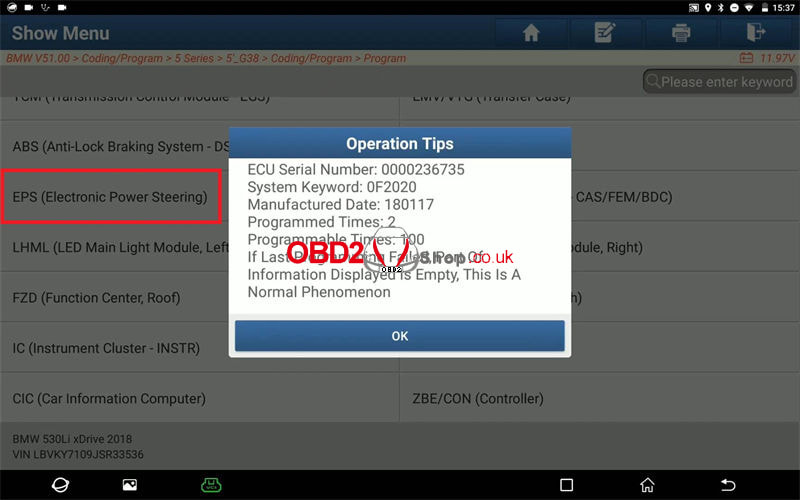 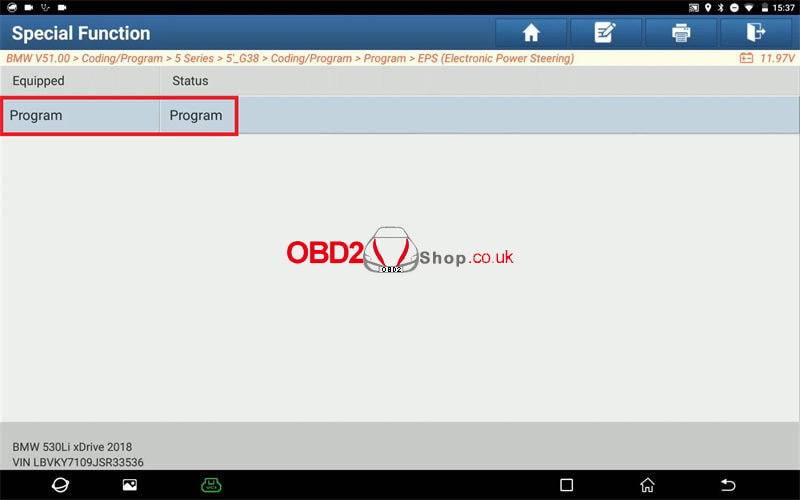 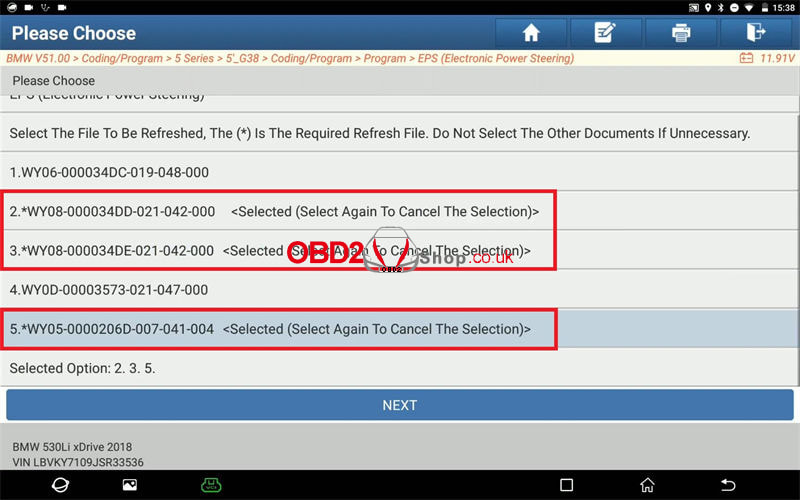 Downloading files... Continue or not? Yes X-431 PAD 7 will start programming automatically... ECU restart... Testing... Clear fault code... Programming completed. *DO NOT disconnect immediately, as it needs to complete the coding. Recoding has been completed. Done. 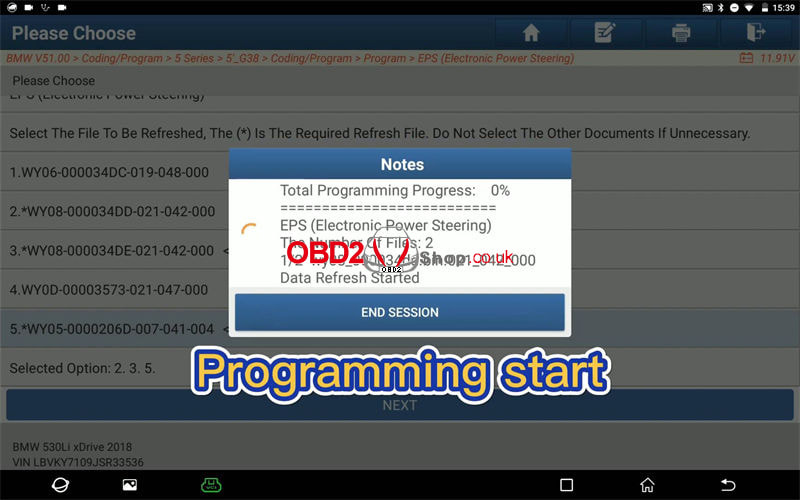 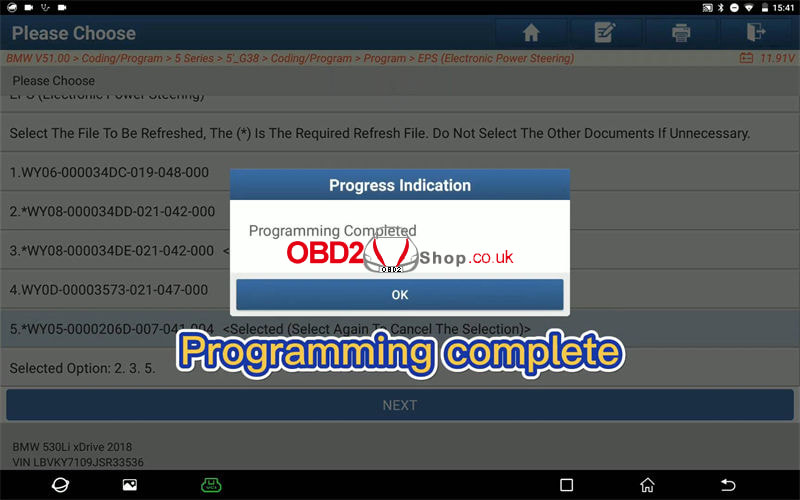 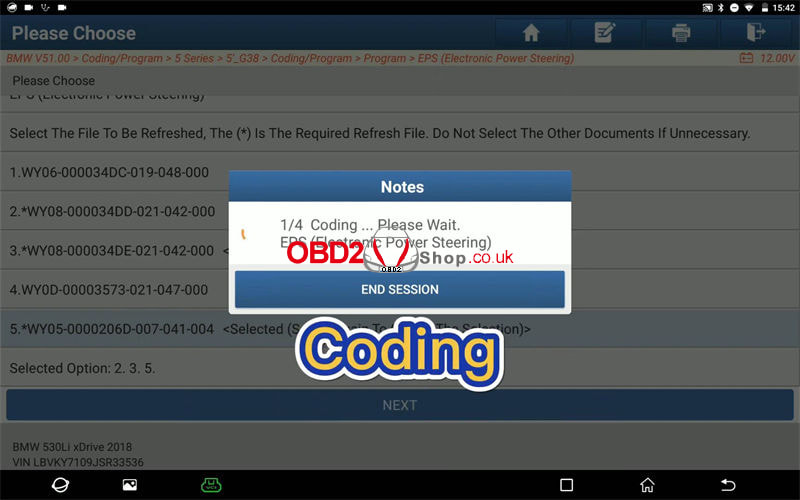
0 Comments
Launch X-Prog 3 Immobilizer Programmer is used to read & write car key chip data, compatible with a variety of X431 diagnostic tools like X431 V+, X431 PRO5, X431 PRO3S+, etc. This is a quick guide on how to connect GIII X-Prog3 with the X431 scan tool. Connection Instruction 1. Plug in the DBSCAR connector line.  2. Connect DBSCAR to the X431 scanner via a USB cable.  3. Connect DBSCAR to X-Prog3 via a three-way extension cable. 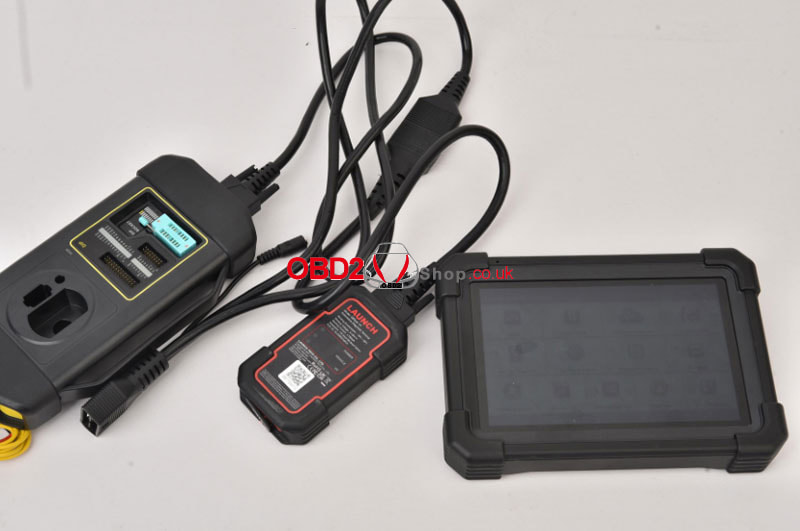 4. Insert MCU-V3 board into X-Prog3 if any. 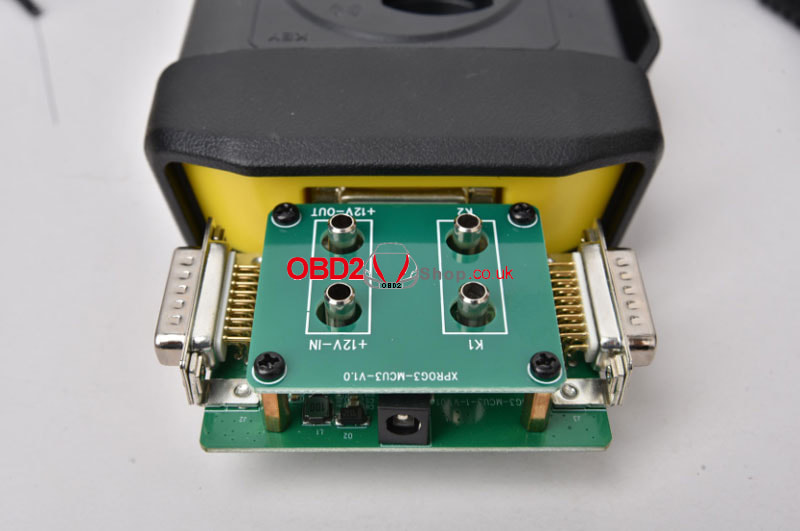 5. Connect the power cable to the MCU board via a three-way cable. Plug the BENCH cable into the MCU board. 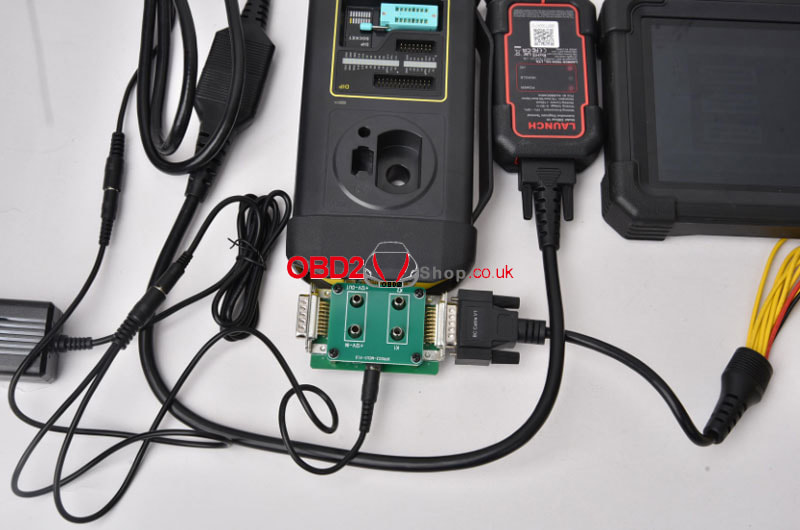 6. Connect the BENCH cable & control unit via flash cable.  Completed.
www.obd2shop.co.uk When you receive your foxFlash, how do you use it? This article will guide you on how to do it, let's take a look! 1. Go to https://www.dfb-technology.com/download.html and download the foxFlash Manager app, then install it. 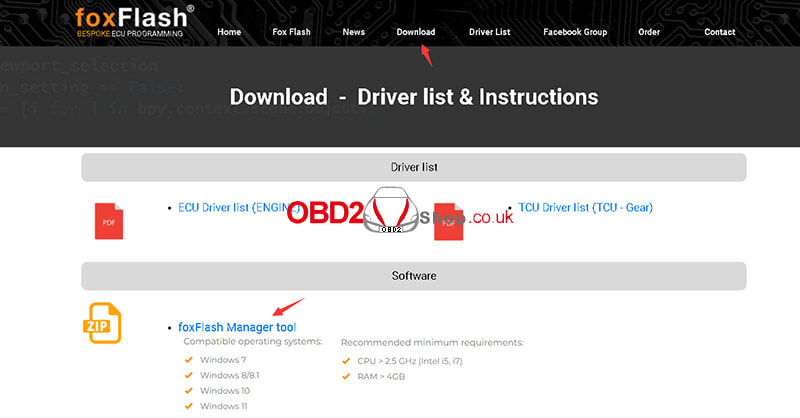  2. Register this app with your email. 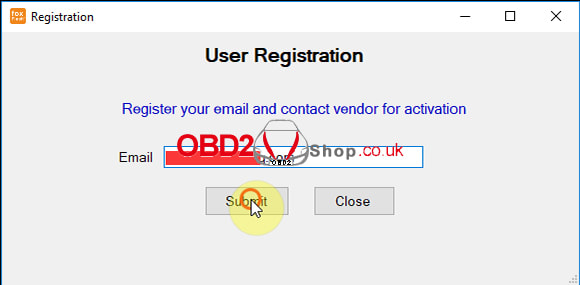 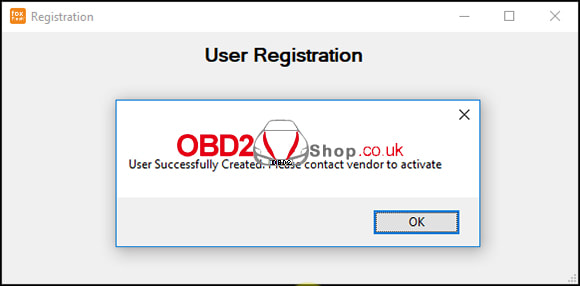 3. Enter your binding code on your device. NOTE: Don't spread your SN on the internet, or others will try to steal your tool's password. 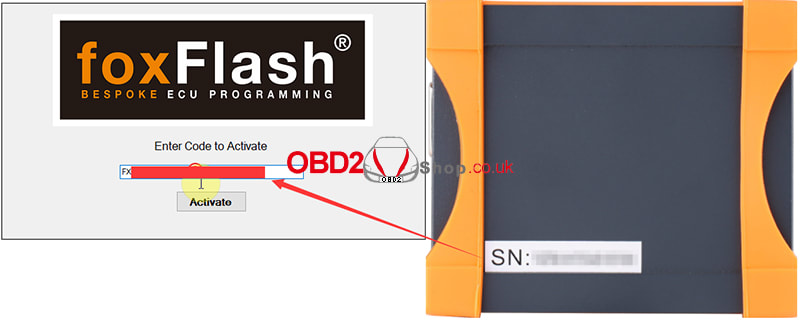 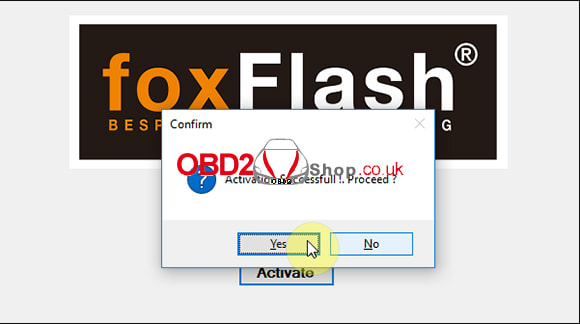 4. Connect your foxflash tool to your laptop via a USB cable, then click the download button located in the foxFlash app inside. 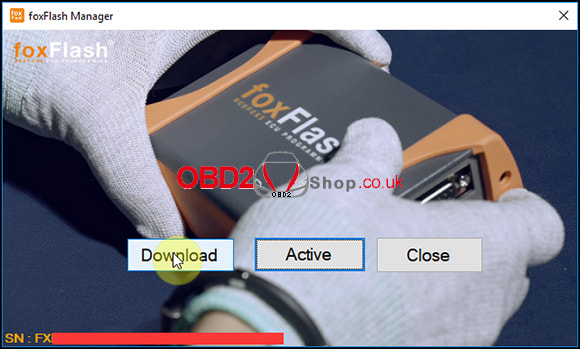  5. After the download is complete, open the folder C:\Program Files(x86)\FoxFlash Manager\foxflash\DFB Technology\DFBTech_DRIVER, then install the drivers. 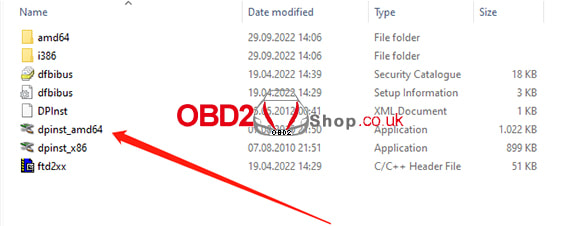 6. Unplug your foxFlash tool, then plug the USB back in. 7. Click the "Activated" button of the foxFlash manager app until activated, then run the foxFlash app on the desktop, then enter the password in the windows, and click login. 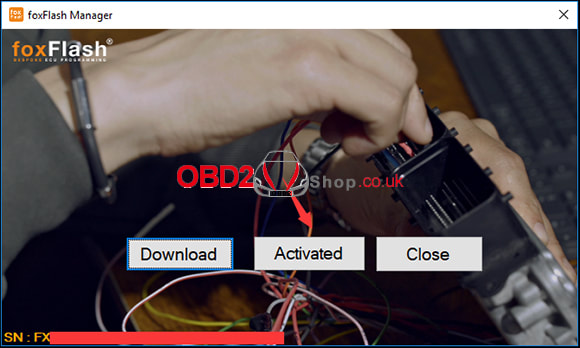 Note: Always run foxflash manager app whenever you need to use our tool. Run it then click the active button, it will continue to allow the tool to access our server.
For more technical services of foxFlash, please follow https://www.obd2shop.co.uk/wholesale/fox-flash-ecu-tcu-clone-chiptuning.html
Obdstar X300 DP Plus is supported to program 2018+ 8A-A9 Camry, Lexus, IZOA, CHR, LS add keys & all keys lost with free pincode by OBD. Need to work with Key SIM, follow the steps below to learn.
Tools Required Main Cable Key Master DP Plus(X300 DP Plus) Key SIM 

Procedure
Full operation video:
1. Read & Save IMMO Data
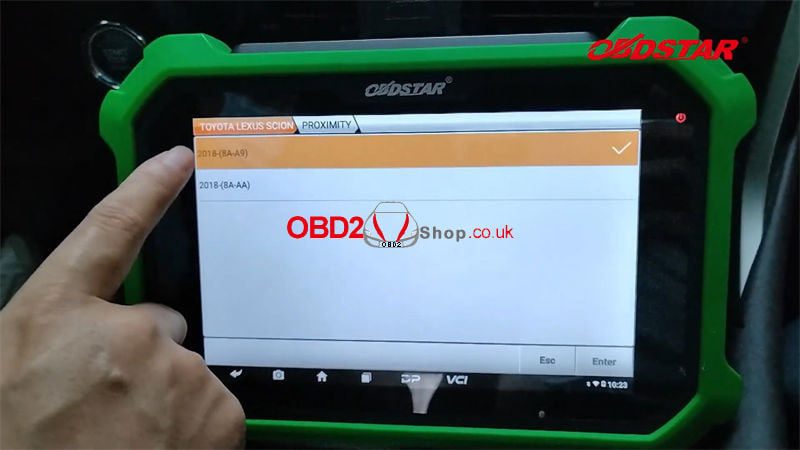
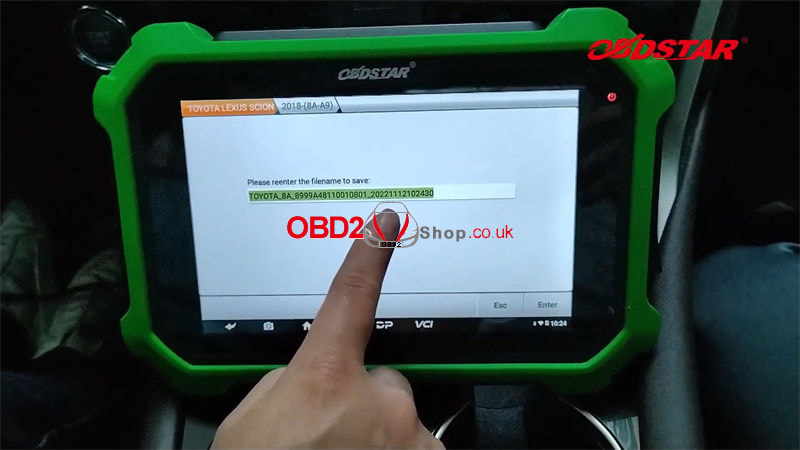
Connect X300 DP Plus with the vehicle by OBD. Car IMMO >> Asia >> Lexus Toyota Scion >> Latest version >> Manual select model >> LEXUS >> ASIA >> RX series >> Proximity >> 2018-(8A-A9) >> Read immo data >> With gateway 8A-A9 >> OBD This function is available by connecting the server, please ensure the Internet connection is normal. Save the data file. 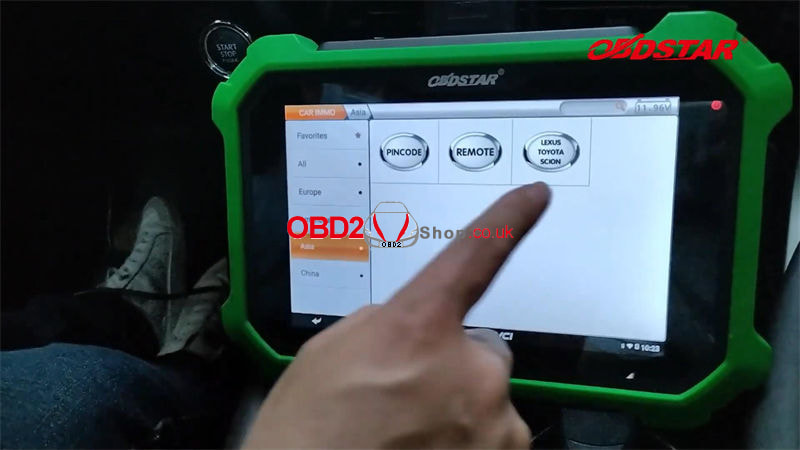
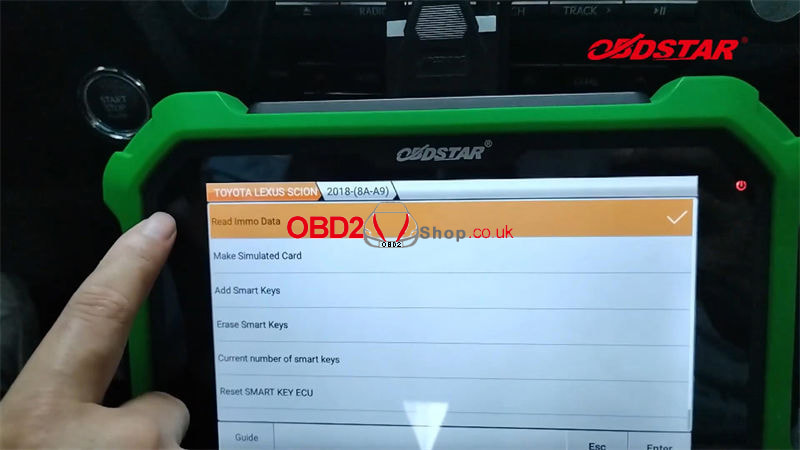
2. Make Simulated Key
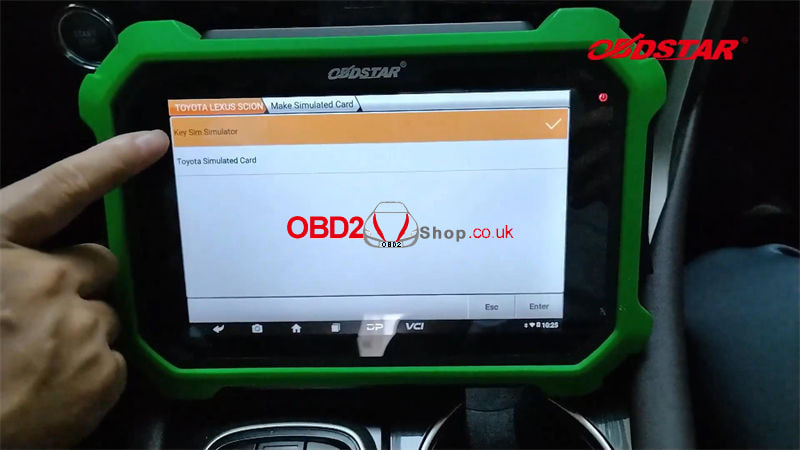
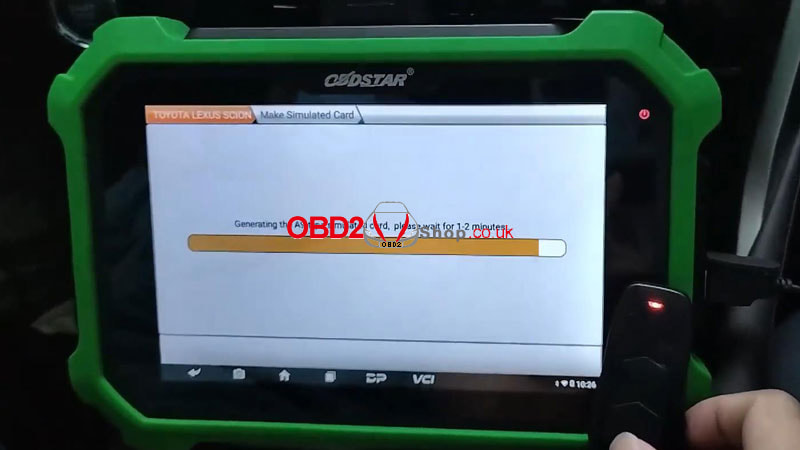
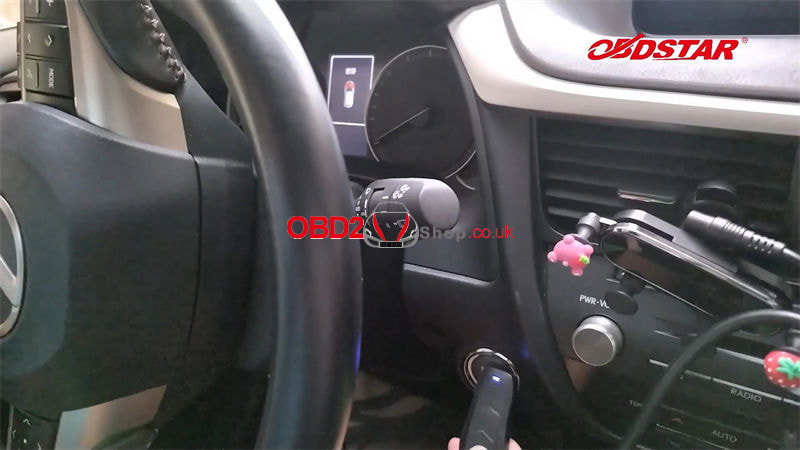
Go back to "Make simulated card". This function is available by connecting the server, please ensure the Internet connection is normal. This function can generate a simulated card with all keys lost. Use this simulated card instead of the original car key to approach the start button and turn on the instrument, perform "add smart key" operation. Make sure the simulated card is fully charged, otherwise the add smart key operation may fail. Select immo data >> Enter >> Key sim simulator Please connect key sim simulator. Generating the A9-type simulated card, please wait for 1-2 minutes... Generate simulated card successfully. Move the simulated card close to the start button and try to light the meter. If you can light up the meter normally, use the simulated card instead of the original car key for the "Add smart key" operation. Now you're allowed to go on adding keys. The operation is also applied to all keys lost situations. 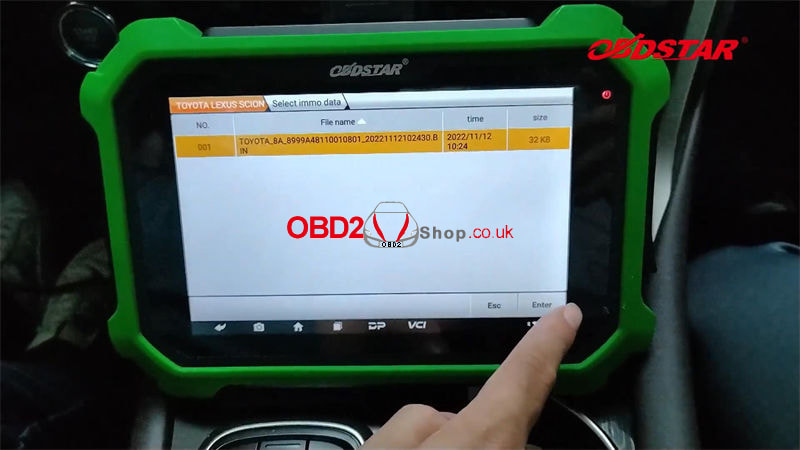
Is your wishlist ready? The OBD2shop.co.uk Black Friday Sale is now live! Special offer for multiple products! Shop now>> https://www.obd2shop.co.uk/producttags/black-friday-sales.html  The following hot-selling products with the best price, you cannot miss them!
Xhorse Xhorse VVDI PROG Latest price: £399 Buy now: £379 VVDI Key Tool Plus Latest price: £1,979 Buy now: £1,666 Dolphin XP005 Key Cutting Machine Latest price: £1,539 Buy now: £1,479 VVDI Mini Key Tool Latest price: £110 Buy now: £106 Xhorse Key Reader Latest price: £323 Buy now: £295 VVDI Super Chip (10pcs/lot) Latest price: £28 Buy now: £26 and more... Launch X431 Launch X431 V Latest price: £689 Buy Now: £625 Launch X431 V+ Latest price: £889 Buy Now: £772 Launch X431 V+ Plus HD3 Module Latest price: £1,589 Buy Now: £1,444 Launch CRP909E Latest price: £369 Buy Now: £344 Launch X-431 Pad VII Latest price: £3,019 Buy Now: £2,403 Launch X431 PRO5 Latest price: £1,359 Buy Now: £1,203 and more... Autel Autel MaxiIM IM608 Pro with XP400 Pro Latest price: £1,999 Buy Now: £1,899 Autel MaxiIM IM508 Latest price: £789 Buy Now: £755 AUTEL MaxiDAS DS808 KIT Latest price: £685 Buy Now: £629 Autel MaxiTPMS ITS600E Latest price: £425 Buy Now: £406 AUTEL MaxiSYS MS906 Latest price: £775 Buy Now: £721 and more... Lonsdor Lonsdor K518ISE Key Programmer Latest price: £1,100 Buy Now: £999 Lonsdor JLR Smart Key Latest price: £56 Buy Now: £52 CGDI CGDI Prog MB Latest price: £579 Buy Now: £542 CGDI Prog BMW Latest price: £579 Buy Now: £542 CGDI Prog MB with ELV Repair Adapter Latest price: £588 Buy Now: £573 CGDI MB with Full Adapters for ELV Repair Latest price: £607 Buy Now: £555 Yanhua ACDP Yanhua Mini ACDP with 12 Modules Latest price: £2,129 Buy Now: £2,036 Yanhua Mini ACDP Plus JLR KVM Module Latest price: £490 Buy Now: £462 MB SD C4 MB SD C4 Plus Without Software Latest price: £431 Buy Now: £406 MB SD C4 Plus + 500G HDD software Latest price: £462 Buy Now: £444 Super MB PRO M6 Super MB PRO M6 with Latest SSD Plus Lenovo X220 4GB Laptop Latest price: £629 Buy Now: £619 Super MB PRO M6 Full Configuration Latest price: £481 Buy Now: £444 Super MB Pro M6 Without Software Latest price: £431 Buy Now: £412 ECU Programmers PCMtuner ECU Programmer Latest price: £413 Buy Now: £351 Fetrotech Tool Black Color Latest price: £312 Buy Now: £258 PCMtuner Plus KESS V2 Plus KTAG (Bundle kit) Latest price: £542 Buy Now: £490 Full Version KT200 ECU Programmer Latest price: £703 Buy Now: £657 and more...
Yanhua Mini ACDP + Module 27 supports reading, writing, and cloning BMW E/F chassis ISN without having to open the DME shell. Apply to MSV80, MSD80, MSD81, MSD85, MSD87 MSV90 Continental/ SIEMENS DME types.
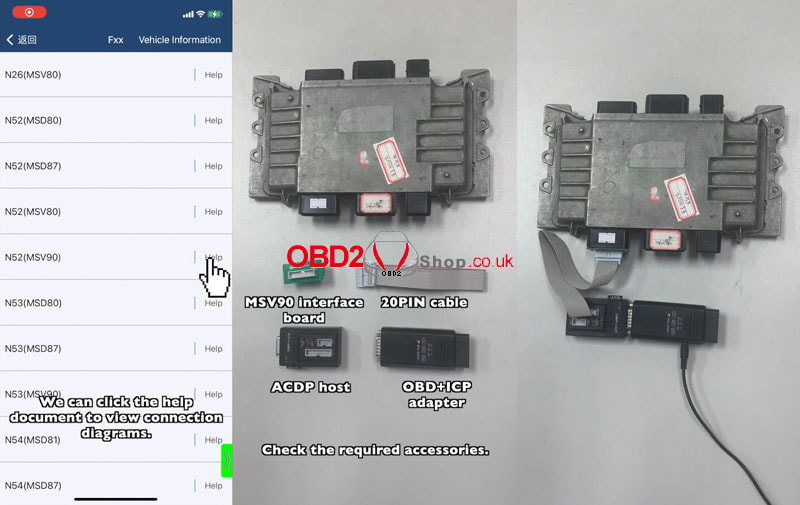
This is reading BMW MSV90 DME ISN on the bench as an example, follow the post carefully to learn how to do it. To check the connection diagram, please click "Help". Check the full video to learn:
Accessories
BMW MSV90 DME Module MSV90 interface board 20PIN cable ACDP host OBD+ICP adapter Install the MSV90 interface board. Short the CAN resistor on the OBP+ICP adapter to the CAN-R-Join side. Connect the MSV90 DME & ACDP host. 
Operation
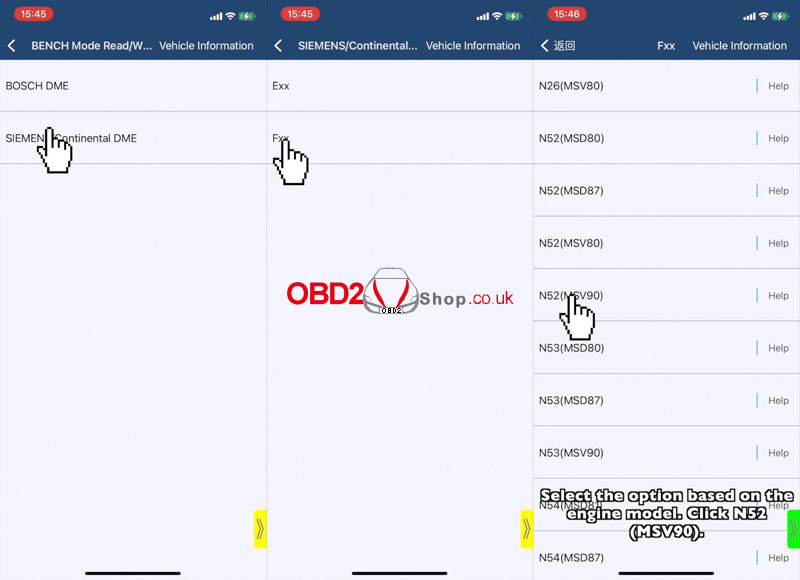
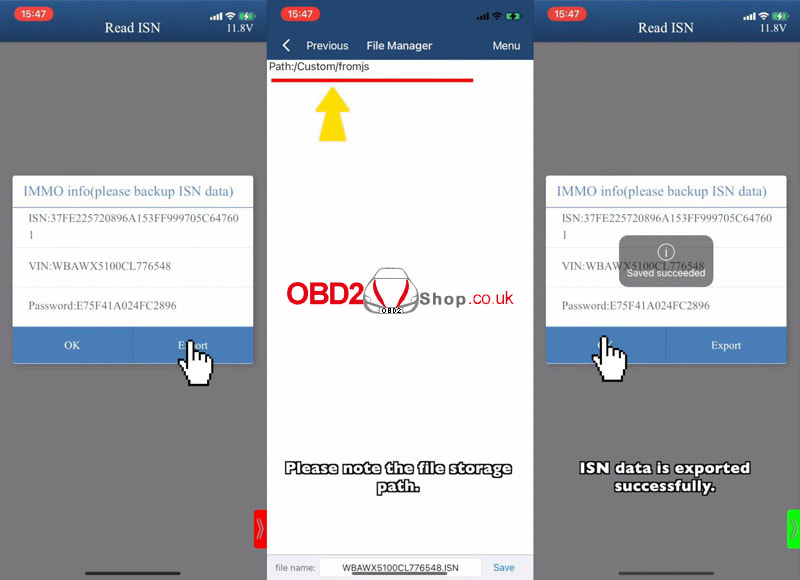
Mini ACDP >> BMW >> DME ISN >> BENCH Mode read/write DME ISN >> SIEMENS/Continental DME >> Fxx >> N52(MSV90) >> Read ISN >> Continue Confirm the system info and save the screenshot. Please take a screenshot and export the ISN data. Export >> Save >> OK ISN data is exported successfully. Reading ISN data finished. 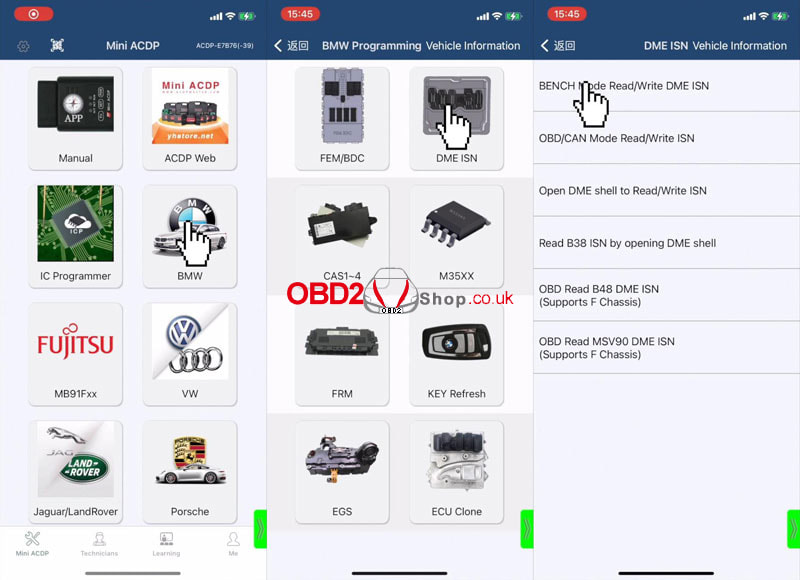

This is a tutorial on using Yanhua Mini ACDP + Module 9 to program Land Rover 2010-2019 KVM add key & all keys lost. Users can click "Help" in app to check the connection info. Normally, Land Rover's KVM module is at the left side or right side of the vehicle trunk. Jaguar's KVM is at the right side of the rear seat or in the front of passenger seat. Preparation Blank key BAV-KEY adapter KVM interface board ACDP host Copper pillar OBP+ICP adapter 20PIN cable KVM module 1. Install the copper pillar, and align D1-D4 test points. As long as the 4 test points are aligned, then all test points are aligned. 2. Lock the board with PCB lock & copper pillar. Connect the OBP+ICP adapter & KVM, interface board. 3. Connect the adapter & ACDP host, and power up ACDP. 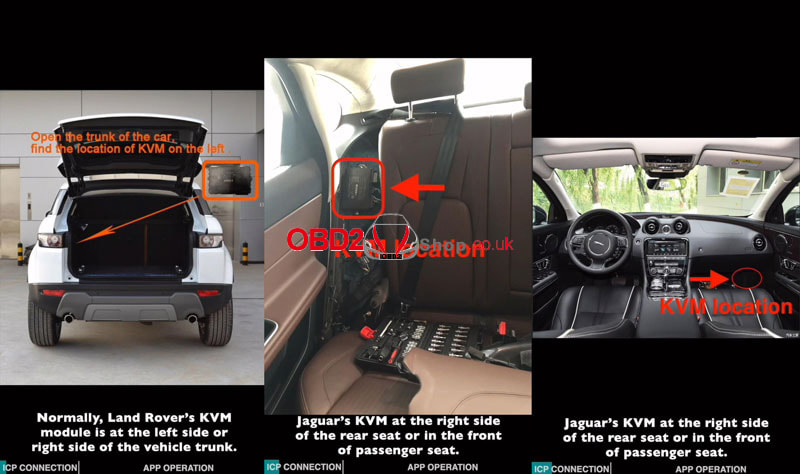 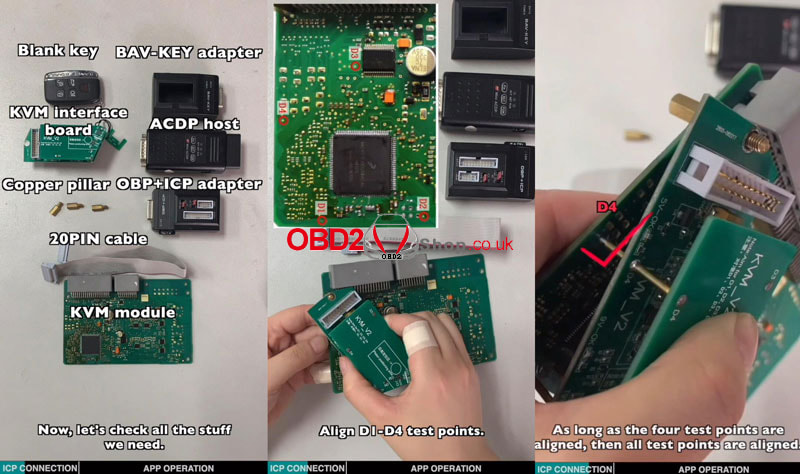 Operation Mini ACDP >> Jaguar/ Land Rover >> ICP Add key/All key lost(2015-) >> KVM ICP(MC9S12XEQ384) >> Add key auto mode Note: 1. Please prepare the OBP+ICP adapter, KVM interface board, KVM module, BAV adapter, and blank key. 2. Save the original EEPROM, DFLASH data& the ones after programming the keys according to the software prompt. 3. ACDP device is forbidden to be powered off during the process of adding a key, otherwise it will cause the key to fail to be added. Precautions: 1. Ensure the well-connected ACDP device, OBP+ICP adapter, KVM interface board & KVM module. 2. Follow the software prompts to save the chip data read from the KVM module. Pin detection passed. If the detection fails, please check and clean the test points. Press "Continue". It is detected that the KVM module chip has been encrypted. Press "Continue". Please save the original PFLASH data of the KVM module. Please save the original EEPROM data of the KVM module. Please save the original DFLASH data of the KVM module. 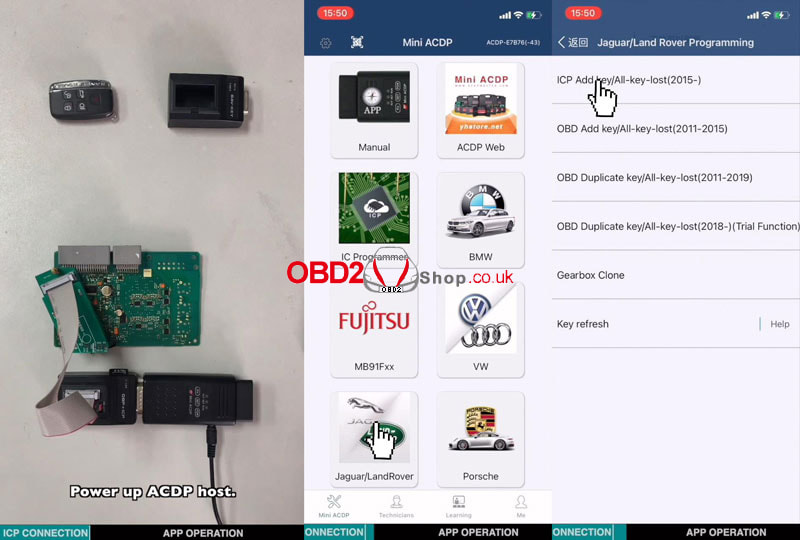 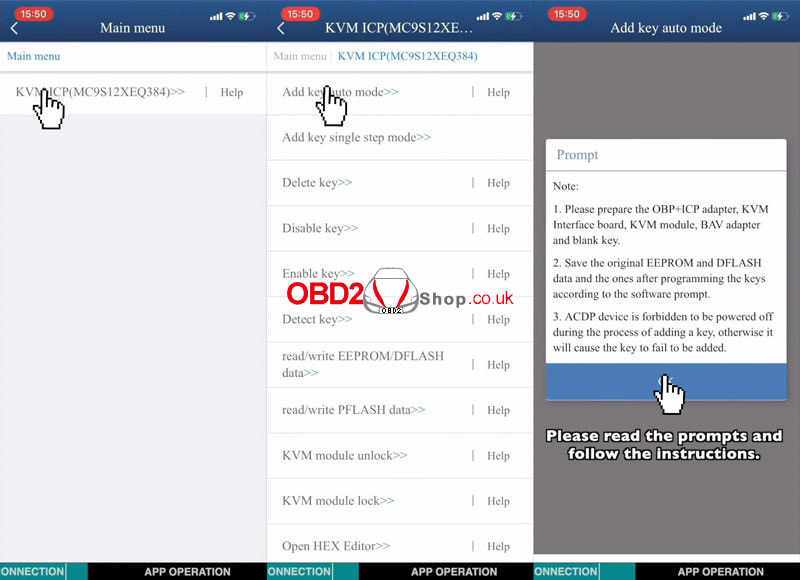 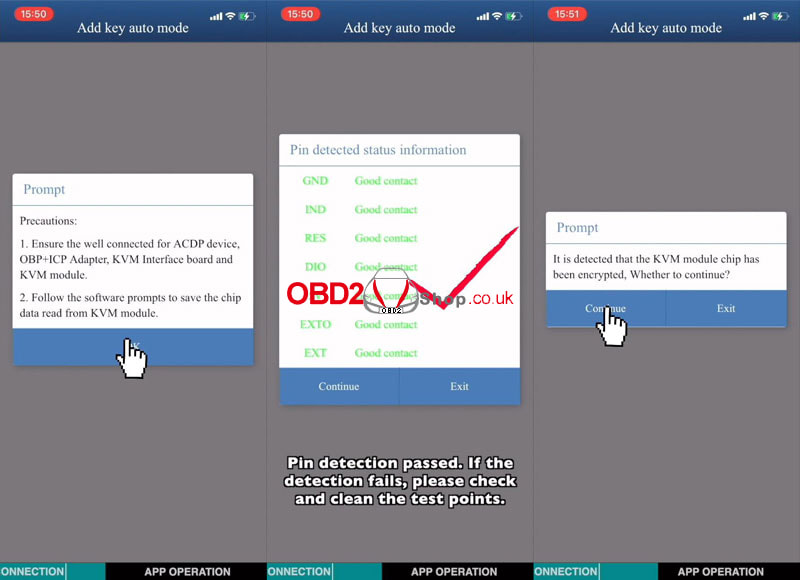 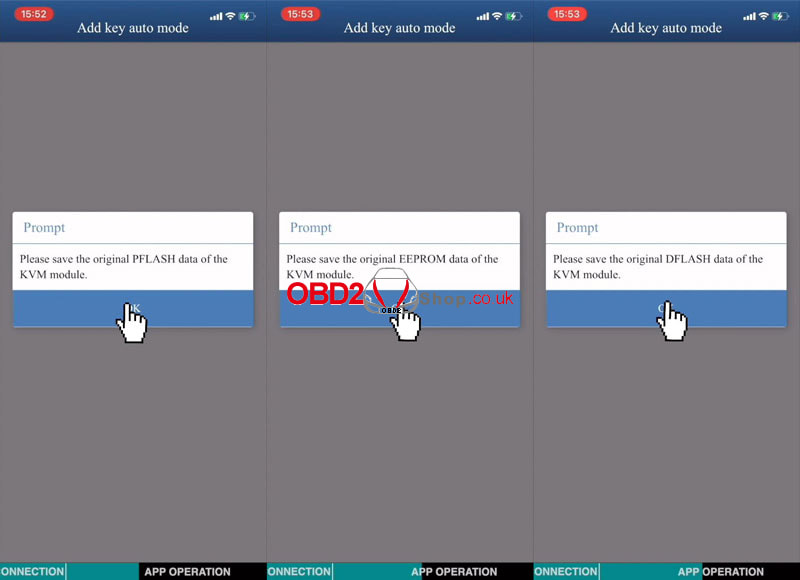 Check the VIN number and other vehicle info, and press "Continue". Note: 1. To maintain the ACDP device power-on state, first disconnect the OBP+ICP adapter from the ACDP device(keep the OBP+ICP adapter, KVM interface board and KVM module connected). 2. Then connect the ACDP device to the BAV-KEY adapter and place the programming key correctly on the BAV-KEY adapter. Current key ID: 822D4E37 Choose the unoccupied key ID displayed as 000: Key3 Please save the EEPROM data of the KVM module after adding the key. Please save the DFLASH data of the KVM module after adding the key. Note: 1. Keep the ACDP device powered on. First, disconnect the BAV-KEY adapter from the ACDP device. 2. Then connect the ACDP device, OBP+ICP adapter, KVM interface board, and KVM module to ensure normal communication. Continue >> Continue Check the IMMO info. As you can see, the new key ID is in the key list. Writing chip... Adding the key completed. Please install the KVM module to the car and confirm that the new key can be used normally! OK >> OK This is how to use Mini ACDP JLR KVM Module for key programming. 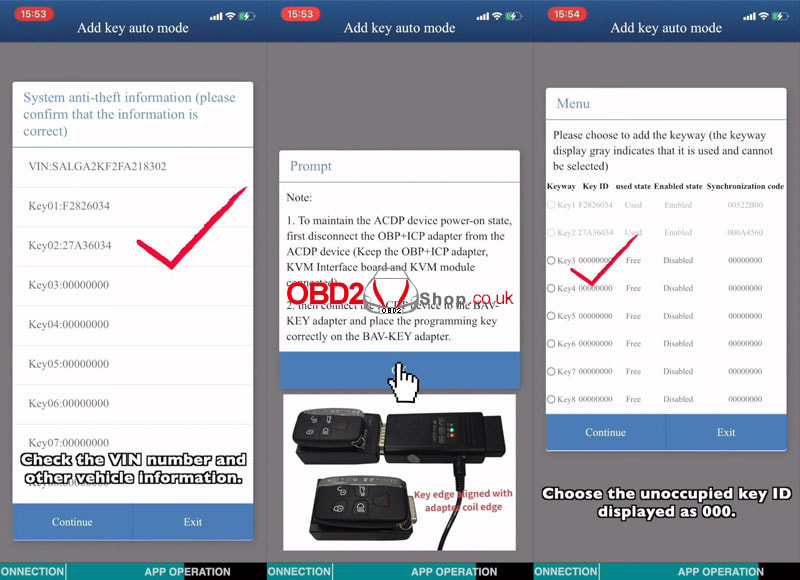 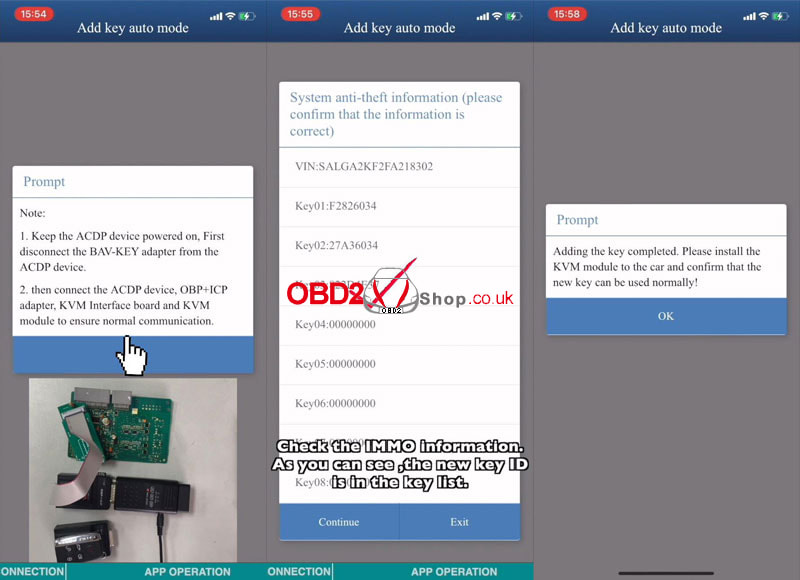 This is a guide to using Launch X-431 Pad VII to perform new ECM(Engine Control Module) VIN registration for a 2017 Nissan X-Trail T32. It's very helpful for ECM replacement in vehicle repair. Procedure Nissan Latest version >> Full system diagnosis >> The vehicle with 16PIN >> System selection >> Engine >> ECM(Engine Control Module) X-431 Pad7 is scanning ECU... please wait 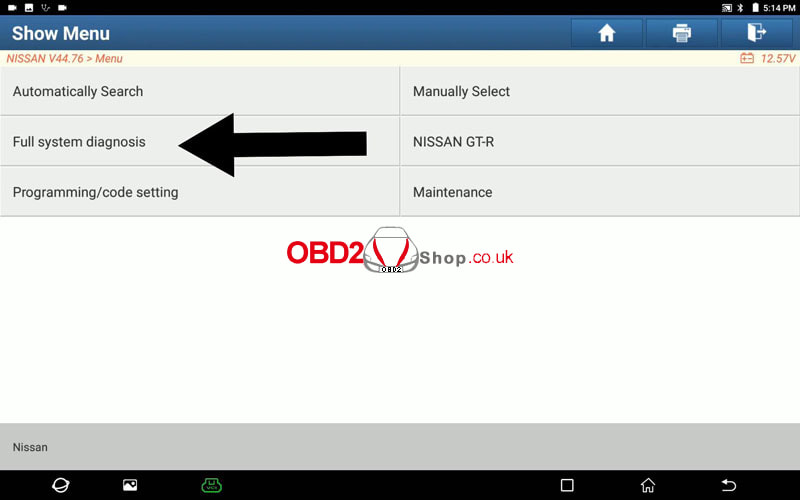 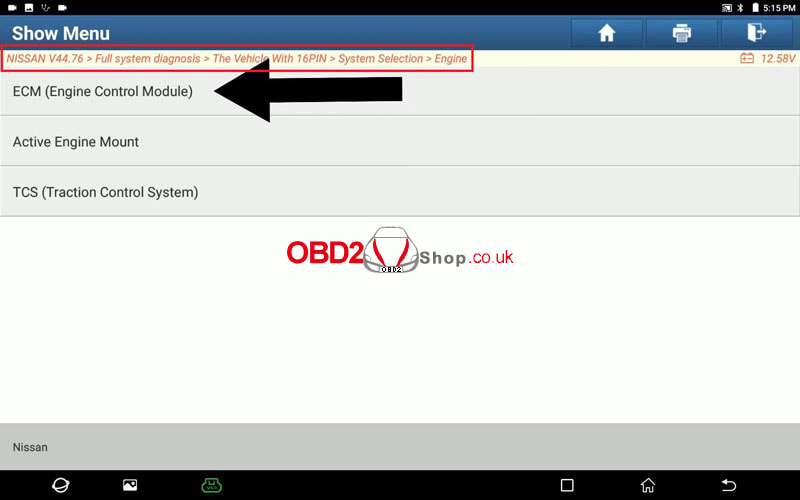 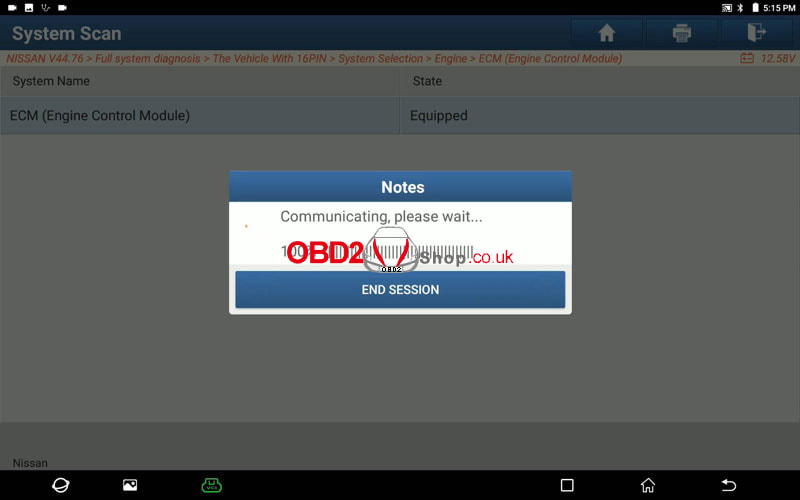 Special function >> VIN registration Confirm the ignition switch is on and the engine stopped. Hold these conditions during this procedure. Touch start. As we can see, the VIN/Chassis value is blank now. VIN Read >> Input Input the VIN of the vehicle. Refer to S/M for the location of the identification plate. Write >> Input Input VIN once again. Press "Start". Command succeeded. Turn the ignition switch off for 10s, then the ignition switch on to confirm no DTC. 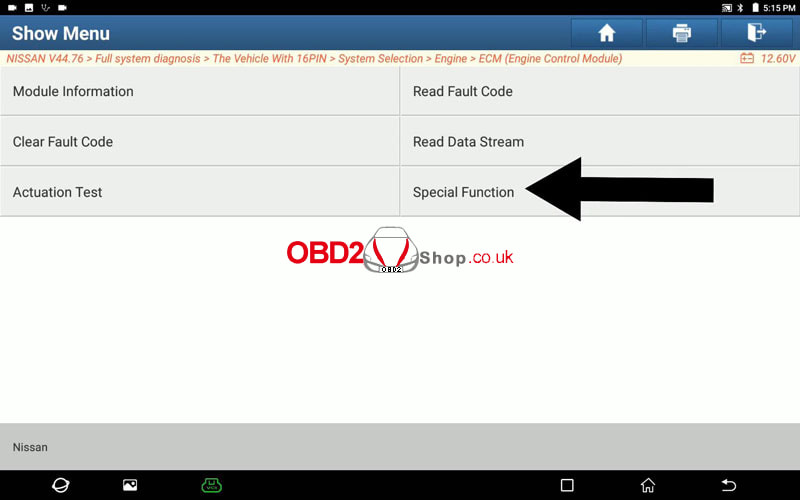 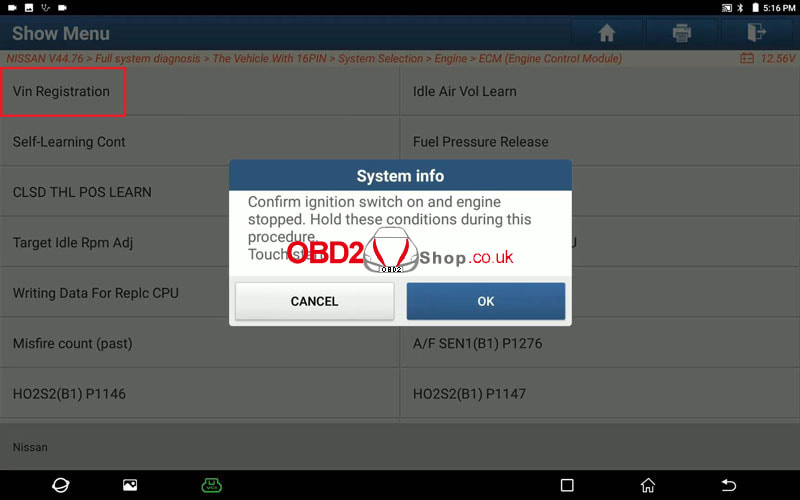 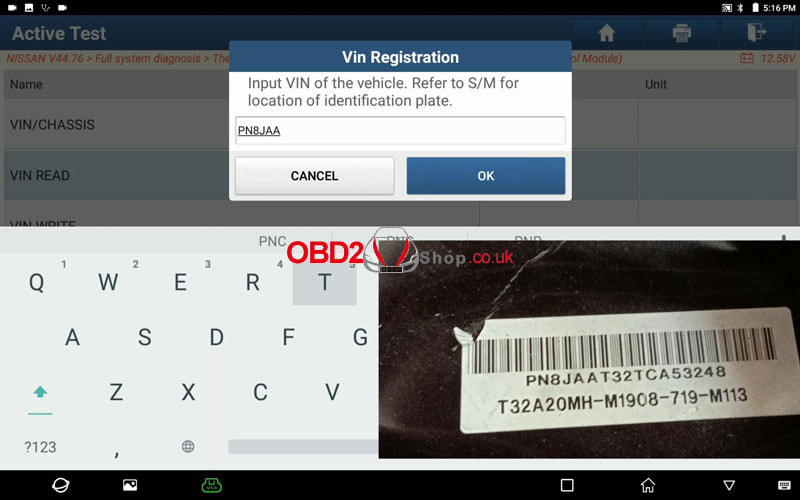  Exit to enter into "VIN registration" again. The VIN/Chassis value was displayed, which means the VIN number has already been registered successfully. Done. 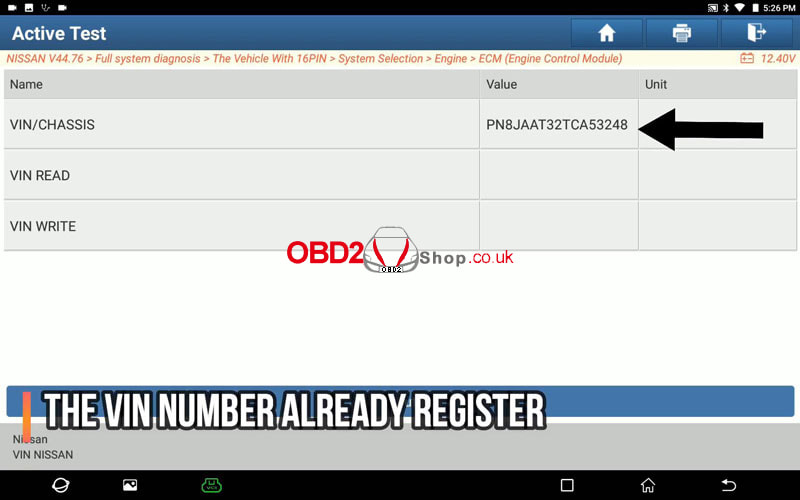
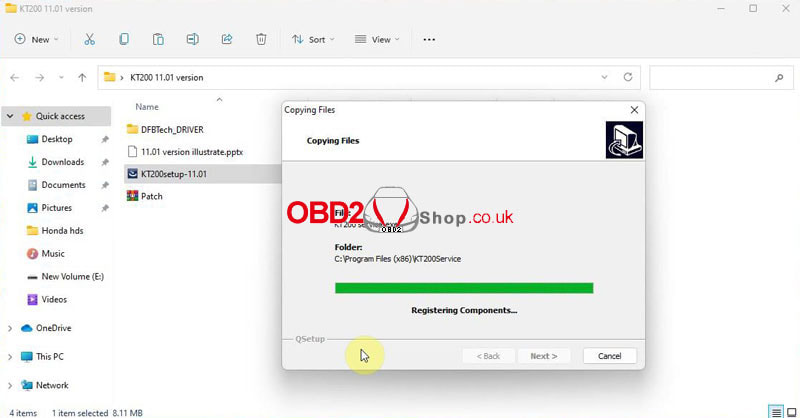
KT200 ECU Programmer's latest software version V11.01 has been released, here you can free download & a guide to install it.
Where to free download KT200 v11.01? Mega: https://mega.nz/file/NPM0GDZb#PVVHI2mXLekSAiRNd1UvHEom4wLtKcc64isJB7SV6m8 Weiyun: https://share.weiyun.com/T1ZVPy6u (password: zug4hj) Size: 38.7MB Compatible system: Win7, Win8/8.1 Win10, Win11. How to install KT200 v11.01? Operating video:
Step1. Click the "KT200setup-11.01" package to install the software.
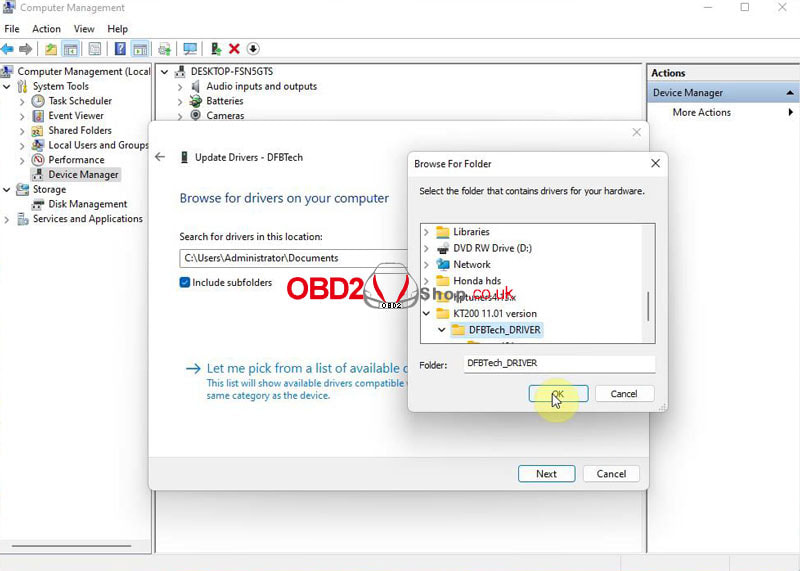
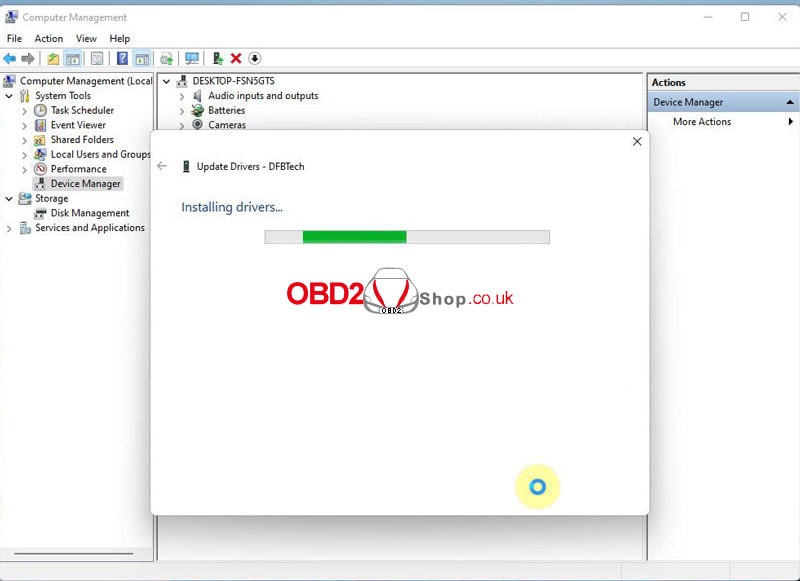
Step2. Install & update KT200 driver:
Computer management >> Device manager >> DESKTOP-FSN5GTS >> Other devices >> DFBTech >> Update driver >> Browse my computer for drivers >> Selected "DFBTech_DRIVER" folder >> Next 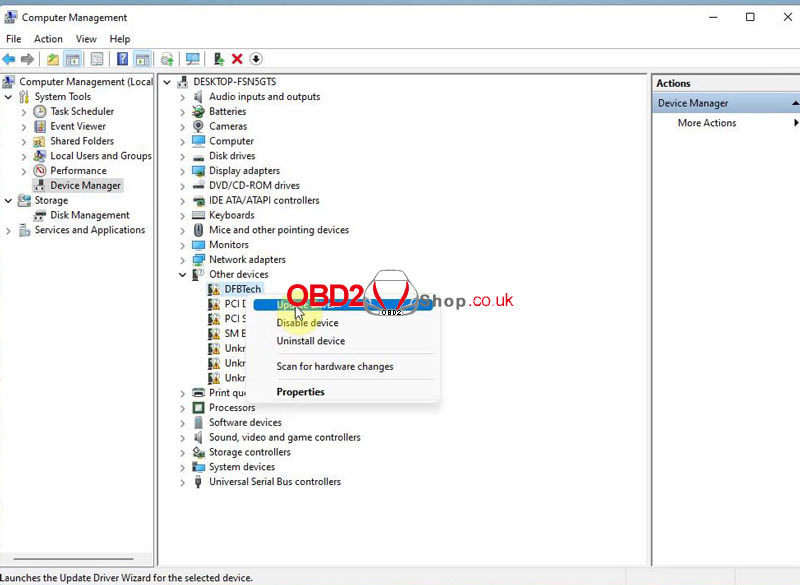
Step3. Download software & diagram
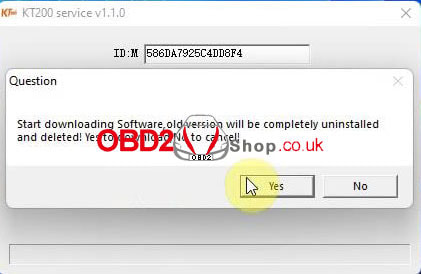
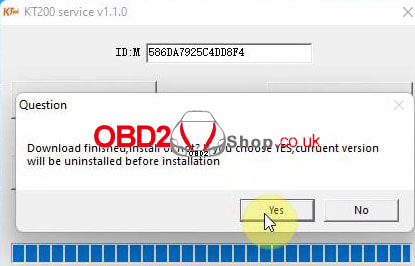
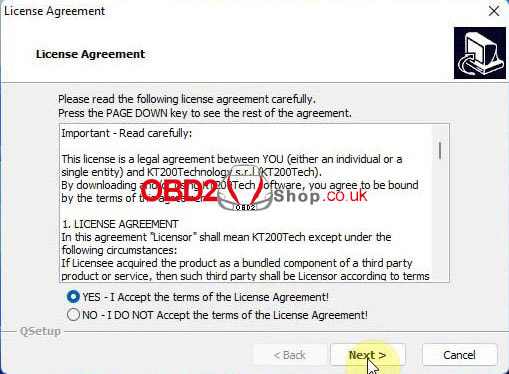
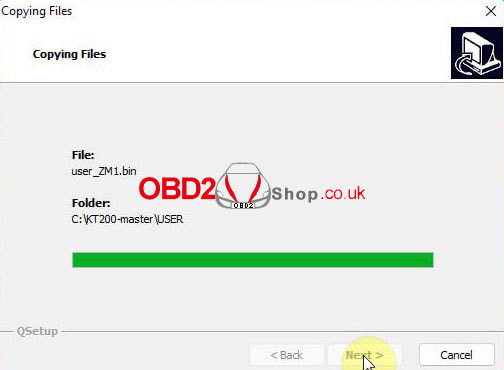
Start "KT200 Service" >> Download Software Start downloading software, the old version will be completely uninstalled and deleted! Click "Yes". Download finished, install or not? If you choose YES, the current version will be uninstalled before installation. Click "Yes". Yes, I accept the terms of the License Agreement! >> Next >> Next >> Finish Reset the device successfully! 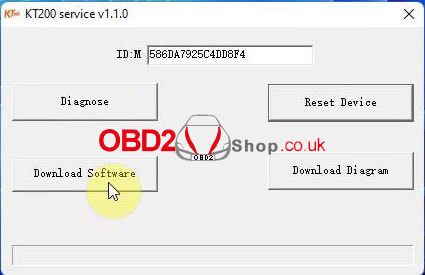
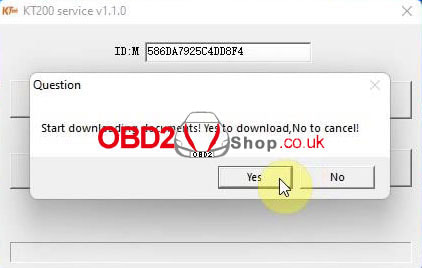
Restart "KT200 Service" >> Download Diagram
Start downloading documents! Yes >> Finish 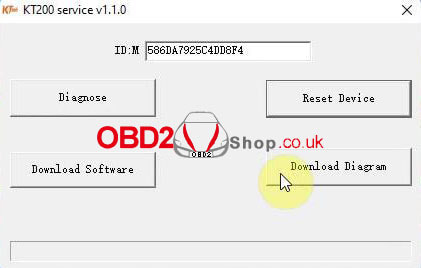
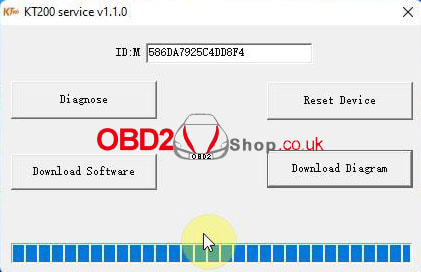
Completed.
Now you can start to use Full Version KT200 software. 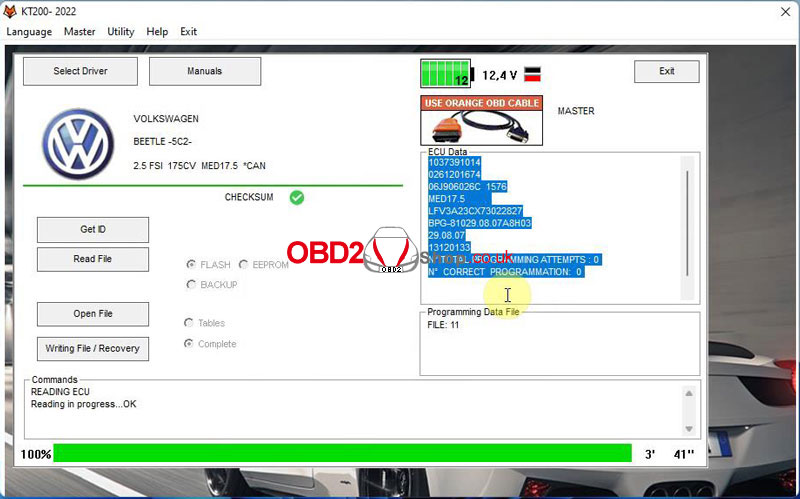
Customer Problem: When I use Yanhua Digimaster 3 to adjust the mileage of my 2006 sport range rover, a (1E10) Program device error is displayed, please tell me what to do. 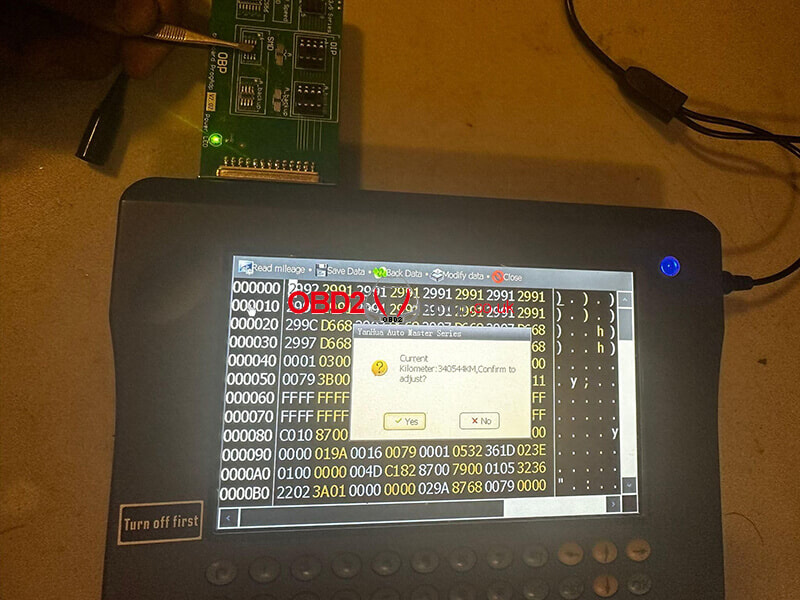 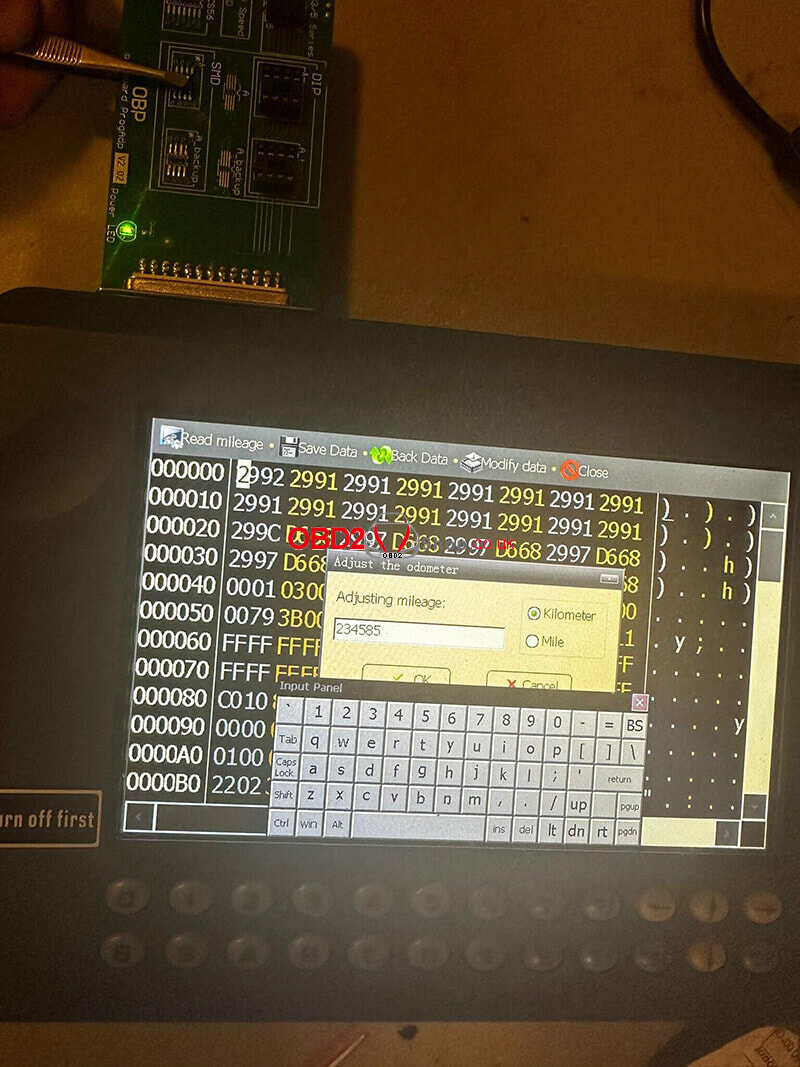 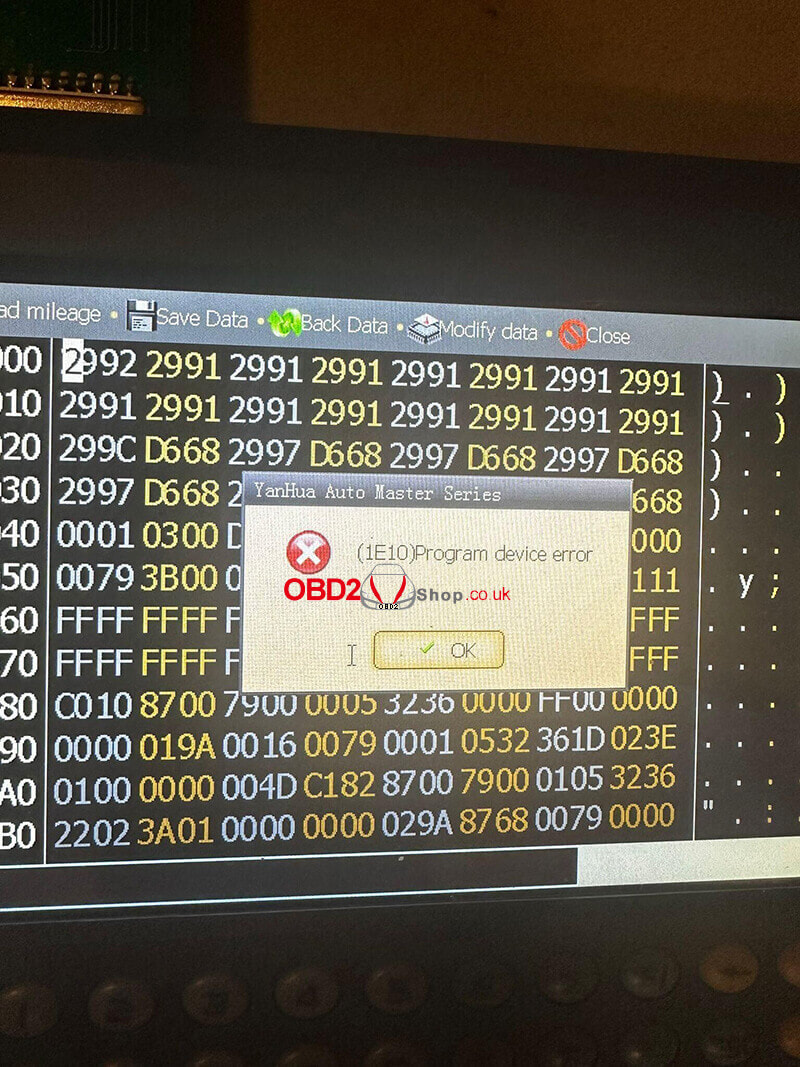 Solution: Digimaster 3 can read mileage normally, but can't adjust because the chip is not soldered well, you can solder it again.
For more technical services of Yanhua Digimaster 3 mileage correction tool, please follow http://blog.obd2shop.co.uk/ |
