|
This article will guide you on how to authorize the Yanhua Mini ACDP module automatically.
Here are the steps: The new module has an authorization code sticker on the outside. Please peel off the green protective film. If the authorization code is covered with residual gel, remove it with an eraser. Make sure the QR code is clearly visible. 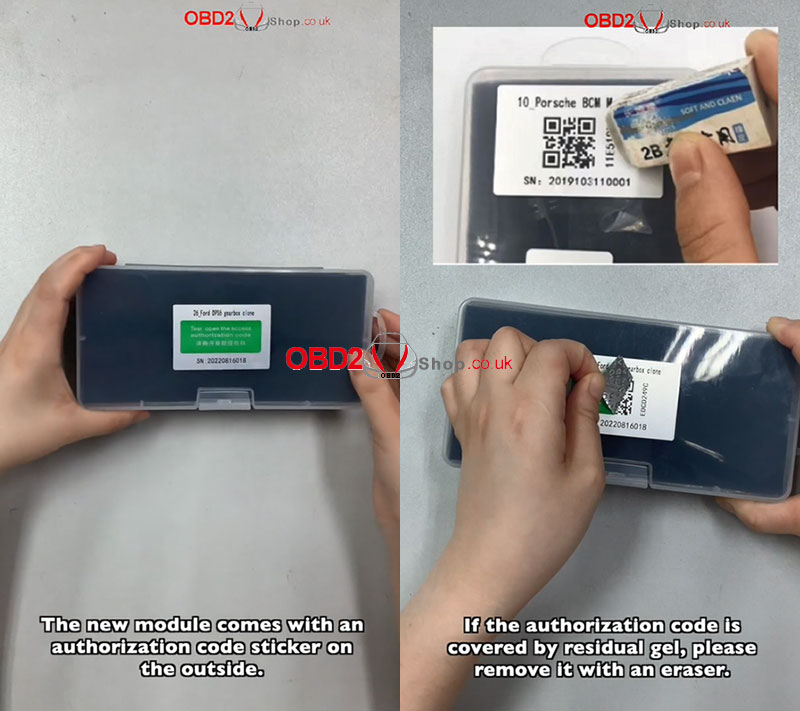
Open the ACDP APP and check that the ACDP device is connected correctly.
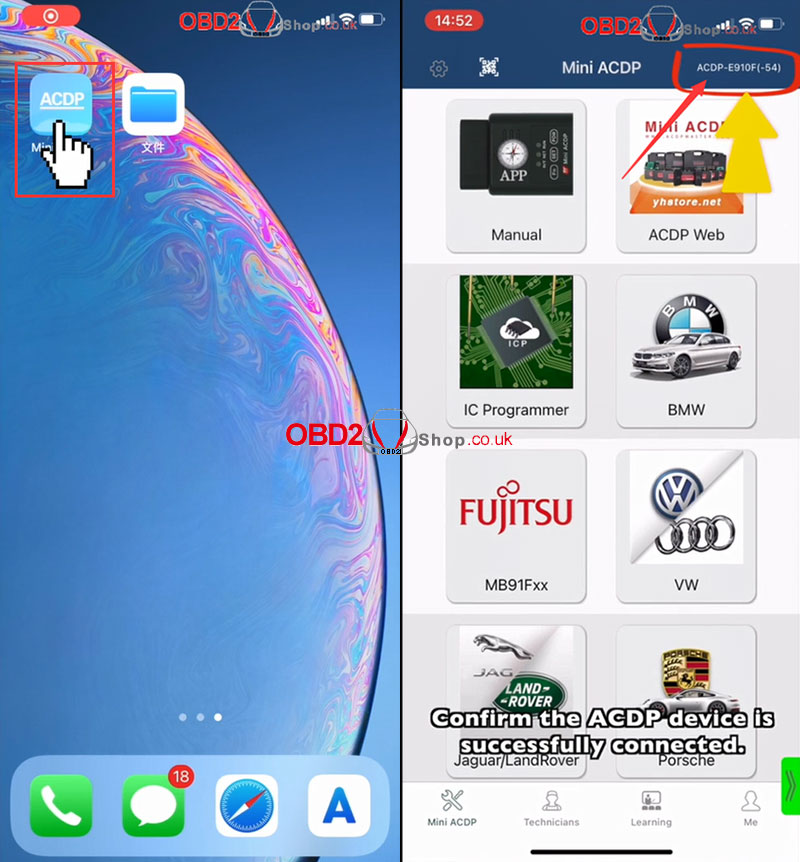
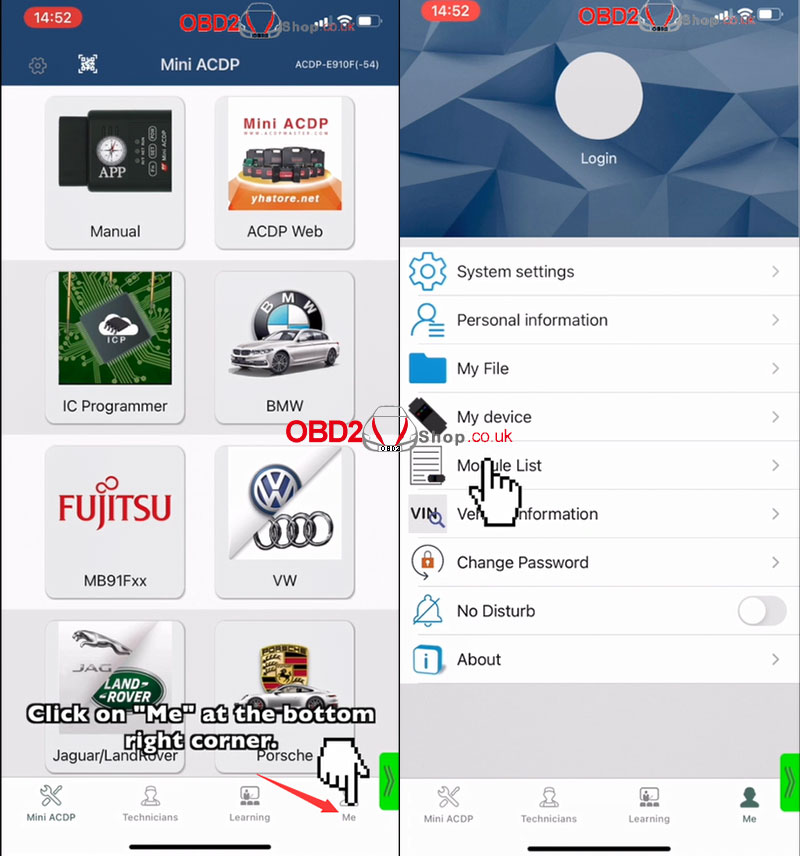
Click "Me" in the lower right corner and choose "Module List".
Click "Add" in the lower left corner, then click "Scan QR Code" to continue.
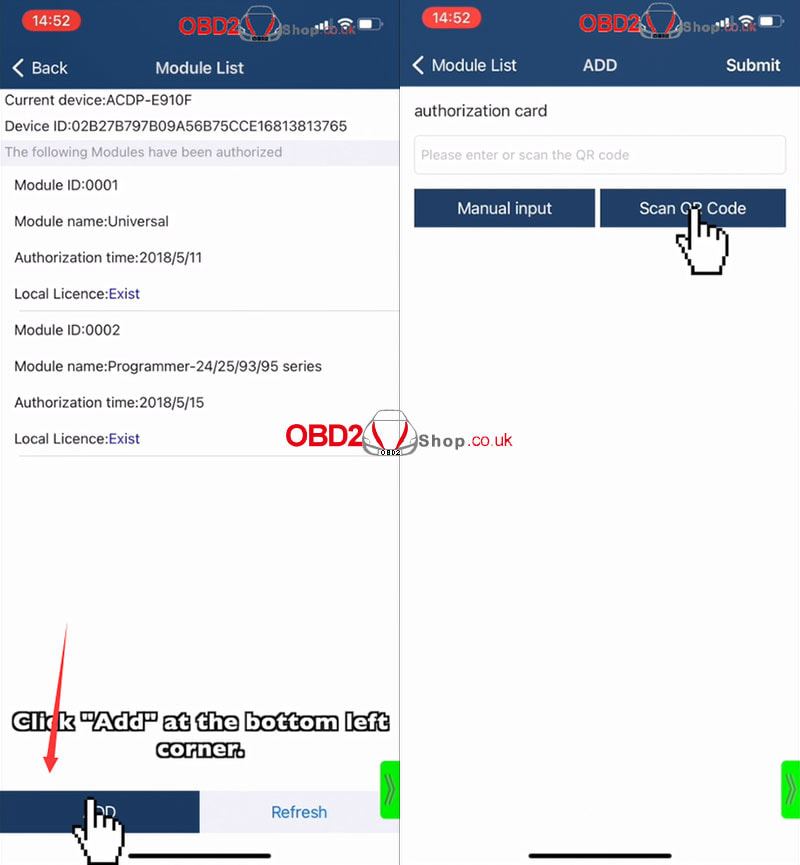
The authorization card number will be filled in automatically.
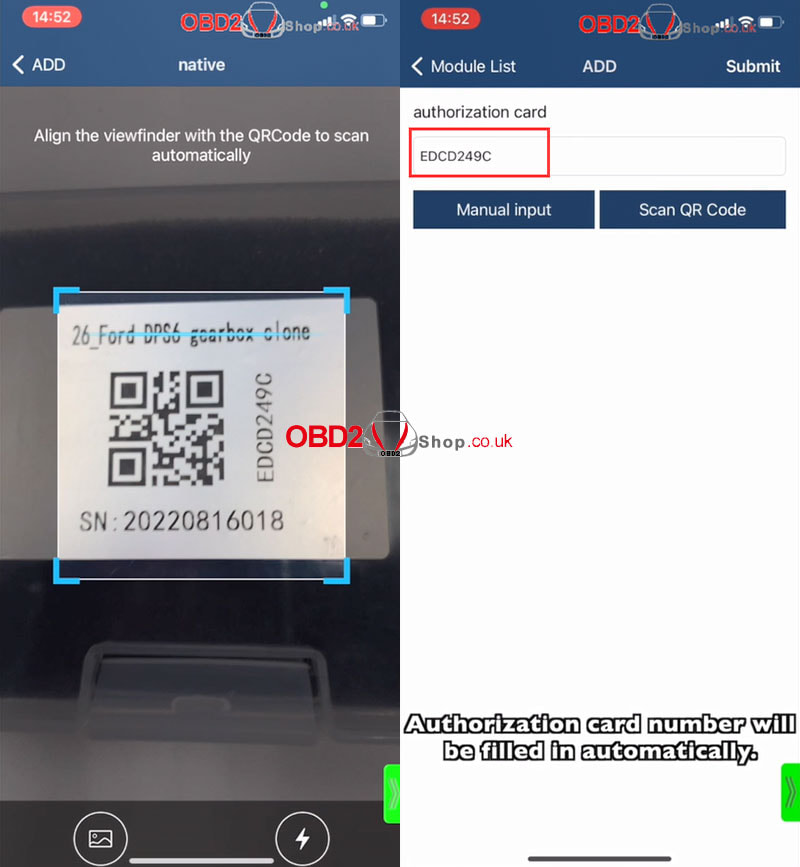
You can also manually enter the authorization card number.
Please note that letters must be capitalized. Check the authorization card number, make sure it is correct and click "Submit". The authorization is successful! 
Video guide:
0 Comments
Here www.obd2shop.co.uk provide ECUHELP ECU Bench Tool 3.0.0 free download link, 100% work, rest assured download. ECU Bench Tool is a universal bench service tool for reading & writing ECU. Where to free download ECU Bench Tool: https://www.mediafire.com/file/vfg2jx5whgtfg9f/Ecuhelp_Setup_3.0.0.zip/file File name: Ecuhelp setup.3.0.0 Size: 72.47MB Q: How to get ECU info in software? A: Input ECU model for search. eg. BOSCH 0281011982 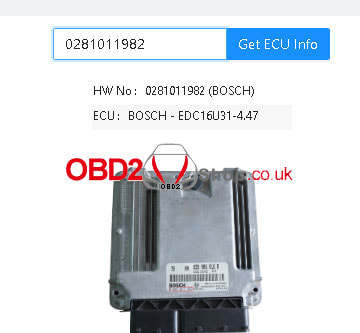 Q: How to get ECU wiring diagram? A: Input ECU model for search. Eg. MED17.5 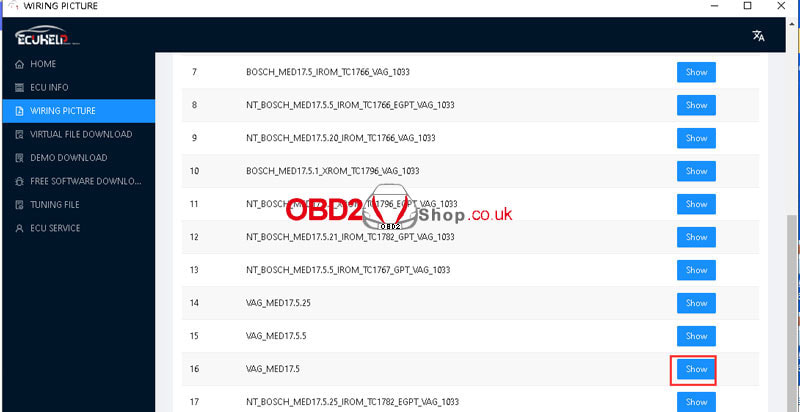 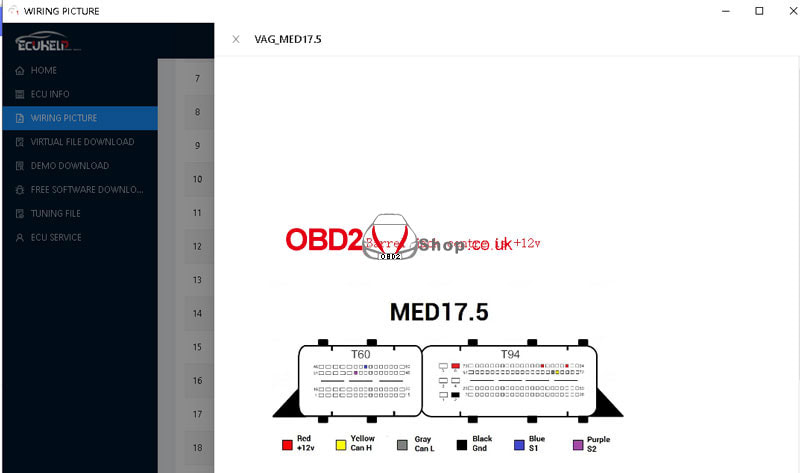 Q: What's the free download software? A: ECU Bench Tool allows to free download pcmflash1.20, immo off, kt200, etc. 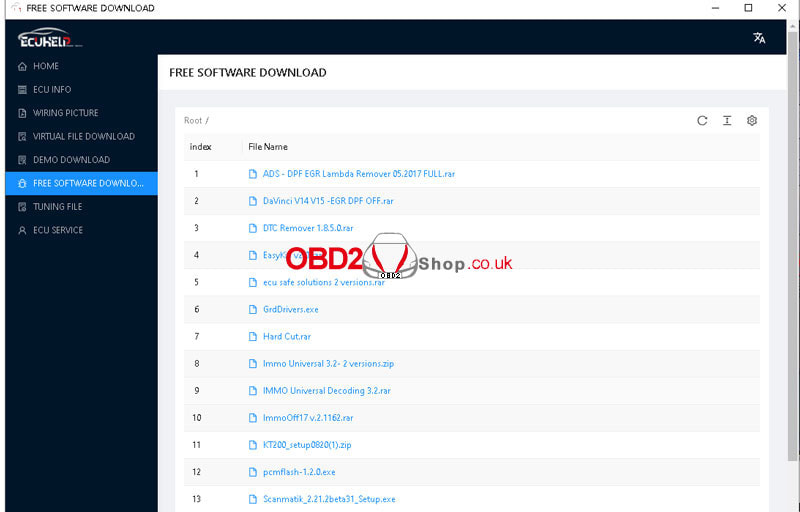 Q: Can ECU Bench Tool download VR file? A: Yes, it can support. Q: How to do powertrain adjustment? A: Users can upload ECU flash files directly after paying. Need to fill in the correct model, engine, year, gearbox, ECU type, etc.  Q: What's ECU service? How to use? A: ECU service includes DTC delete, dpf/egr remove, immo off, etc. Users can upload ecu flash files directly after paying. Need to fill in the correct vehicle type, manufacturer, model, engine, year, gearbox, ECU type, etc. 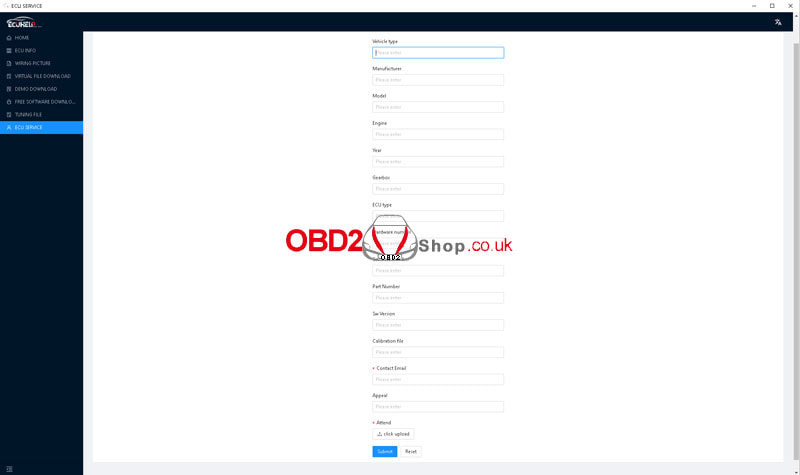 Problem: VXDIAG VCX NANO for Toyota is unable to connect while programming 1AD-FTV, ADT vehicle. It gives attention: "A communication error with Engine ECU occurred. Please confirm that Engine ECU is properly installed." The Techstream "Cannot establish communication with the ECU." "Error: Unable to connect to VIM." Any advice? 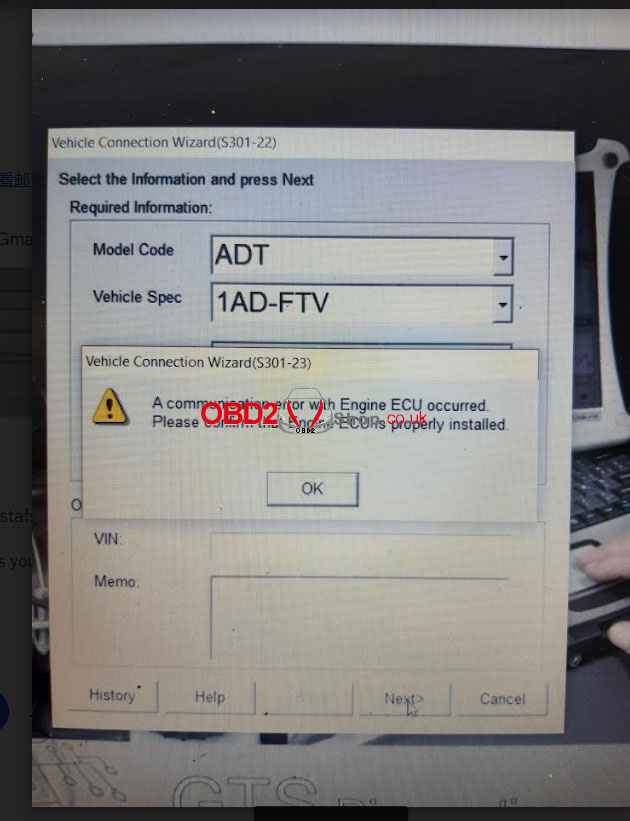 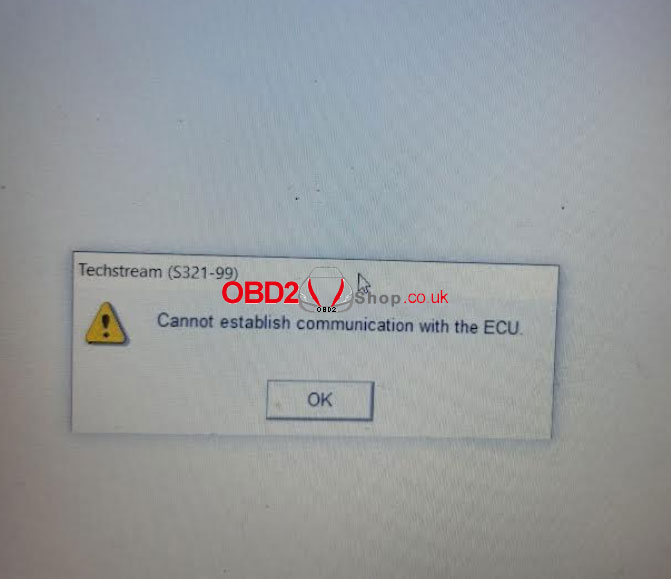 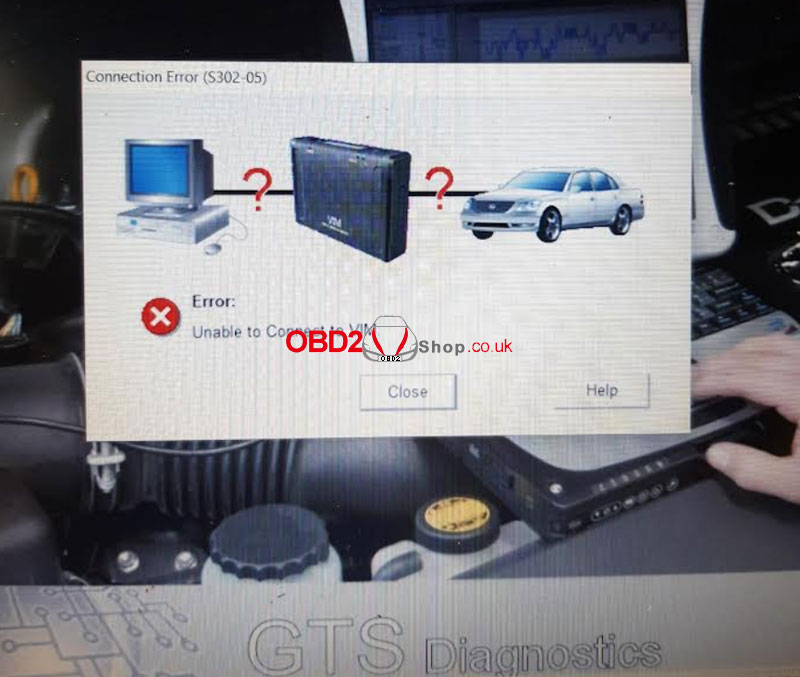 Solution
The reason is because of the patch missing. Download the Techstream Patch, and the problem can be solved. Free download link: https://disk.yandex.com/d/gYz7ExYLfcH_eA Thanks to www.obd2shop.co.uk, the problem was fixed! This is a tutorial on how to clone Ford DPS6 & MPS6 gearbox module with Yanhua Mini ACDP step by step. The MPS6 gearbox clone procedure also applies to Volvo, Land Rover, Chrysler, Dodge, etc. How to Clone Ford DPS6 Gearbox? Tip: Click "Help" to view the connection diagram before operation. Accessories Required: Ford DPS6 gearbox module 20PIN cable OBP+ICP adapter ACDP host Module 26 Ford DPS6 interface board Connection 1. Install the interface board. 2. Short the jumper cap on the OBP+ICP adapter to the "CAN-R" JOIN side. 3. Connect to ACDP together 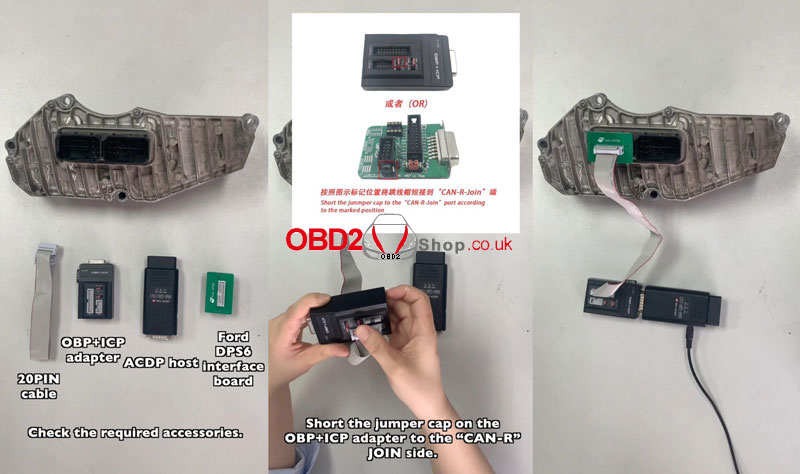 Operation Step1. Backup Original Data Mini ACDP >> Ford >> Gearbox clone >> DPS6 >> Connect >> OK Please ensure a stable network connection. DO NOT pull out the device during working. Click "Continue". Check system info, Continue >> OK >> OK >> OK Read/write data >> Full backup data >> OK >> Continue Save chip data. Reading chip data finished. Return back to the previous page. Disconnect >> OK >> Continue Disconnect finished.  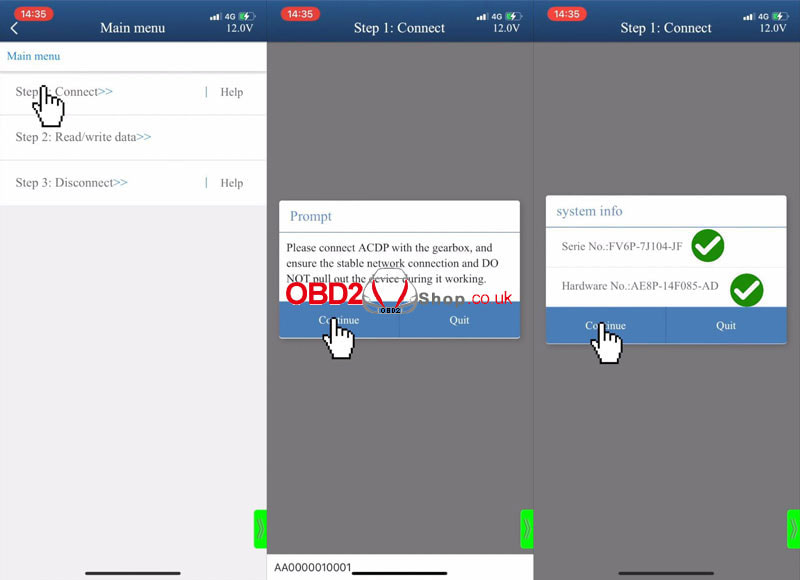 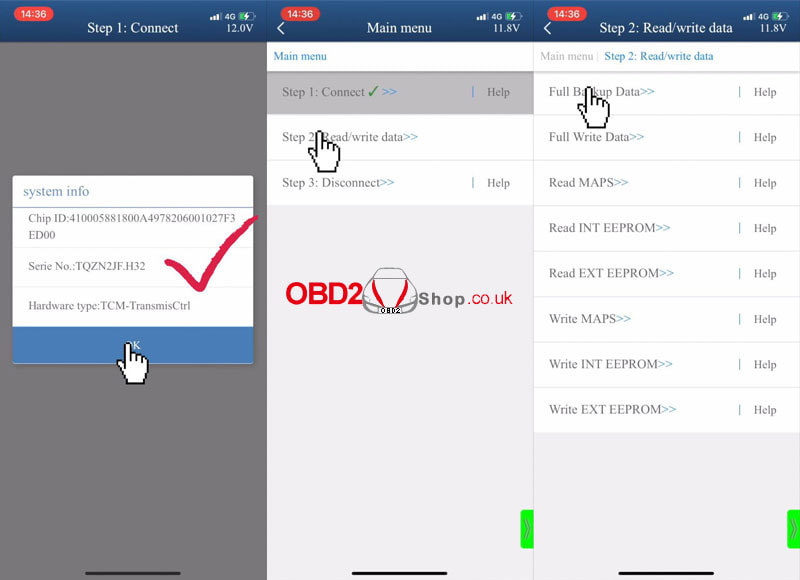 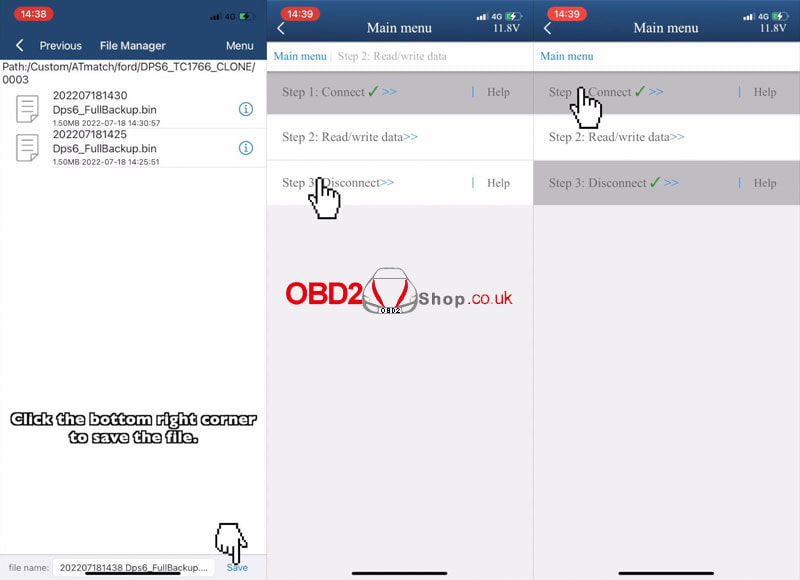 Step2. Write to New Gearbox Connect the new DPS6 gearbox module & prepare to write the original data. Connect >> OK >> Continue >> Continue >> OK Connect system finished. Read/write data >> Full write data >> OK >> Continue >> Load original data file Ready to write chip data, please don't cut the power nor pull out the device during the programming! Click "Continue". Writing chip data finished. Return back to the previous page. Disconnect >> OK >> Continue Disconnect finished. Completed! 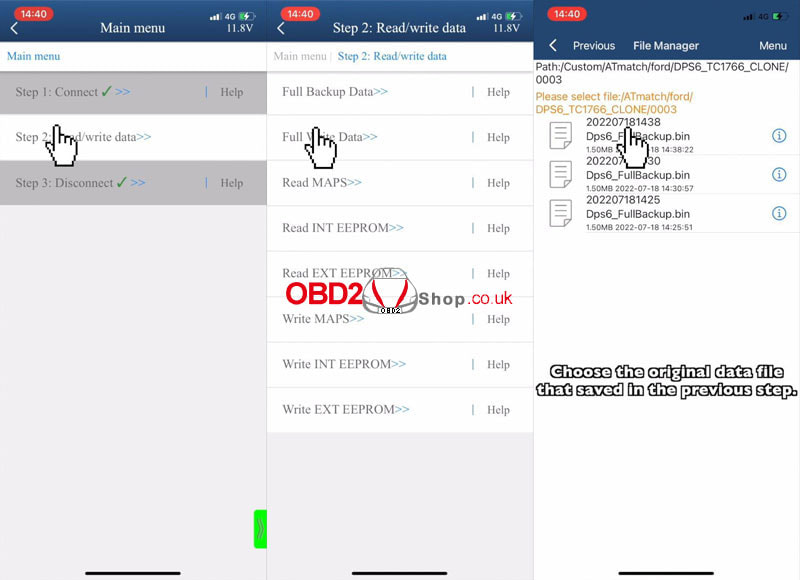 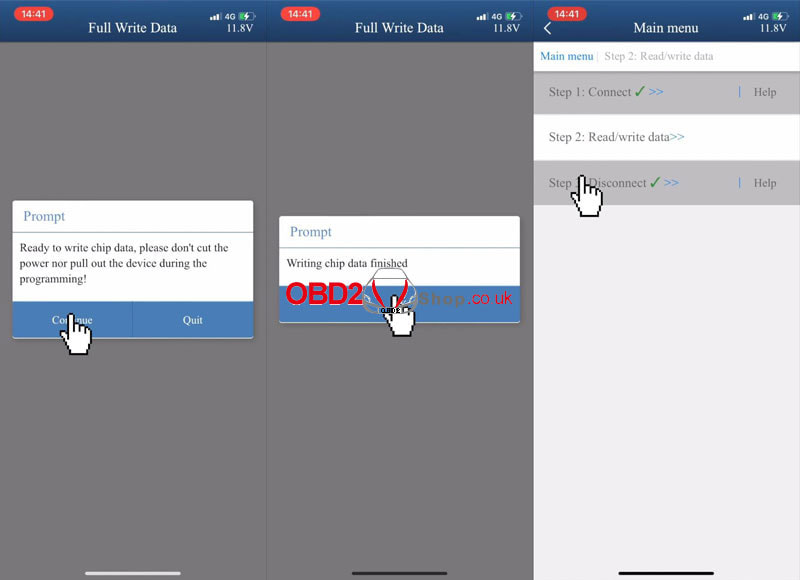 How to Clone MPS6 Gearbox? Tip: Click "Help" to view the connection diagram before operation. Accessories Required: MPS6 module OBP+ICP adapter ACDP host 20PIN cable Module 14 MPS6 interface board Connection 1. Install the MPS6 interface board. 2. Short circuit the CAN resistor on the OBD+ICP adapter to the "CAN-R" JOIN side. 3. Connect ACDP, OBP+ICP adapter & MPS6 gearbox. 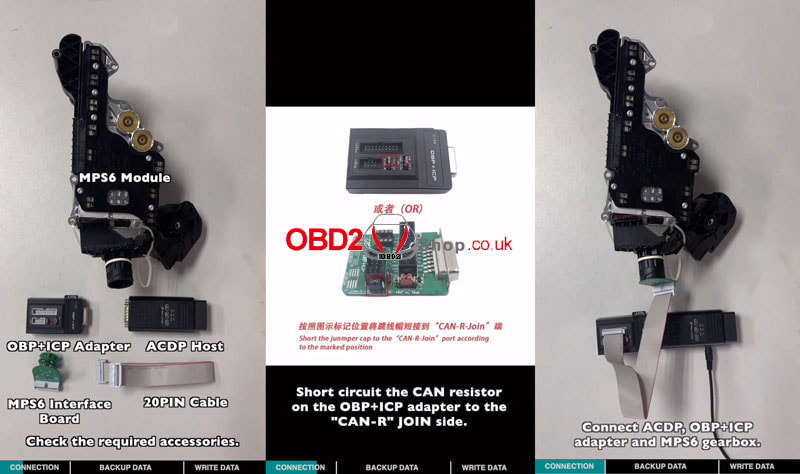 Operation Step1. Backup Data Mini ACDP >> Jaguar/Land Rover >> Gearbox clone >> Freelander >> MPS6 >> Full backup data >> Continue Remember to save module info, click "Continue". Save chip data file. Backup chip data finished. Step2. Write Data Connect the new MPS6 gearbox & prepare to write the original data. Full write data >> Continue >> Continue >> Load chip data file Ready to write chip data, please don't cut the power nor pull out the device during the programming! Writing chip data finished. Completed. 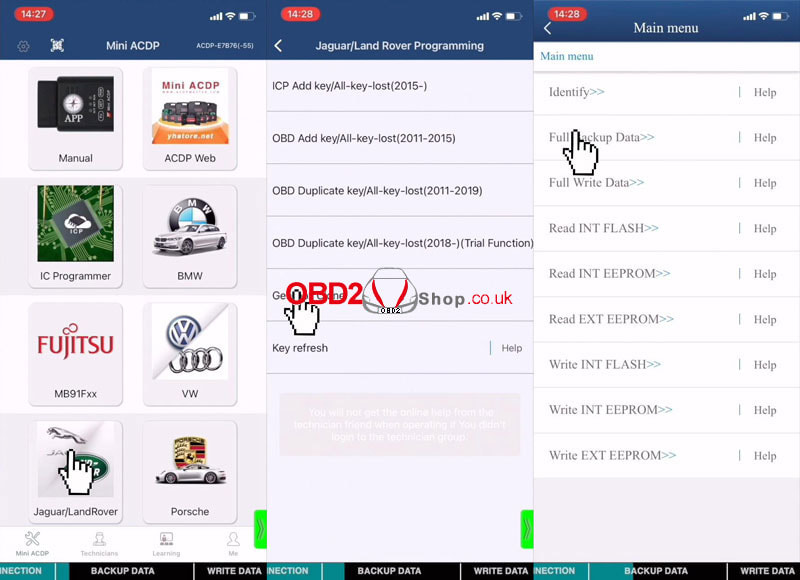 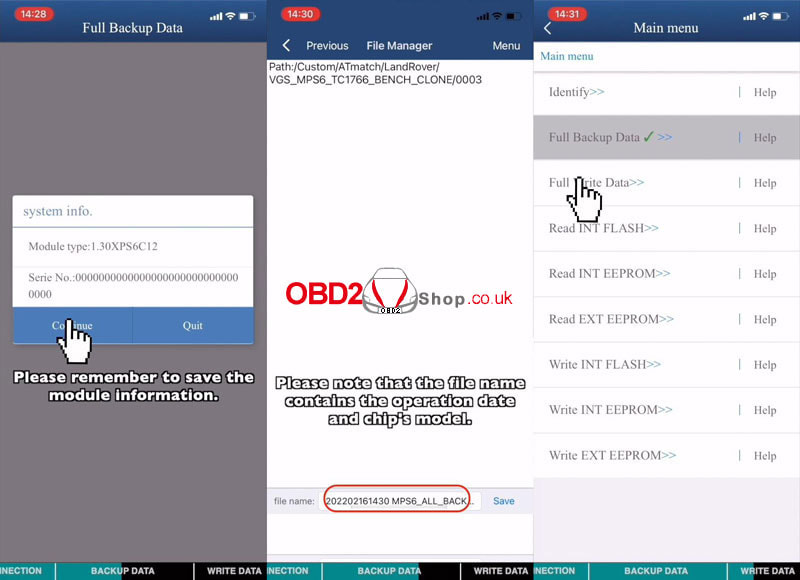 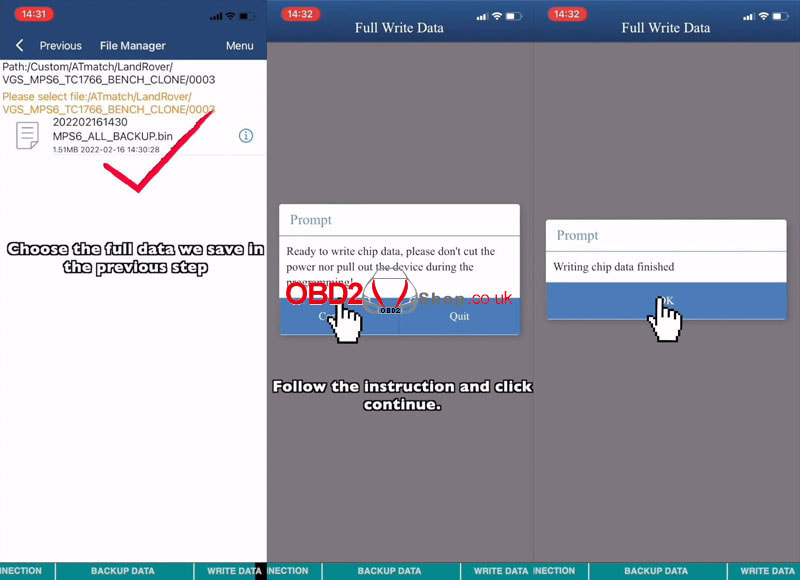
Yanhua FEM/BDC Special Programming Clip can read 95128/95256 chip without soldering. Compatible with most diagnostic tools on market such as ACDP, CGDI, VVDI, Autel, Launch X431, Xtool, etc.
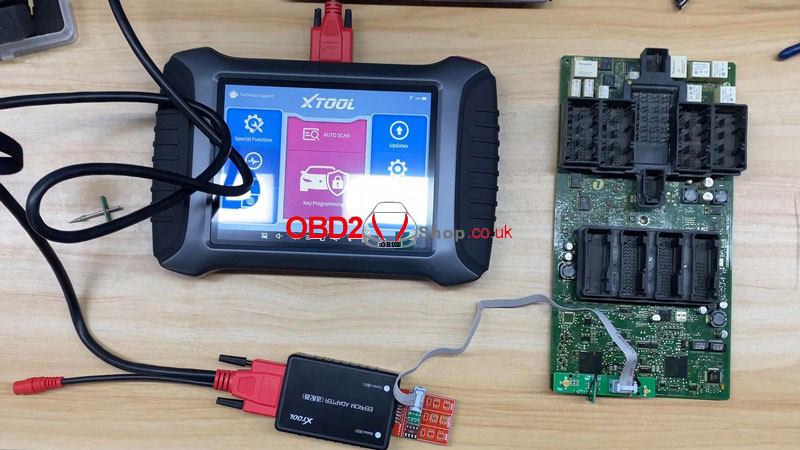
Here's a quick demo on how to read 95128 with Xtool X100 PAD3.
Check full operation on Youtube:
1.Install Yanhua FEM/BDC Clip.
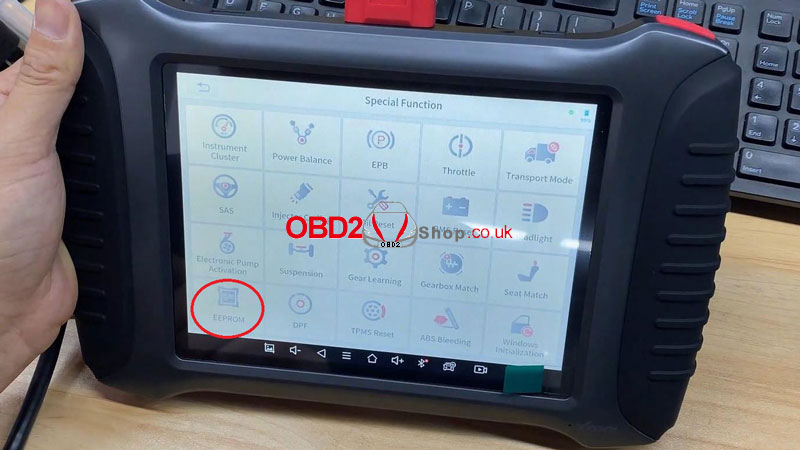
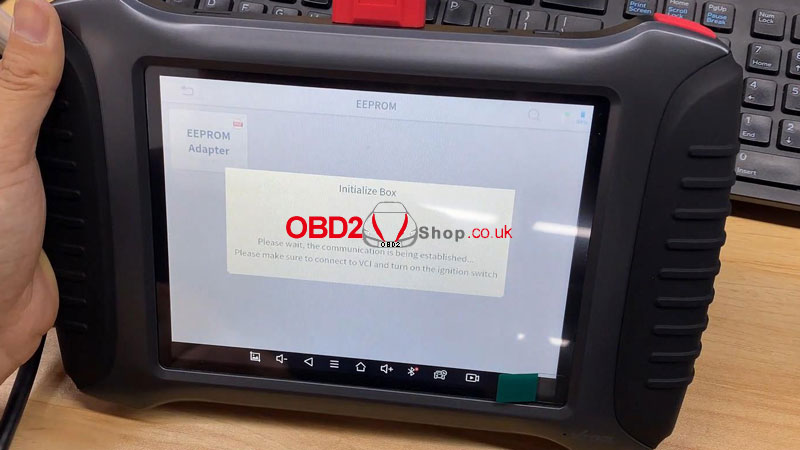
How to install Yanhua FEM/BDC Clip? 2.Connect to EEPROM Adapter & X100 PAD3. Special function >> EEPROM >> EEPROM Adapter Please make sure to connect to VCI & turn on the ignition switch... Read/write EEPROM >> EEPROM adapter Make sure the adapter is connected and powered on, and the status light is turned on. 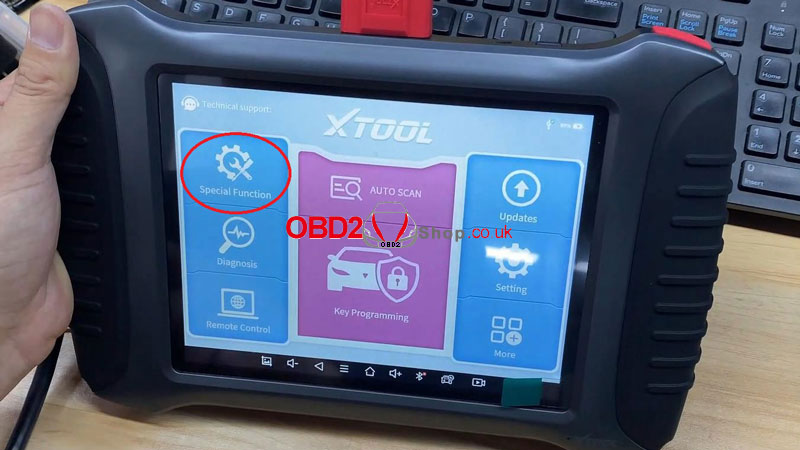
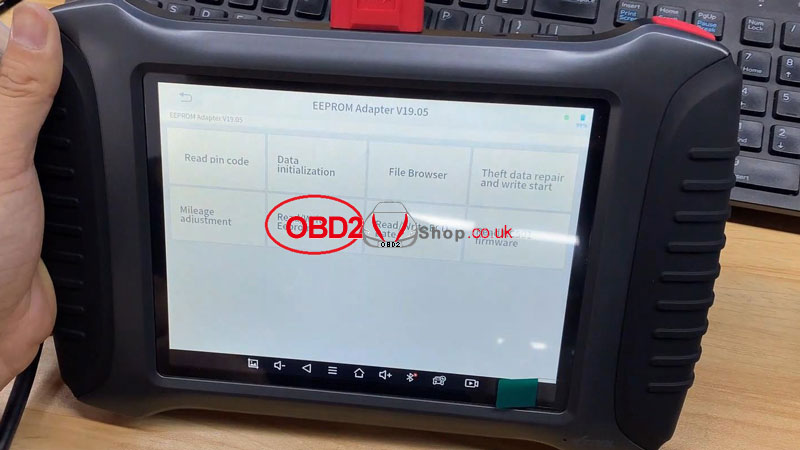
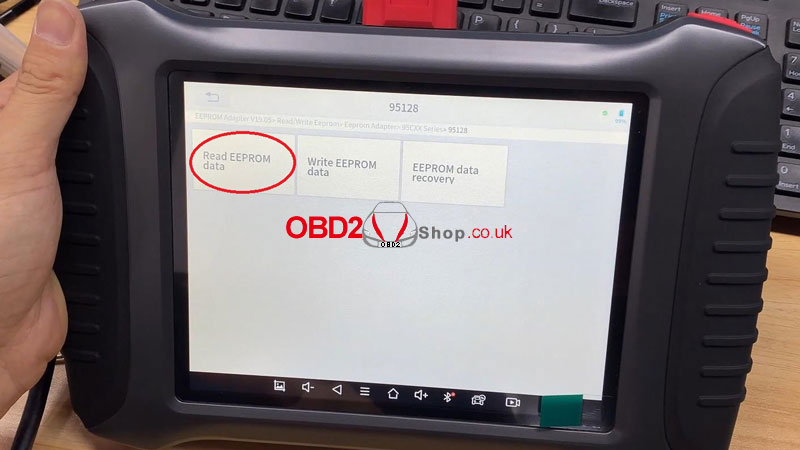
95CXX series >> 95128 >> Read EEPROM data >> Save file
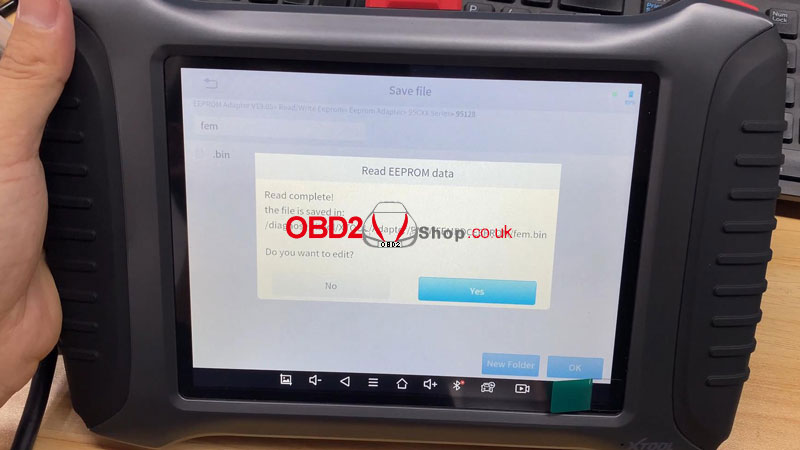
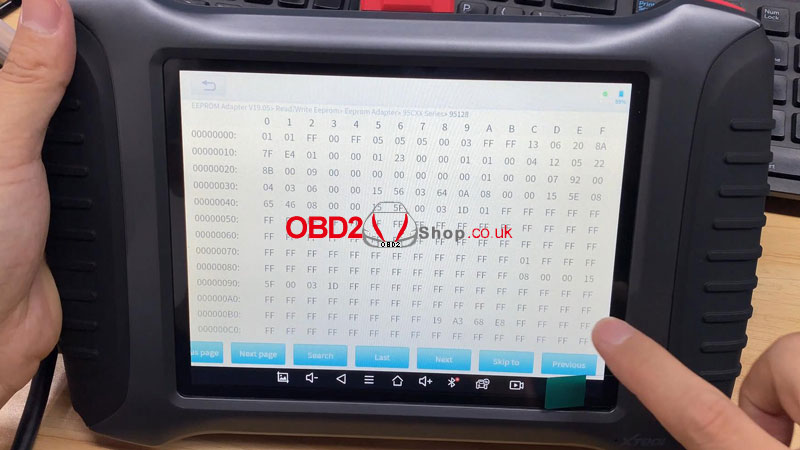
Read completely! This is how to read BMW 95128 chip with Yanhua FEM/BDC Clip without disassembly. 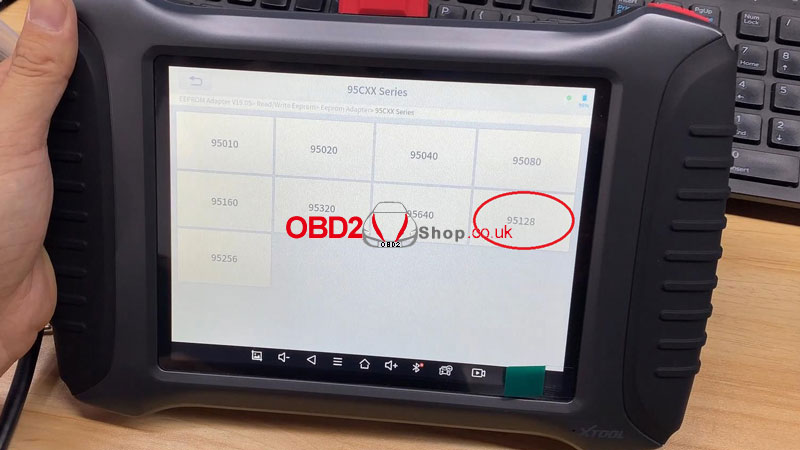
Problem: KT200 ECU programmer can't install the driver, it prompts "Windows encountered a problem installing the drivers for your device", how to solve it?
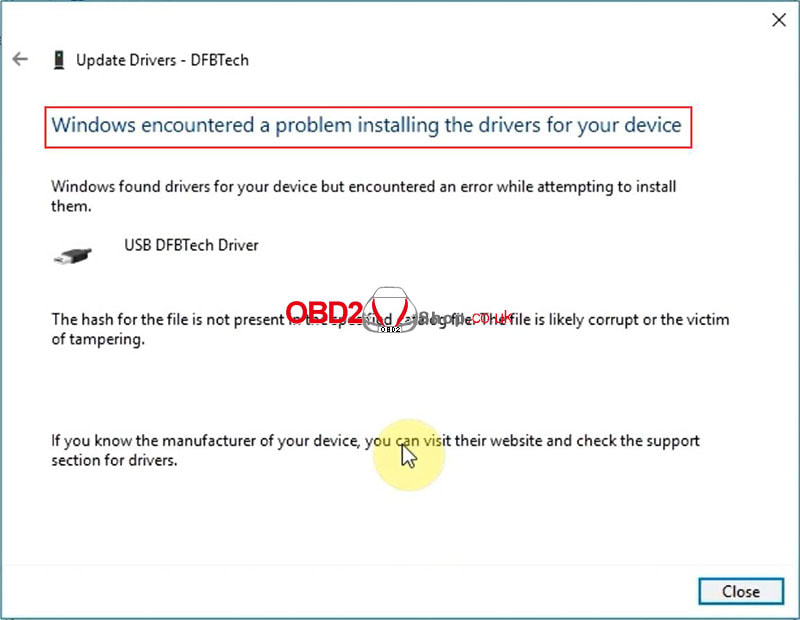
Solution: You need to disable driver signature enforcement, refer to the video for details.
How to use Launch- x431 Diagnostic Scanners to calibrate the BMW DSC steering angle sensor? This is taking X-431 PAD 7 to work on a 2006 BMW E90 as an example, follow the procedure to learn how to do it. DTCs There are 2 fault codes in the ABS module of BMW: 5E3F DSC: steering column switching center: coding DSC required. 5E50 DSC: steering-angle sensor: serial number; calibration required. Enter ABS >> Continue >> Clear fault code The 5E50 fault code is still exited. 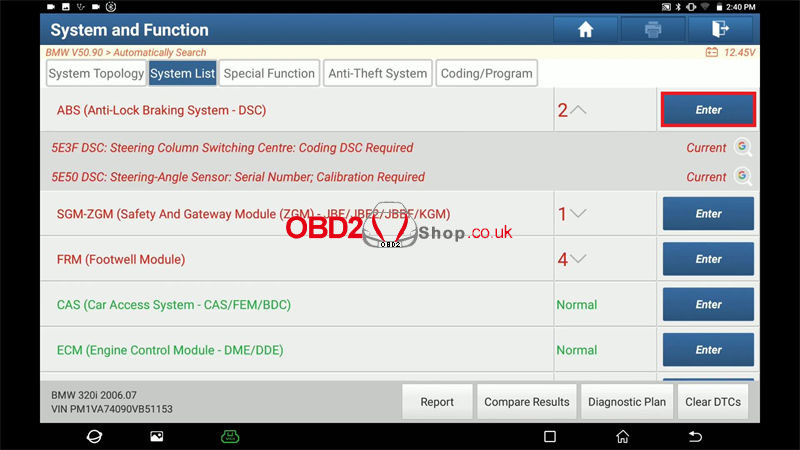 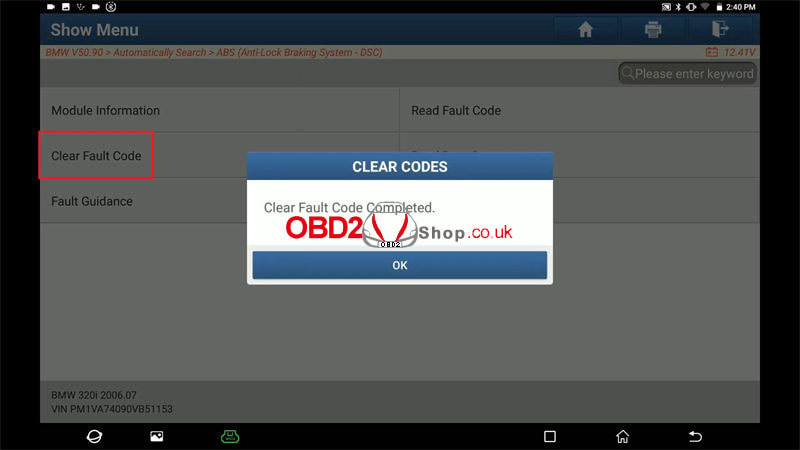 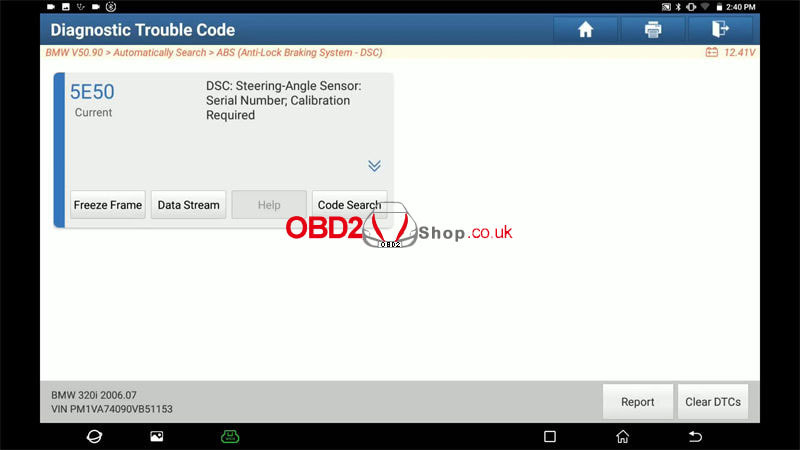 DSC Steering Angle Sensor Calibration Fault guidance >> SZL/DSC: steering angle sensor adjustment >> Operate 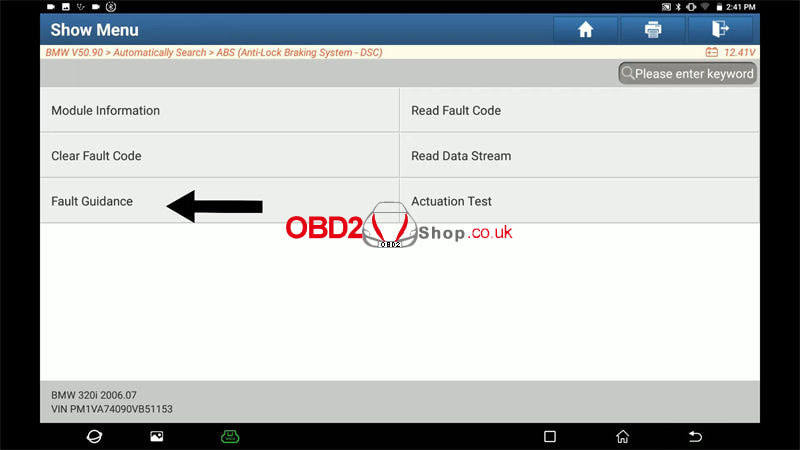 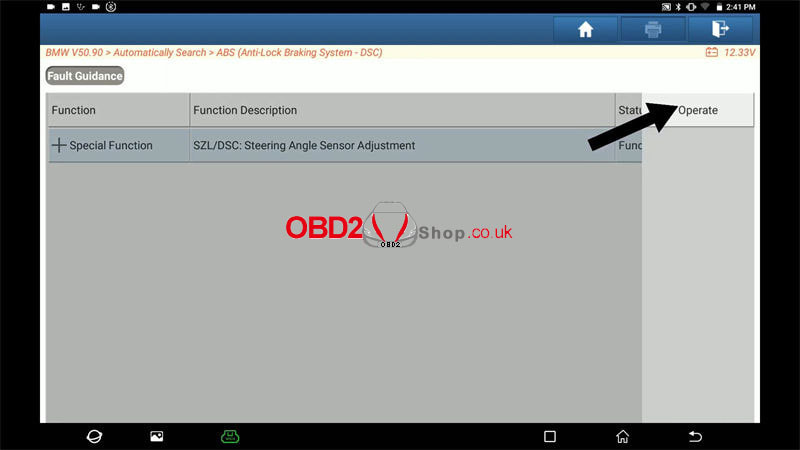 The steering angle must be calibrated after the following jobs: Replacement of steering column switch cluster. Encoding of DSC control unit Replacement of DSC control unit Adjustment work on steering geometry Working on steering and/or Front Axle Press "Continue". The run flat indicator must be additionally initialized after adjusting the steering angle sensor on completion of the following work: Encoding of DSC control unit Replacement of DSC control unit Press "Continue". Important info: For vehicles starting from 12/2004, the SZL must be encoded after a replacement. The adjustment of the steering angle sensor in the steering column switch cluster only works if the steering column switch cluster is encoded. The steering column switch cluster is automatically encoded as the DSC control unit is encoded. Do you wish to cancel the test module? No. 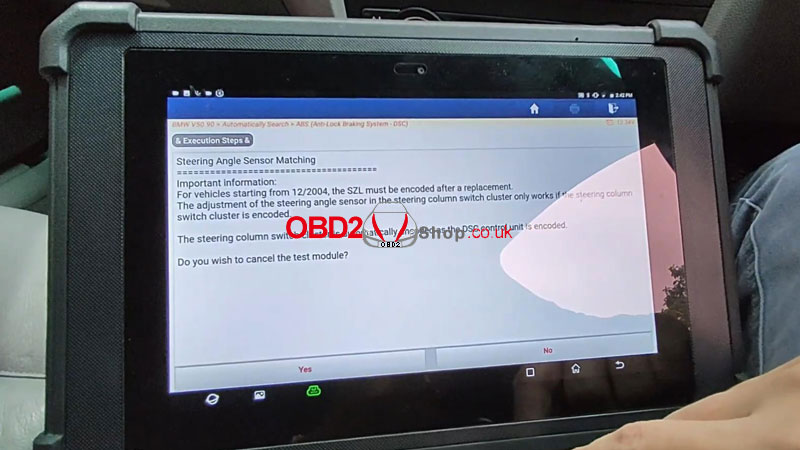 Exactly set front wheels to the straight-ahead position. The steering wheel must be positioned horizontally(approximate setting sufficient). Press "Continue". The steering wheel must be positioned horizontally! Otherwise, this may cause problems during vehicle operation(zero point of steering angle is detected as faulty)!!! Press "Continue". Adjustment in progress... Please wait. At this time, warnings on the dashboard have all gone. 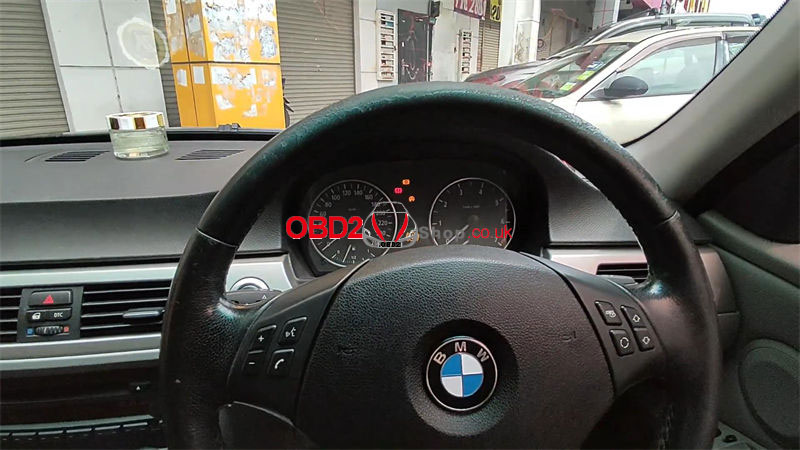  Adjustment of the steering angle was successful. Visually align the steering wheel in a horizontal position to check the zero position of the steering angle(wheels in straight-ahead position) Press "Continue". With the steering wheel in a horizontal position, does the displayed steering angle = 0 degree (Tolerance +/-2 degree)? Yes Adjustment of the steering angle was carried out correctly. Initialize Run Flat Indicator if necessary. The test module is ended in the next test step. Press "Continue". Service function finished. Go to read the fault code. There's no DTC anymore. Done. 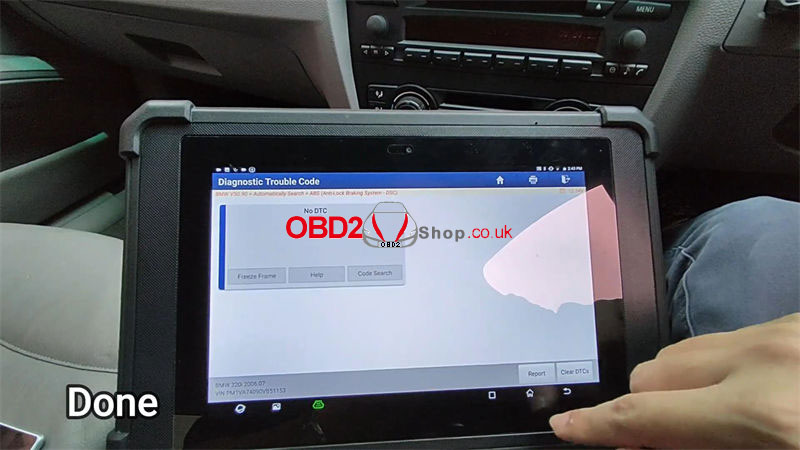 This is using Launch X-431 PAD VII to successfully solve BMW DSC steering angle sensor calibration problems.
www.obd2shop.co.uk
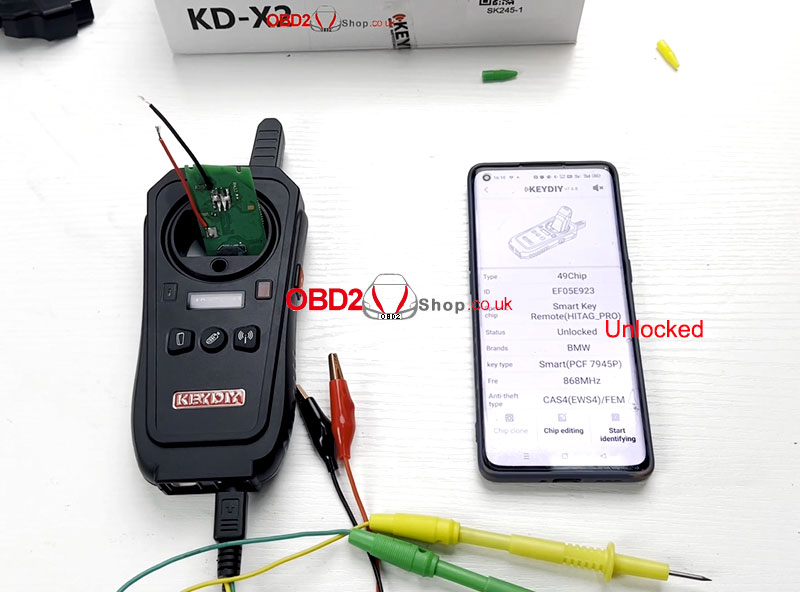
This article will guide you on how to use Keydiy KD-X2 to renew the BMW 868MHz remote.
The tools we need: Keydiy KD-X2 Unit Remote Data Cable BMW Remote Mobile phone loaded with Keydiy APP 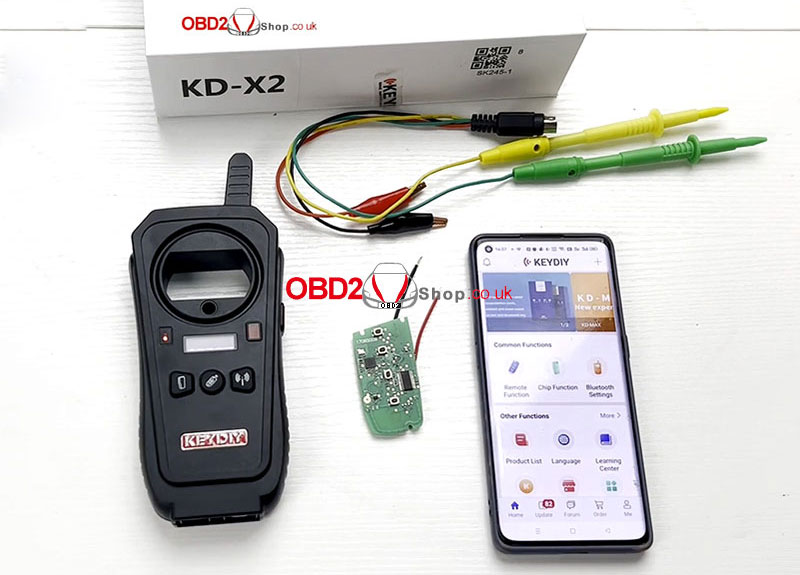
Insert the BMW remote into the slot of the Keydiy KD-X2, click "Chip Function" → "Automation Detection Clone" → "Start Identification".

The status shows "Blocked".

After the Remote identification is successful, return to the "Chip Clone" interface.
Connect Keydiy KD-X2 Unit and BMW Remote with Remote Data Cable. Select "Remote renew" → "BMW" → "5WK49661 F Series 868 MHz Continental". 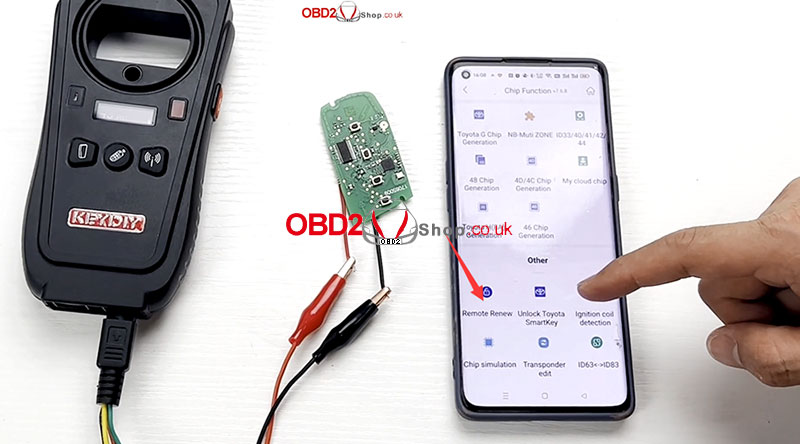
Make the correct connections according to the connection diagram.
Generate successfully! 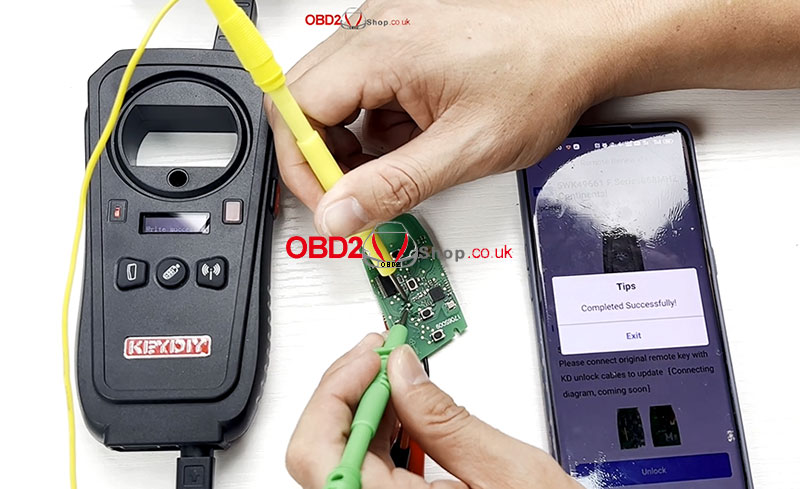
Click to return, re-insert the BMW remote into the Keydiy KD-X2 slot for identification, and now the status shows "Unlocked".
The whole operating process is very simple.
Click the video below to see a more complete operation:
Hope this helps!
Customer Problem: When using my SVCI J2534 by accessing the programming menu, the software displays a prompt as shown below, what should I do? 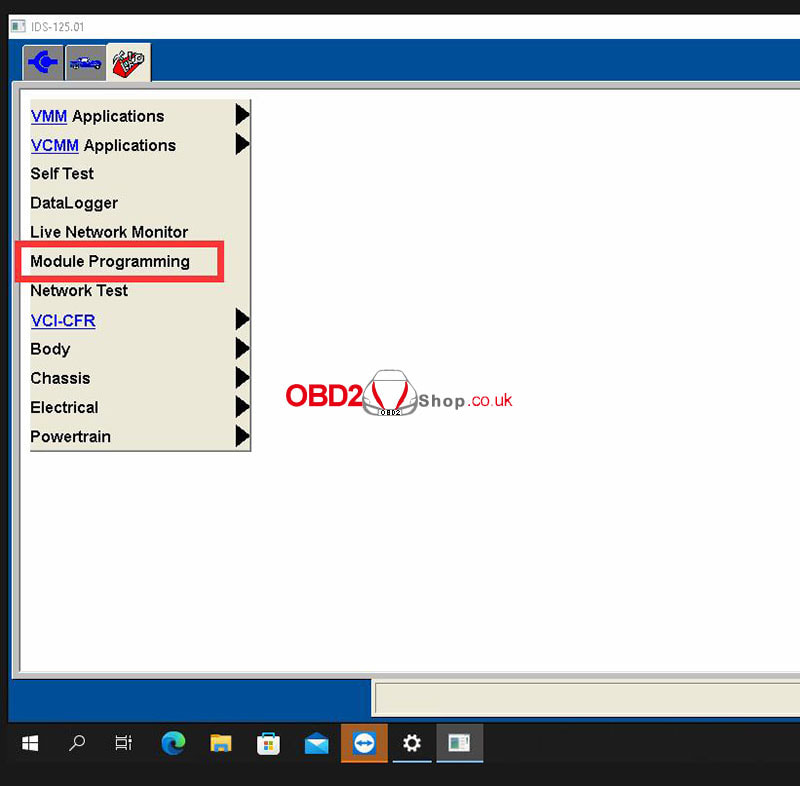 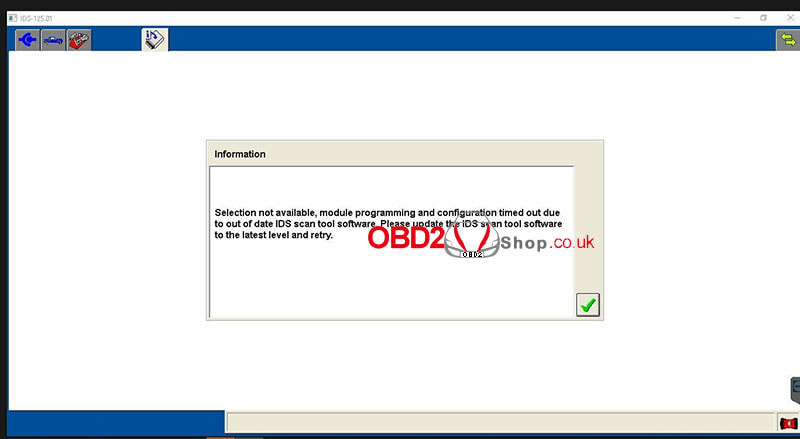 Solution: 1. Change the computer date to 2022.05.12 2. Run the "FordExtendProgr" patch FordExtendProgr download link https://mega.nz/file/CV4TBK6B#Dbkq0Ow5JXyCO_IAJx5w0Zj6sM-_iqybxmAeweWFI-U 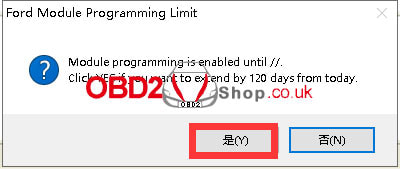 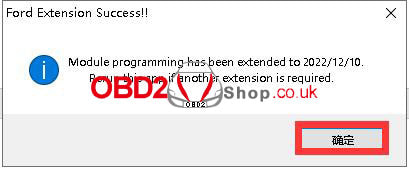 After the repair, open the ids to enter the programming menu and it can be used normally. 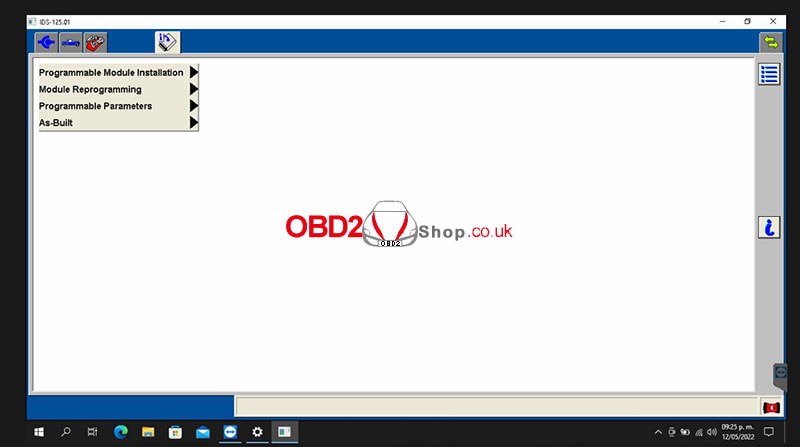 Note: After the software is repaired, the computer date can be changed back to the current one without affecting the use.
For more technical services, please pay attention to http://blog.obd2shop.co.uk/ This is a guide on how to configure GM MDI 2 Multiple Diagnostic Interface wireless connection settings. 4 steps to easy finish. 1. Connect GM MDI 2 to a PC, and wait until the 2 orange lights were on. 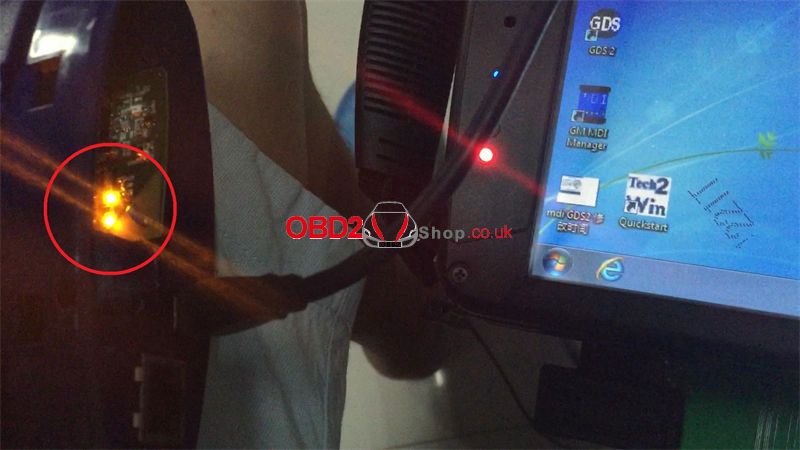 2. Connect PC to WIFI. 3. Open GM MDI Manager >> Connect >> Network setup >> Wireless(802.11) >> Enable wireless interface >> Access point >> Refresh >> Select same WIFI as PC >> Input wireless security password >> Next >>> Yes You can see there's a signal quality icon. 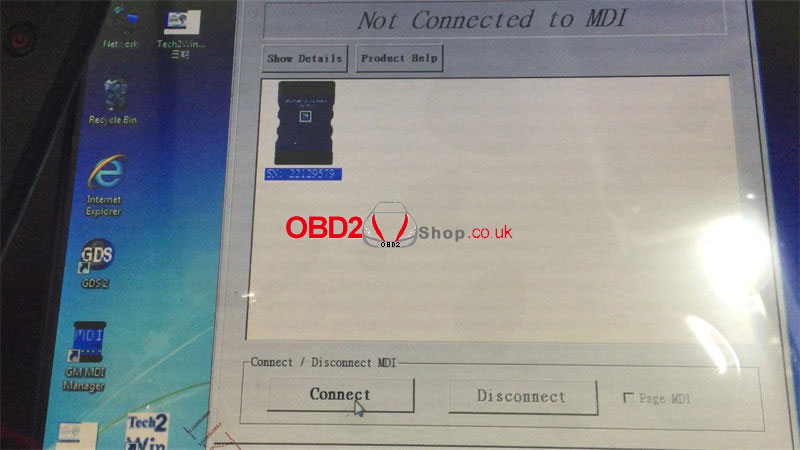 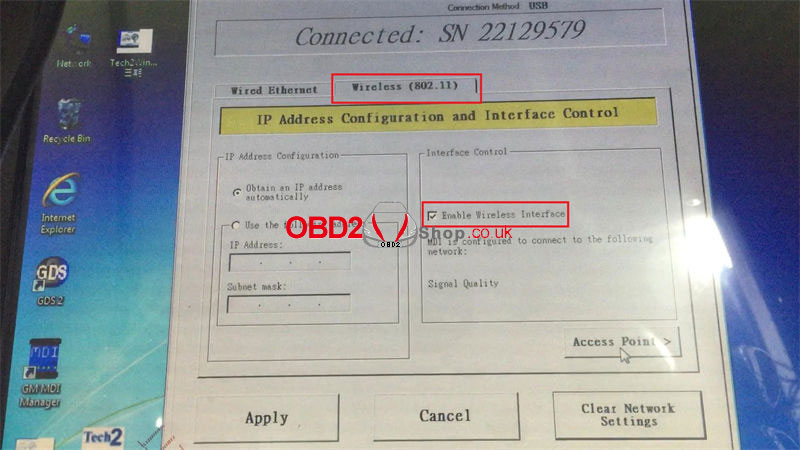 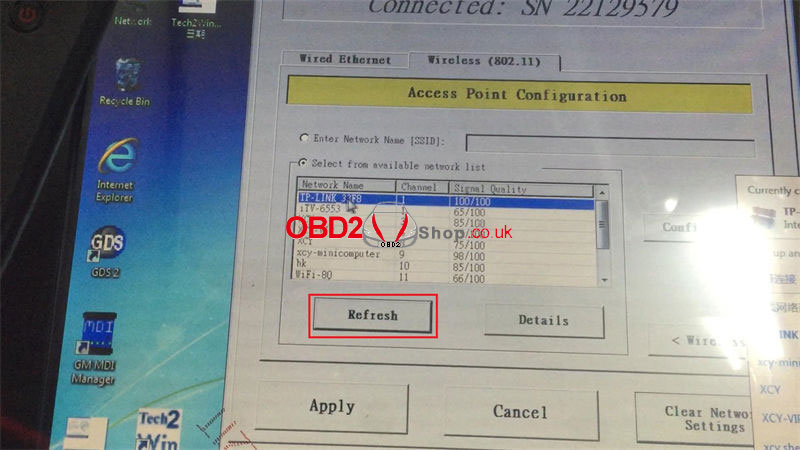 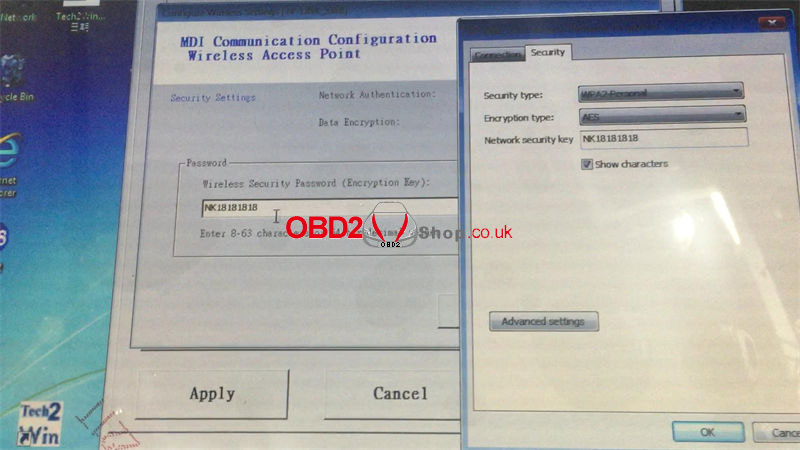 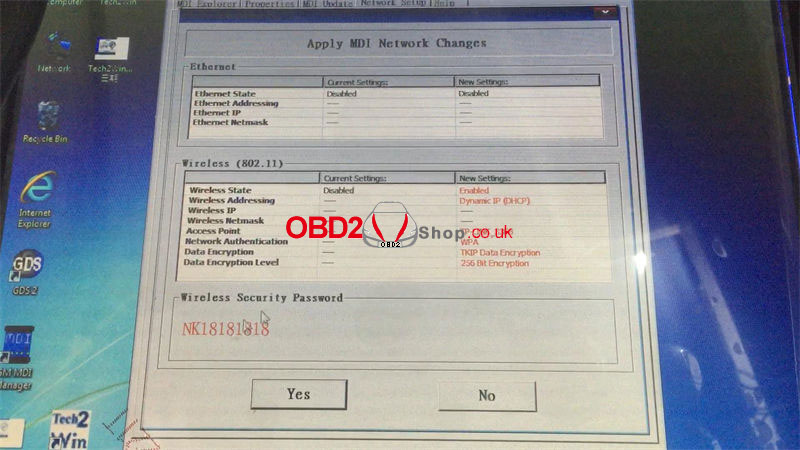 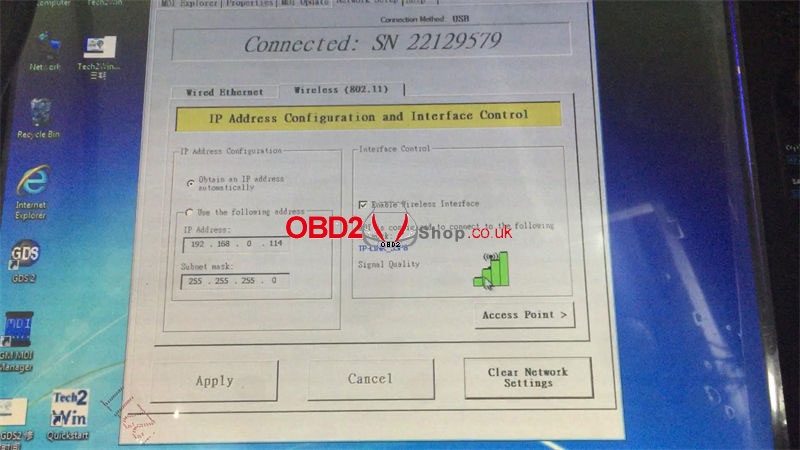 4.Go back MDI Explorer to disconnect, and unplug the connection cable. Click "Connect" when it's showing a signal icon. Once it shows with a tick, and 2 green lights are fast blinking, the setup works. Completed!  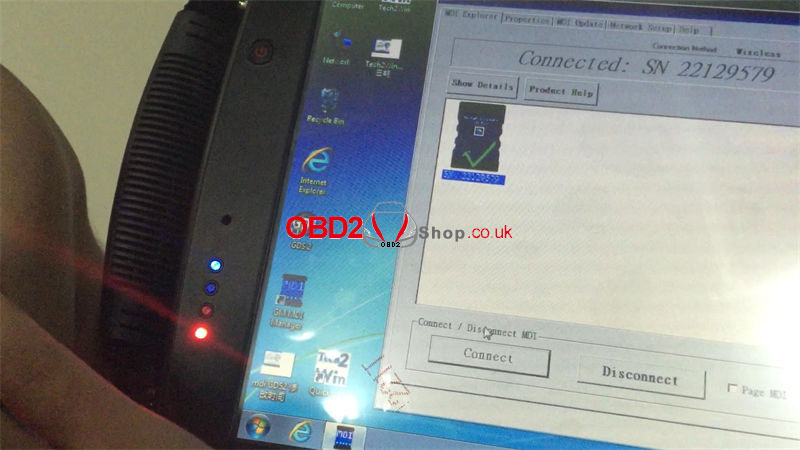 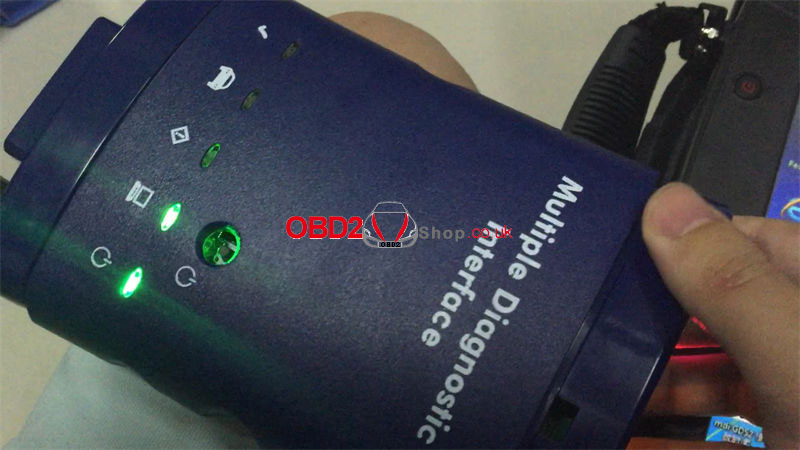 |
