|
This post is about how to use Xtool X100 PAD Plus to read pin code/pin code calculation for Nissan. Click "Diagnosis" >> "Services" >> "Immobilization" >> "Nissan" >> "Pin Calculator", to enter the system, then you will see this menu below. 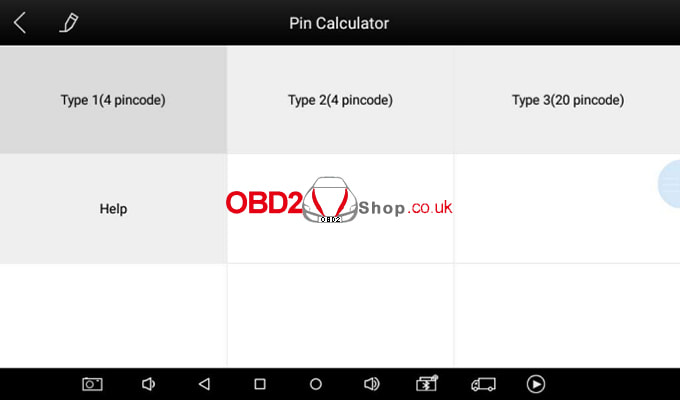 Please choose your vehicle type. If you have any questions, please click "Help" for more details. 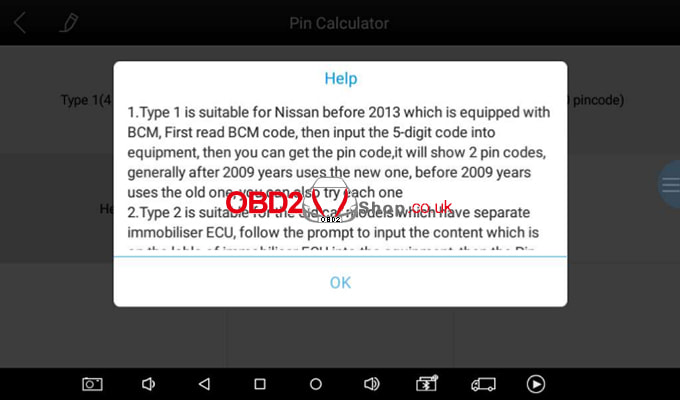 Here we choose “Type 1”, then enter the 5-digit BCM code. The BCM for Nissan vehicles is located under the steering wheel, behind the glove box, behind the passenger/driver's door sill plate, and the dashboard, depending on the vehicle model. 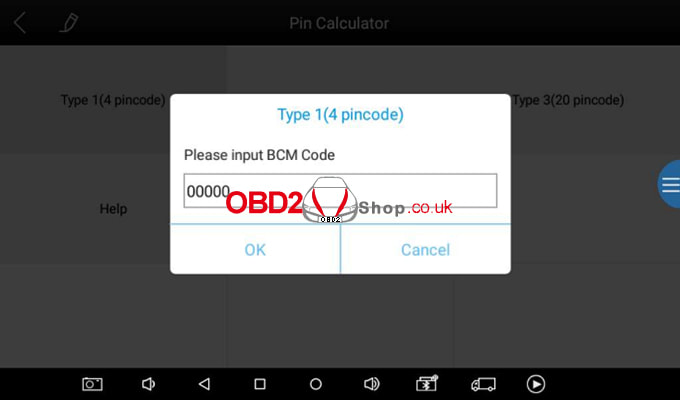 After entering the code, the results will be displayed. 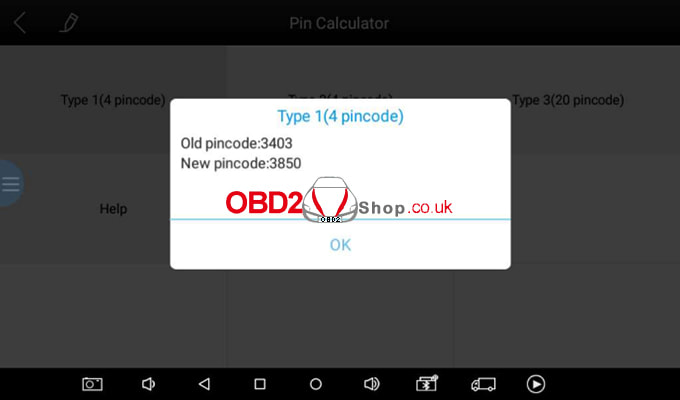 Tip: If you have trouble working on Nissans, change the language to English, check for updates, and see if there is a "NISSAN PIN DATA". Usually, downloading it will fix the problem.
Xtool X100 Pad Plus Tech Support: https://www.obd2shop.co.uk/wholesale/xtool-x100-pad-plus-key-programmer.html
0 Comments
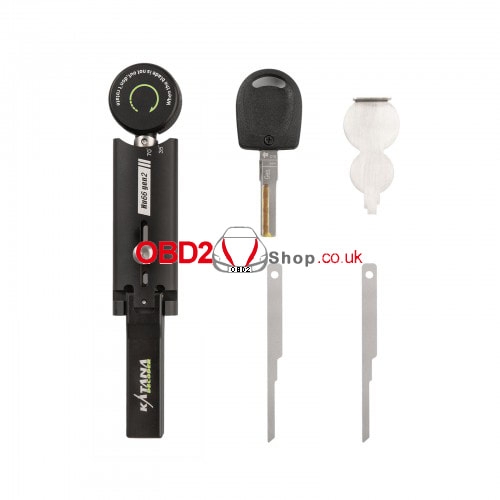
Vapon Katana Decoder Lockpick Tool is a quick-opening tool for locksmiths, which has 2 models that can open HU92 & HU66 car doors (HU100, HU100R, SIP22, and more are coming soon). Here we've collected the most frequently asked questions and answers for your pre-sale reference.
Q: How does Vapon Katana Decoder work?
A: Each time the Katana Decoder is turned, its gears will try to squeeze all the data pieces and push the lock pieces to reset. When all the lock pieces are reset, the lock opens. During the opening process, the calibration position is recorded by each piece of data, which can be obtained to make a new key through a key-cutting machine. 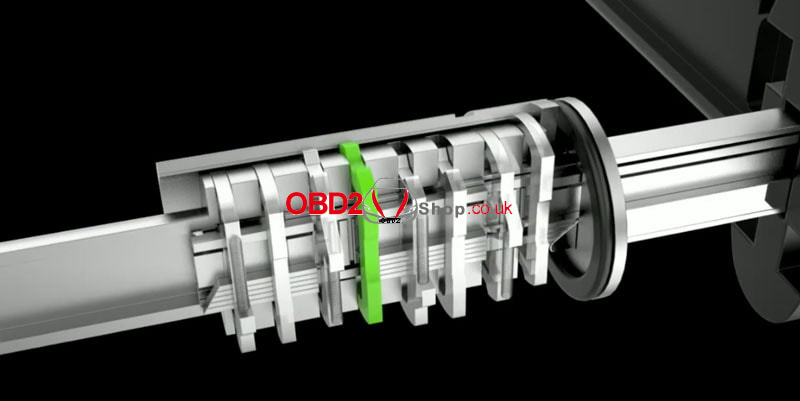
Q: What are the advantages of the Katana Decoder tool?
A: 1) Compare to LISHI or Turbodecoder, the user's operation experience is more excellent with an 18.5cm length. 2) Afterburner handle design improves opening efficiency. 3) Knob-open reduces the force on the tool for damage probability. 4) Replaceable design enables customers to replace the parts by themselves in case the decoder tool is damaged. 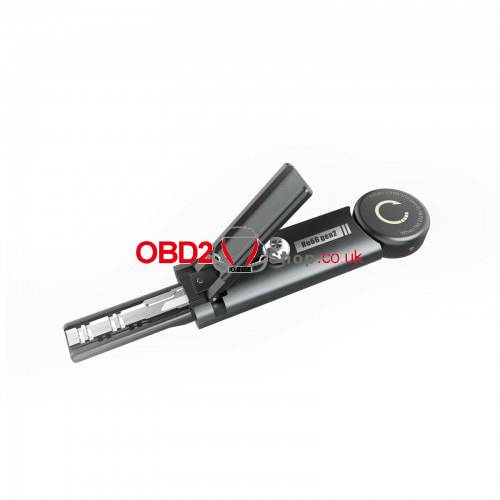
Q: What's Katana Decoder different from LISHI or Turbodecoder?
A: 1) Compare with LISHI/ Turbodecoder, Katana Decoder operates in an easier and more consistent style. Locksmiths can start immediately without learning. 2) Katana Decoder is much cheaper than the Turbodecoder, and it's improved in detail across the board. 3) In contrast to the Kwit HU66 tool, Katana Decoder works by using knobs rather than violent shaking, reducing the force on the tool and making it less prone to damage. Q: What years are supported by Katana Decoder HU66 GEN2? A: Katana Decoder HU66 - VAG G 2/6 supports models from 2004-2017. Q: What years are supported by Katana Decoder HU92? A: Katana Decoder HU92 BMW E series supports all BMWs till 2013. Q: Do Katana only have 2 models: HU66 GEN2 & HU92? A: HU100, HU100R, SIP22, and other models are being tested and will be coming soon. Q: Does Katana Decoder have a warranty? A: Katana Decoder does not provide a warranty. Customers need to study the video, make sure to use it correctly, and won't break it. KatanaDecoder HU66 gen2 operation video:
KatanaDecoder HU92 operation video:
Q: Why Vapon Katana Decoder is expensive?
A: Its precision is high, and the production cost itself is not low. The earliest retail price starts at £299. Now it has been reduced by £130, just to make customers better accept it. Q: Katana Decoder will break? A: It is a metal tool and not easy to break. Just learn how to use it properly. Q: If the Katana tool breaks, can it be repaired? A: You can replace its core parts by yourself. The core components need to be purchased separately Replace Katana core part video:
Q: I'm using LISHI now, why try Katana Decoder?
LISHI is a successful tool, but it takes many days of training time. Katana Decoder can easily master it. It's also a good choice for you. www.obd2shop.co.uk This article will introduce you to Xtool D9 Pro Diagnostic Tool update and specific operation steps to reset to factory settings. Xtool D9 Pro Update After activating the device, please update the software modules identified in the "Updates" screen. The device will identify all currently available software packages, and you can download them as needed. All software updates directly via the Internet. To access the update application, open the Diagnostic application and click Updates to enter the screen shown below: 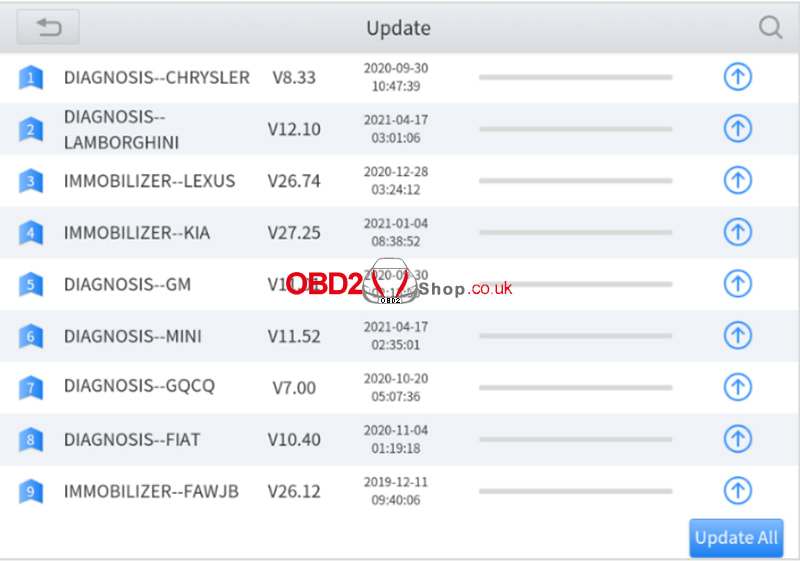 Cautions: When the subscription expires, the software installed on your device itself still is available, but all updates will be invalid. If you delete specific software due to personal operation, we are not responsible for supporting the restoration of the software when the subscription expires. To renew your subscription, please contact us at [email protected] D9 Pro Software Delete Long-press the unwanted software until it has been selected, then click the Delete button shown on the upper part of the screen. And you can select and delete multiple software at once. 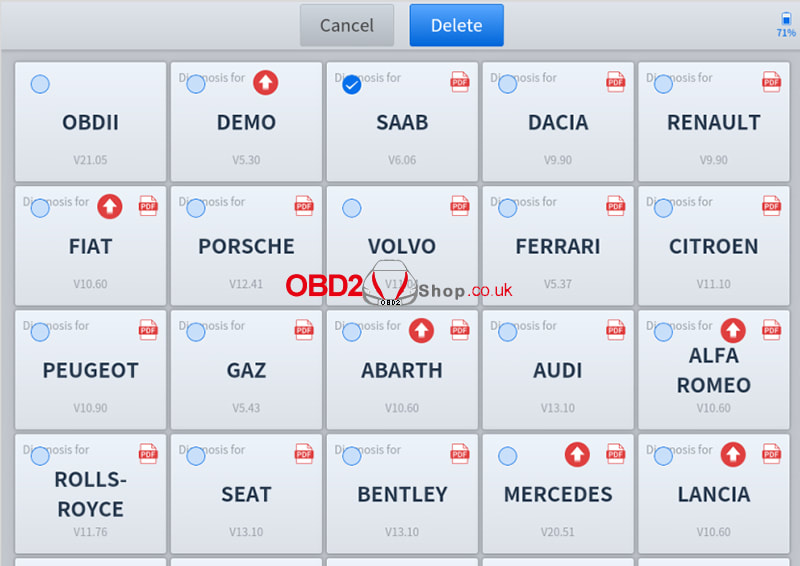 D9 Pro Factory Reset When you choose to restore factory settings in the Android OS system, the device will automatically erase any custom settings and data, restart, and then enter the factory reset mode. A factory reset is triggered by clicking the Settings mode from the main home page, and then clicking on “Backup & reset”. Follow onscreen prompts to initiate the factory reset process. Once the scan tool resets to factory default settings it will start up and then you can select the language in the following interface. 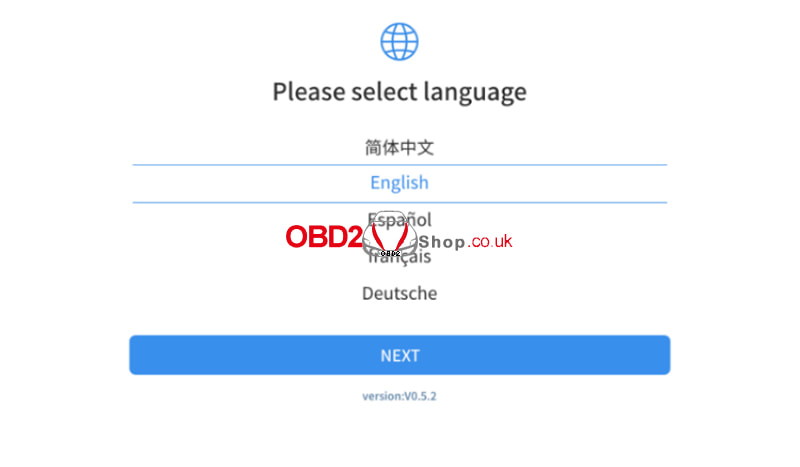 After selecting the system language, click Next to enter the Wi-Fi connection page, as shown below: 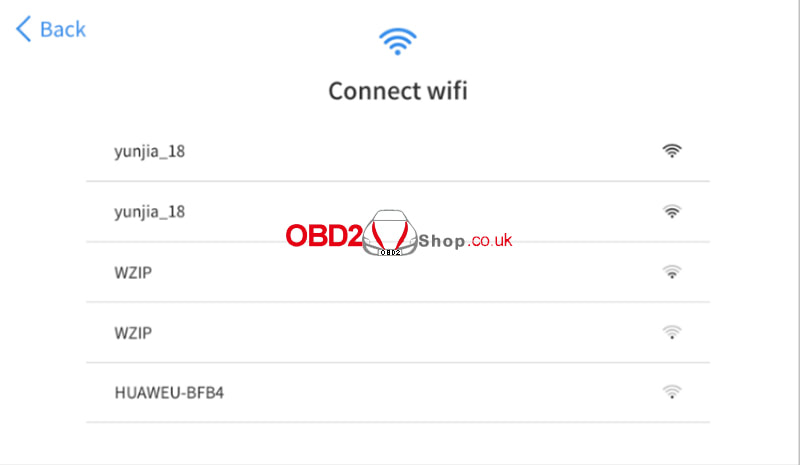 Select a network to connect to on the Wi-Fi connection page. You will need to enter the Wi-Fi password to establish Wi-Fi connectivity. After successfully connecting to an Internet network connection, the scan tool will jump to Factory mode to download the software: 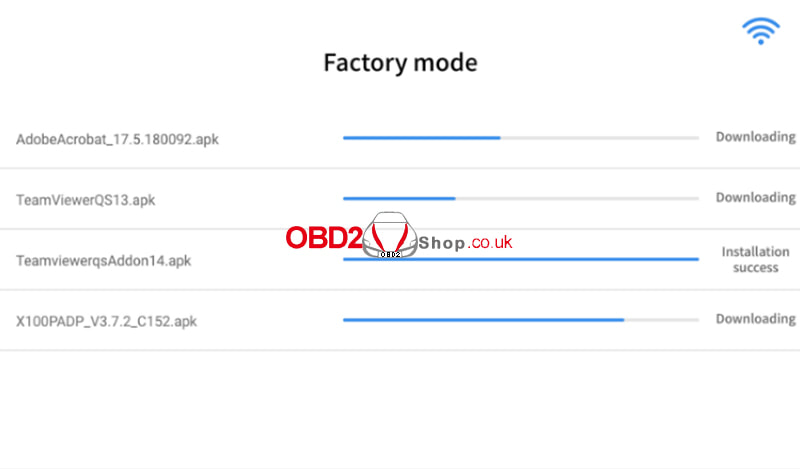 This download process can take several minutes, largely determined by the speed of your Internet connection. Do not power off the scan tool or walk out of range of the Wi-Fi connection during this period. Once the software has been downloaded, the tablet will automatically reboot and request the system language selection again. 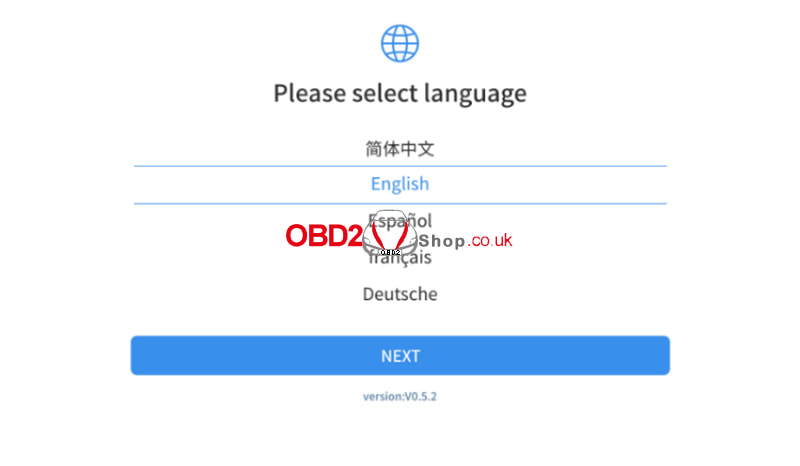 Since restoring the factory settings will erase the user information on your device, you need to enter the email again to activate your device.
For more operating instructions of Xtool D9 Pro, please refer to the user manual https://www.obd2shop.co.uk/upload/pro/23030116776594672695.pdf Xhorse VVDI Key Tool Plus & XDNP30 Bosch ECU Adapter have been upgraded to support reading BMW ISN code on the bench. The ECU code would be very useful when programming BMW CAS3++/CAS4+ encrypted version & FEM/BDC all keys lost. Supported types covering MSV80, MSV90, MSD80, MSD81, MSD85, MSD87, N20, N55, B38, B48, B58.  This is reading BMW MSD87 no soldering on the bench as a demonstration. How to read BMW ISN with VVDI Key Tool Plus? Immo programming >> BMW >> Select from system >> ECU ISN >> Start programming >> BENCH read ISN - MSV90/ MSV80/MSD80/MSD81/MSD85/MSD87.etc >> MSD87 Please ensure the network connection is good. Press "Yes". Here we can check the detailed wiring diagram.  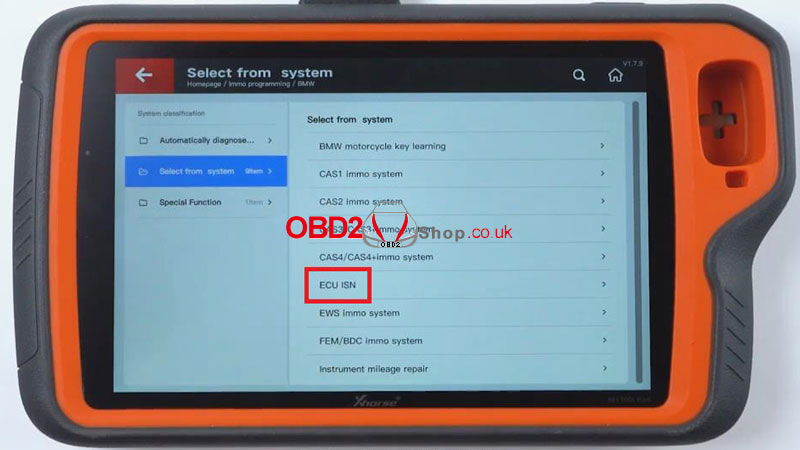 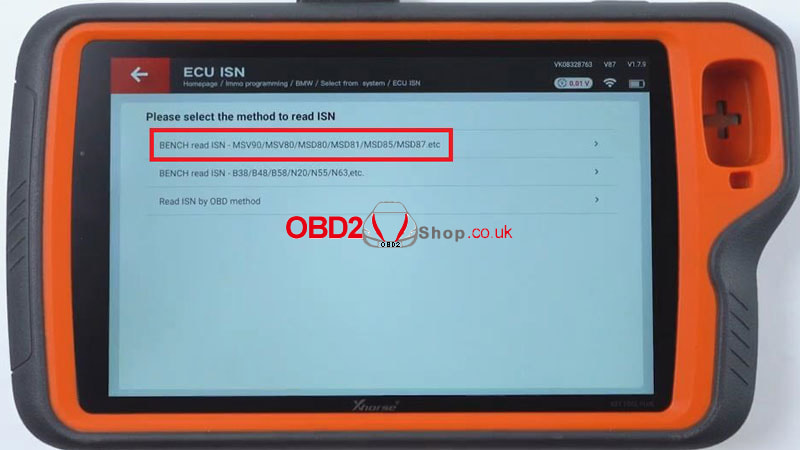 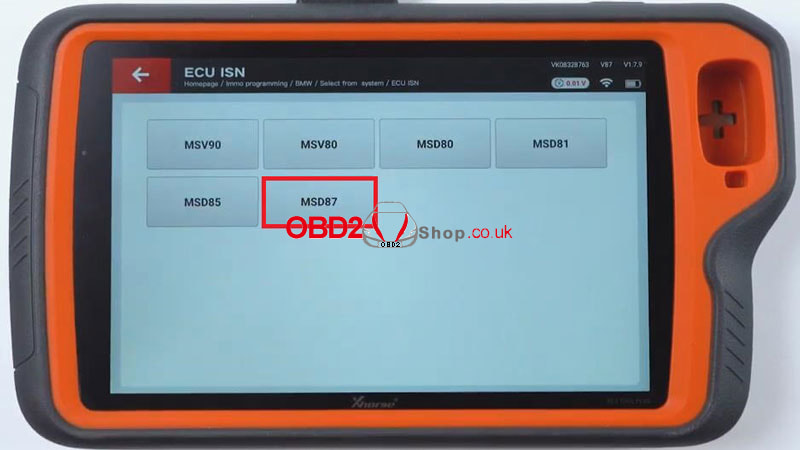  Connect VVDI Key Tool Plus & BMW module via XDNP30 Bosch Cable. Supply 12V to power it on. Press "Read" and wait for a while. Read succeeded. Press "OK" to save the data file. Now Key Tool Plus is showing the VIN & ISN code. Just remember to record it. Done. 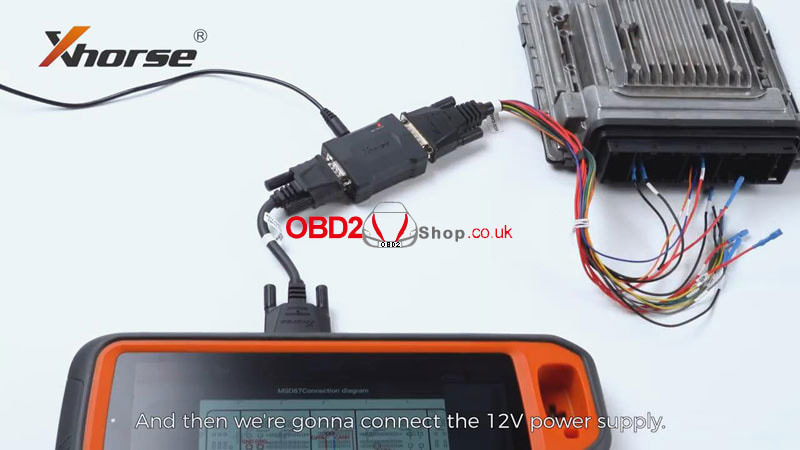 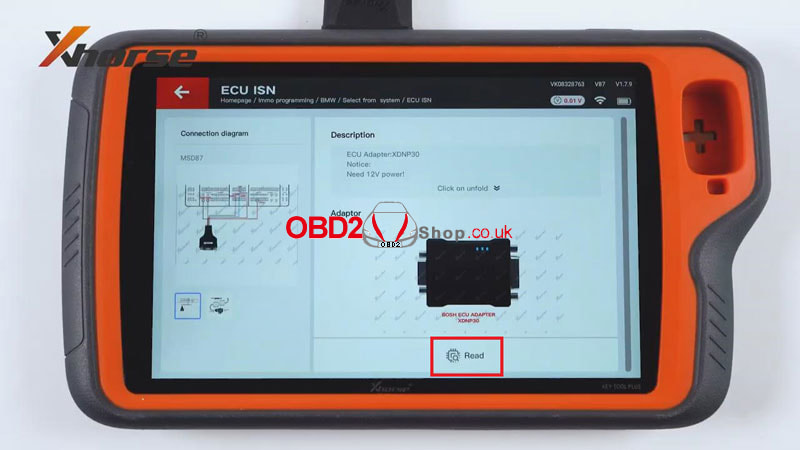 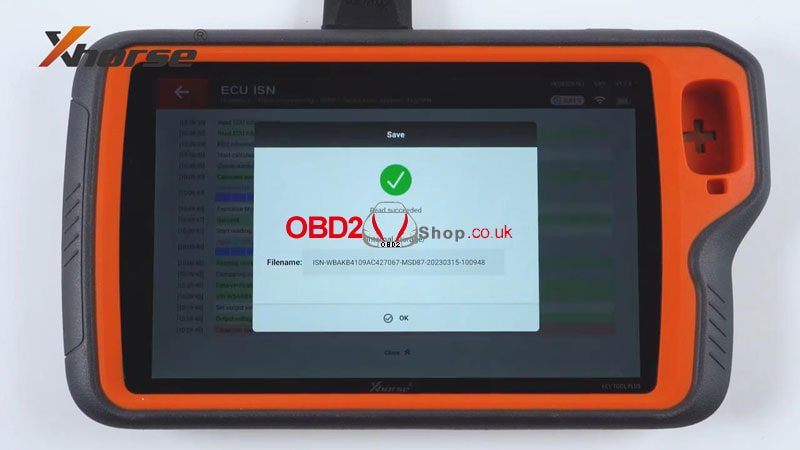 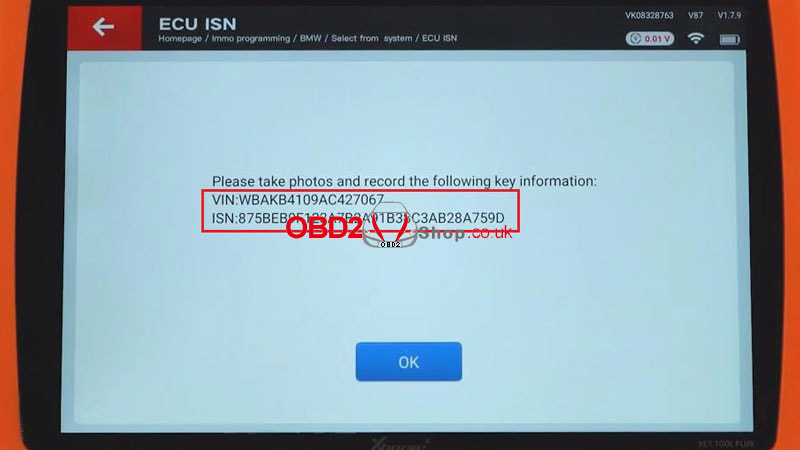 This post will guide you on how to use the print function of the Autel MaxiTPMS TS608 tool. Here are the steps: Step 1. Activate all TPMS sensors to get IDs before performing any TPMS relearn. 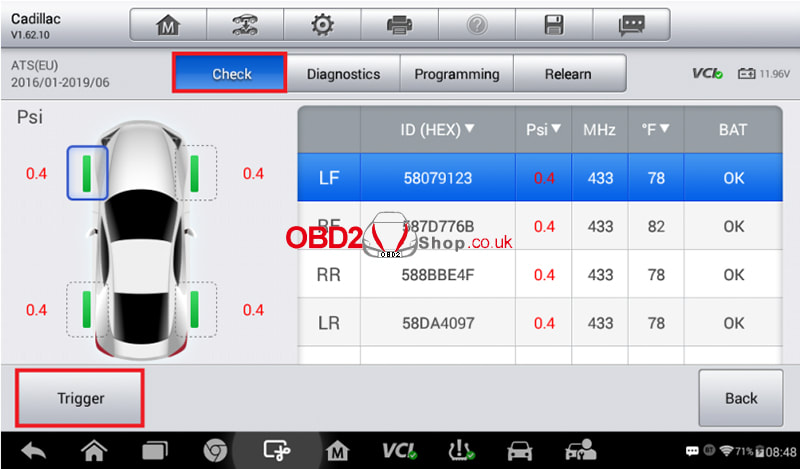 Step 2. Use the "Diagnostics" function to get the IDs and DTCs of the registered TPMS sensors from the ECU. Note: Before performing any relearn operation, data from step 1 and step 2 will be recorded as an "initial customer record". 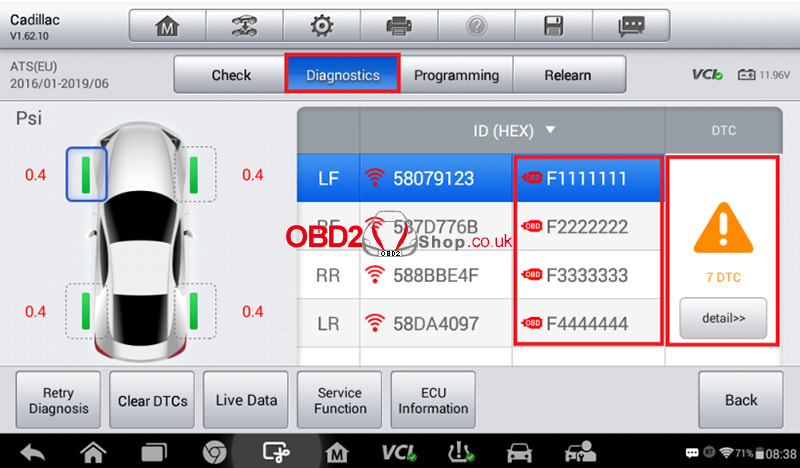 Step 3. Perform OBD relearn to write sensor IDs to ECU, the data of "Final customer record" will be updated after OBD relearn is completed. 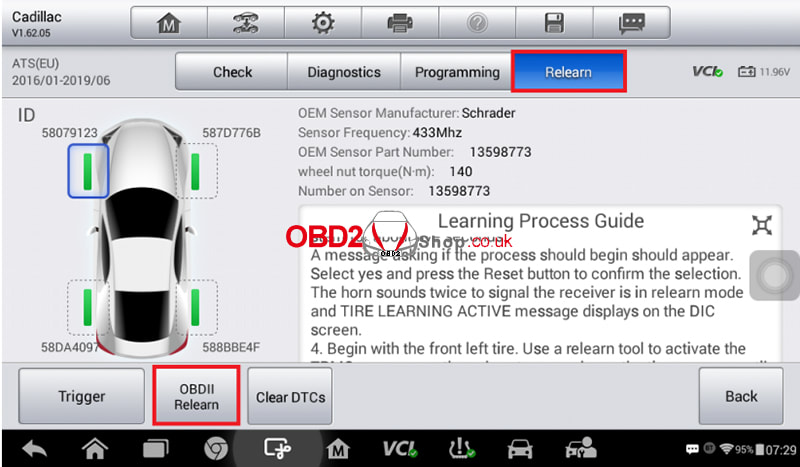 Step 4. Save the test report via the Save button 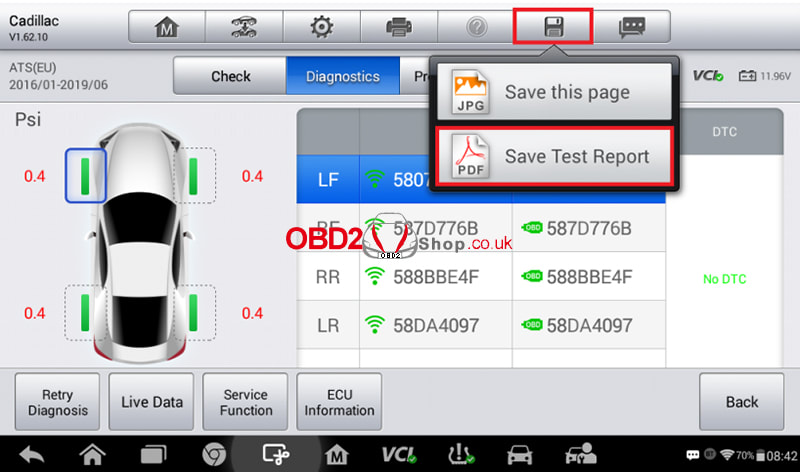 or print the test report via the Print button. 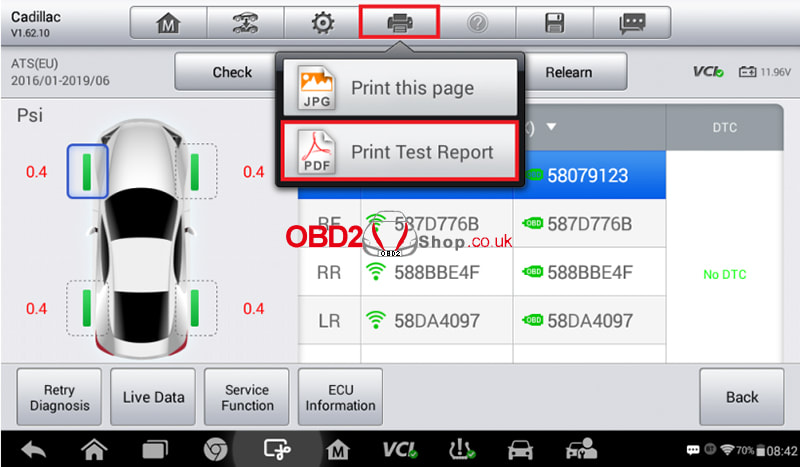 The test report will be displayed. 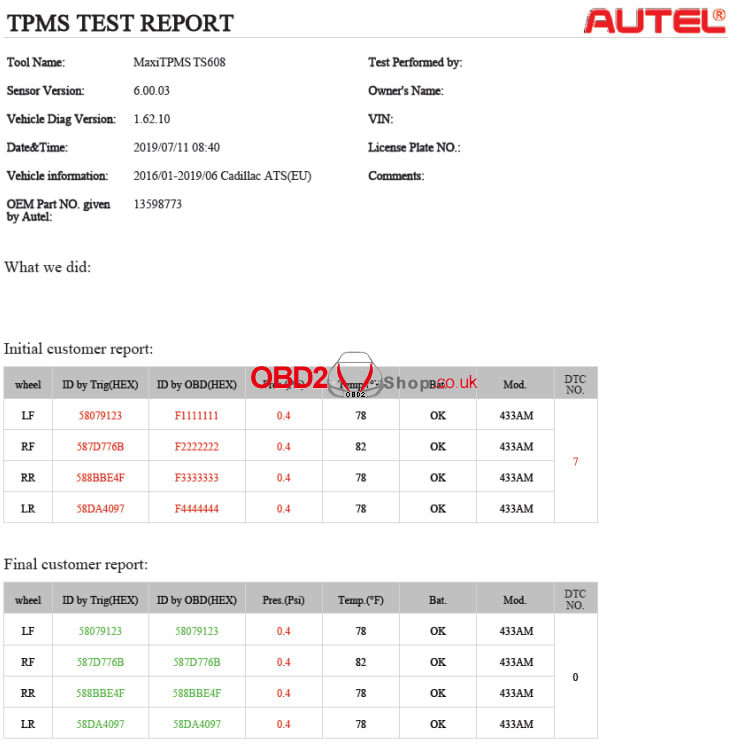 Yanhua Mini ACDP + Module 29 can support reading Audi Gen5 encrypted version BCM2 IMMO data by ICP for key adding. Also, it can read unencrypted and partially encrypted version BCM2 IMMO data by OBD. Follow the steps below to learn how to do it. Step1. OBD Identify Mini ACDP >> VW >> Audi 5th BCM2 IMMO >> Step1: OBD identify >> Read vehicle info Connect ACDP to vehicle OBDII! If have a working key, please insert it to/ near the ignition switch and light the meter! If all key lost, please open the car light and press the brake several times! Press "Continue". Confirm the system information, and press "OK". Save vehicle data file: OK >> OK Please confirm the system information: The working key has been detected, it's an encrypted BCM2 version. Need to read IMMO data by ICP mode, no need to synchronize data. Press "OK". 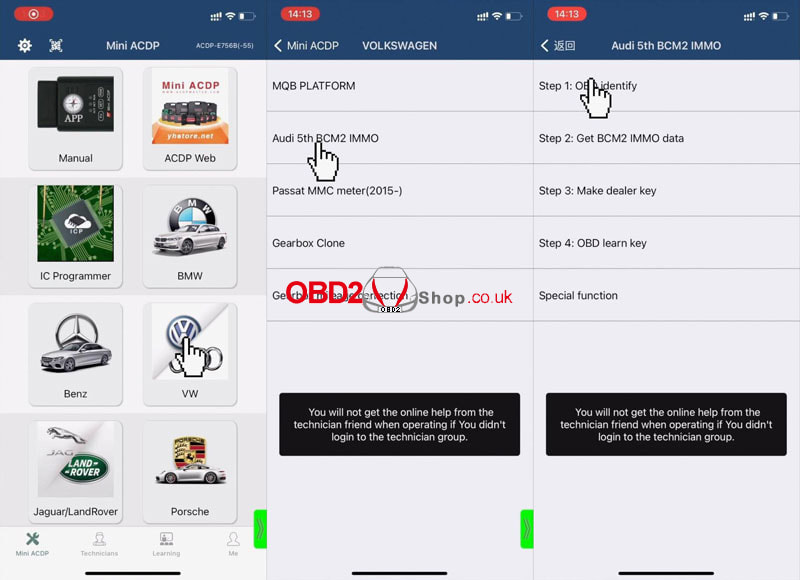  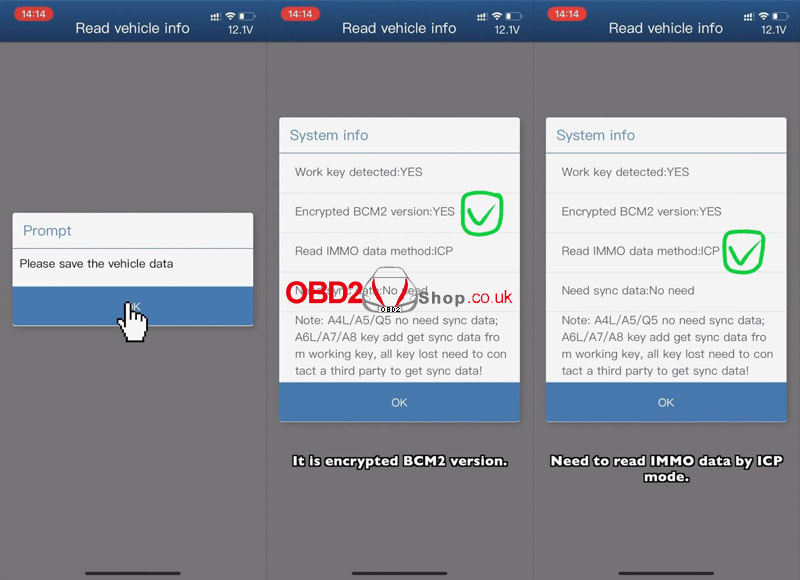 Step2. Get BCM2 IMMO Data Step2: Get BCM2 IMMO data >> ICP read IMMO data - BCM2 encrypted(according to the system info in step1) >> Help Here to check the disassembly instructions: Remove the BCM2 module from the trunk of the vehicle. When removing the BCM2 plugs, please remove the no.1 plug at first, then no.2, and finally other plugs. A4L/A5/Q5 2014- add key or lost all key(all version) >> Help Here to check the detailed connection steps: Required Accessories OBP+ICP adapter ACDP host 20PIN cable BCM2-A interface board BCM2 module 1. Install the interface board fixing studs. Install the BCM2-A interface board according to D1, D2, and D3 positioning points. Fasten the PCB lock and lock the studs. 2. Connect the 20PIN cable to the OBP+ICP adapter. Short the jumper cap to the "CAN-R-NC" end of the adapter. Please note that if you use the BCM2-B interface board, you need to short the jumper cap to the "CAN-R-JOIN" end. 3. Connect to Mini ACDP and power it on. 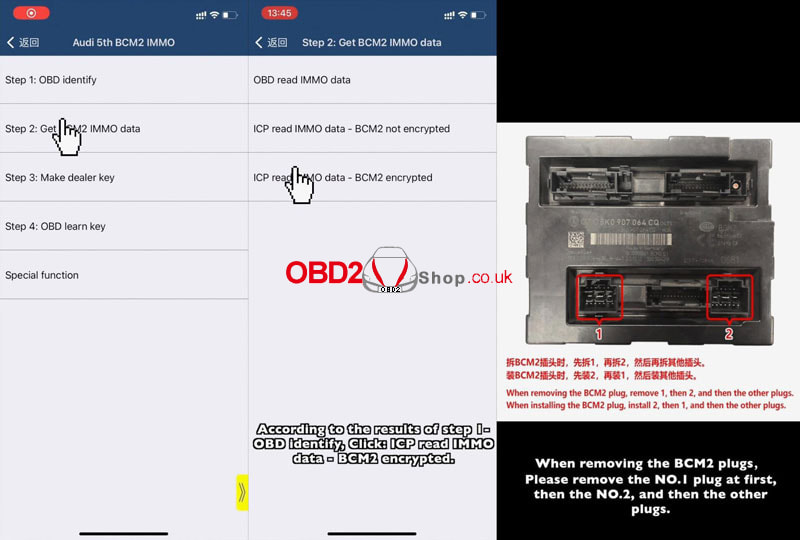 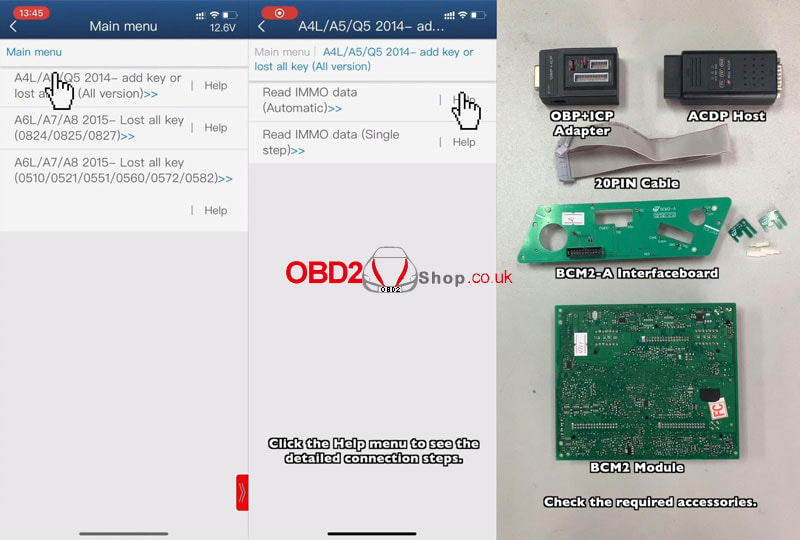 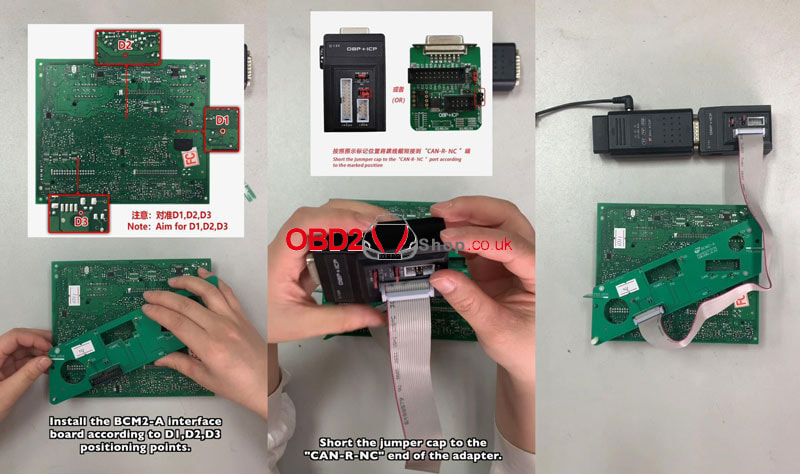 Read IMMO data(Automatic) >> Continue Note: Please DO NOT move the module, harness, and power during the operation! Continue >> Continue About to start getting data from the server. please keep the network open during the process. Save BCM2 CONF data. Save BCM2 IMMO data. Save BCM2 serve data. Confirm the system information, and press "OK". Ready to write data, DO NOT power off or unplug the device during the operation! Press "OK". Get BCM2 IMMO data finished, please restore the BCM2 module and check whether the vehicle status is normal! OK >> OK When installing the BCM2 plugs, please install the no.2 plug at first, then the no.1, and finally the other plugs. Go back to the main menu. 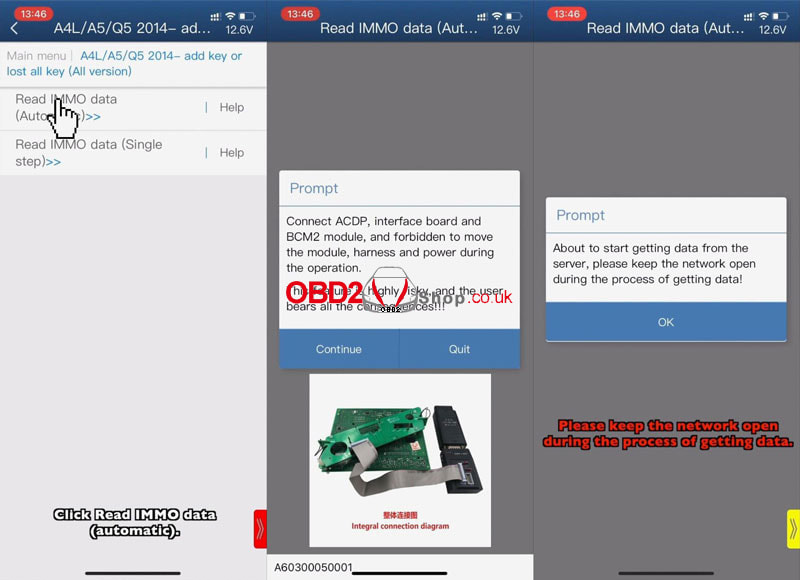  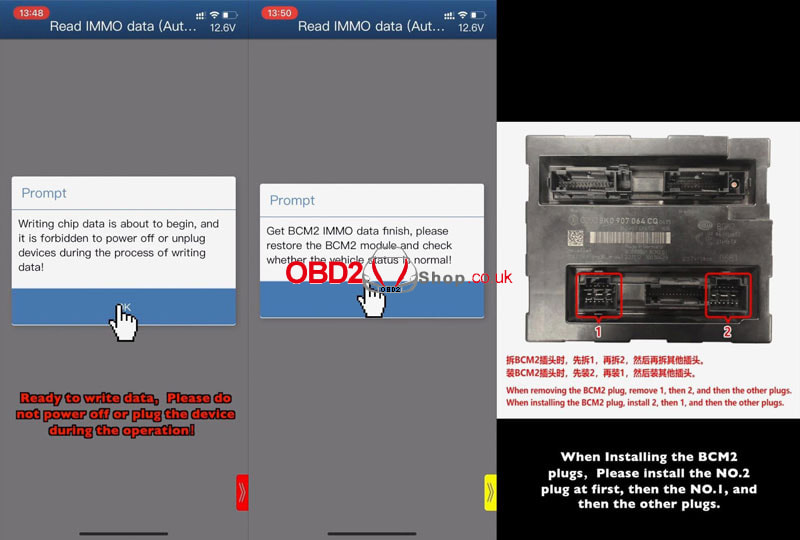 Step3. Make Dealer Key Step3: Make dealer key >> A4L/A5/Q5 add a key or lost all key - Don't need working key Connect ACDP to the BAV-KEY adapter and place the blank key correctly on the BAV-KEY adapter. Press "Continue". Confirm the key information. Select BCM2 IMMO data obtained in step 2. Ready to program keys, please DO NOT power off or unplug the device during the operation! Make dealer key finish.  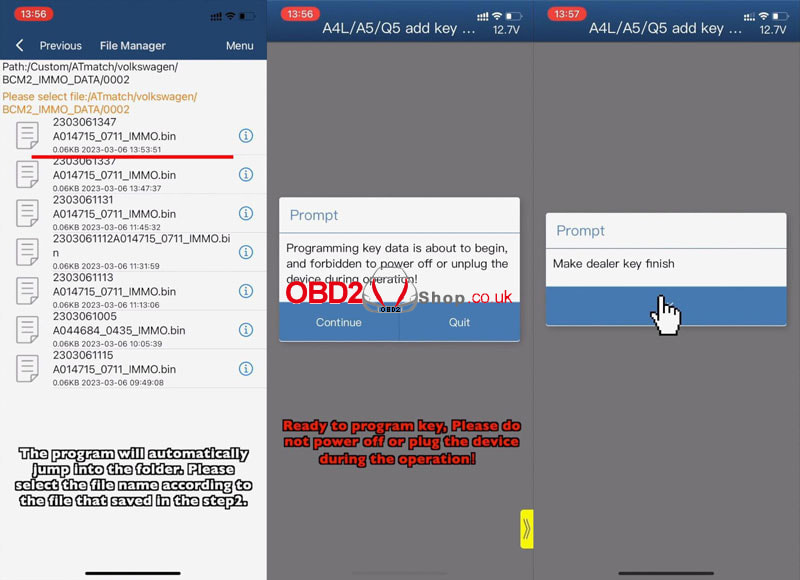 Step4. OBD Learn Key Step4: OBD learn key >> Start learn key Connect ACDP to vehicle OBD!!! If have a working key, please insert it to/ near the ignition switch and light the meter! If all key lost, open the headlight and step on the brake! Confirm the system information. Select BCM2 IMMO data obtained in step 2. Please enter the number of learning keys: 2 1. Have all the keys of the current car ready, the unlearned keys will not be able to start the car. 2. Insert the key to be learned into the ignition switch in turn, and when a key is successfully learned, the X of X/Y in the instrument screen will be added by 1. 3. If there is only an induction coil, you need to close and open the start button after each key learning. 4. Insert a key that needs to be learned into the ignition. Press "Continue". The first key learning is finished, please insert the second key. The second key learning is finished. Done. 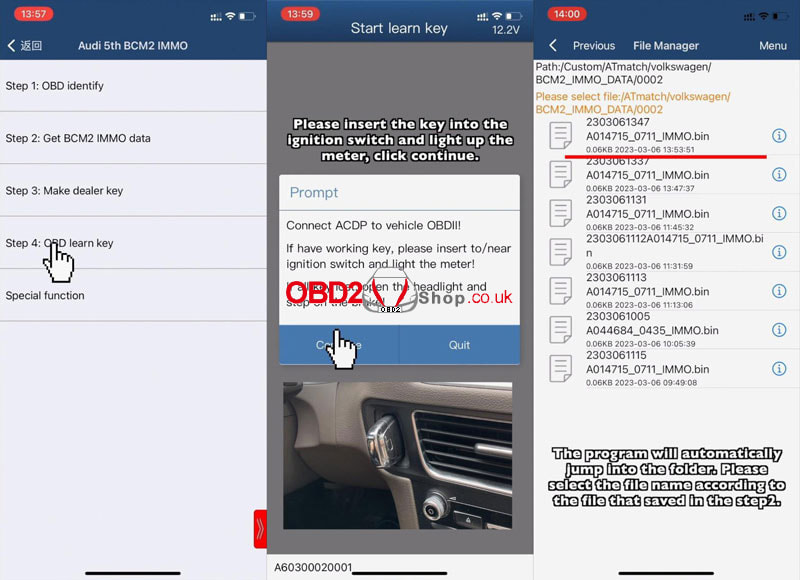 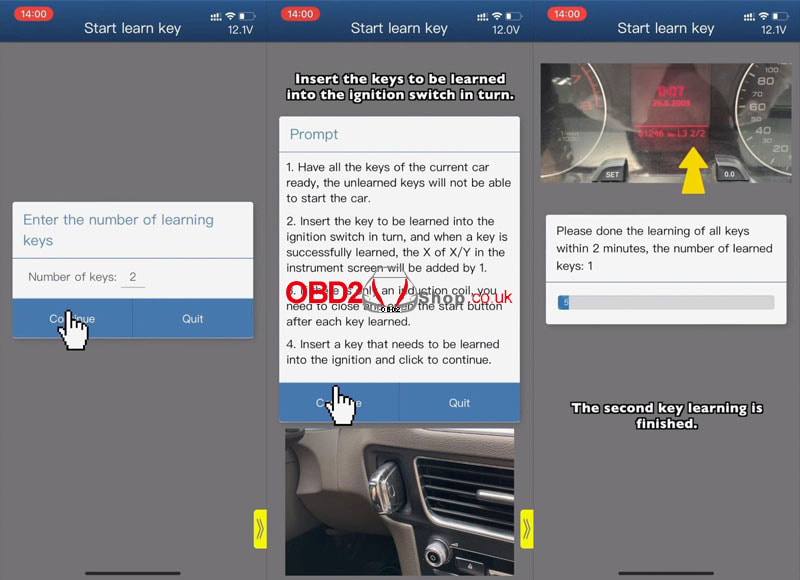 This article will simply show you how to use Lonsdor LT20-04NJ 8A+4D Toyota & Lexus smart key, and a k518ise key programmer will be used here. Turn on K518, click "Push function", then select "Special functions" >> "Key settings" >> "LT smart key". Then we click "Get Version Info" to view the information of this smart key. 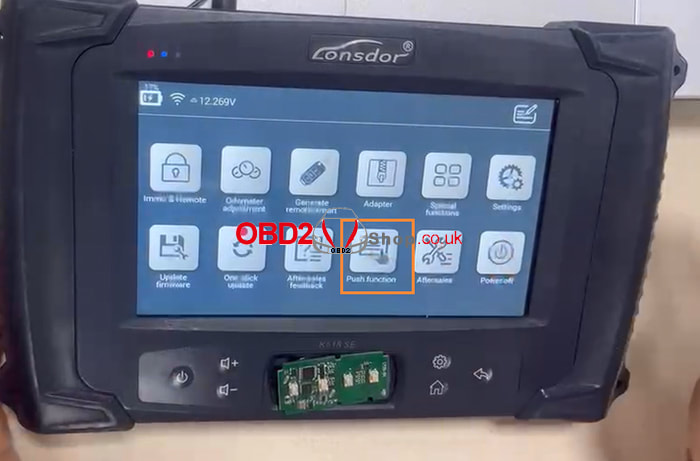 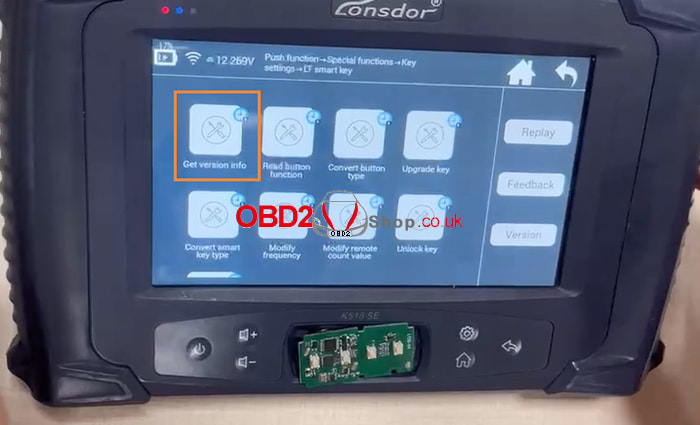 Please place the smart key horizontally on the card slot, and click "OK" to continue. 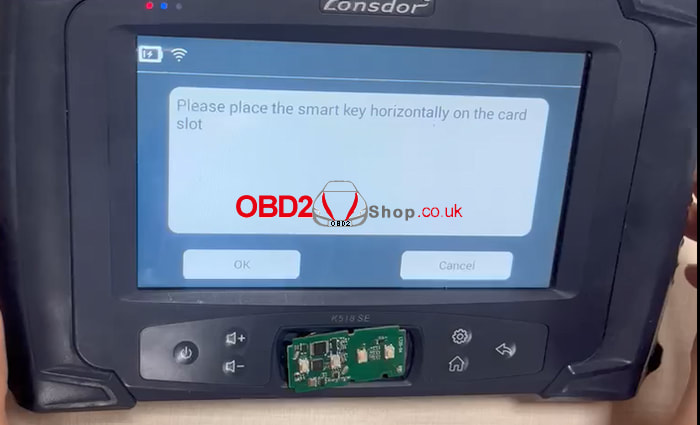 The following picture is the key information. 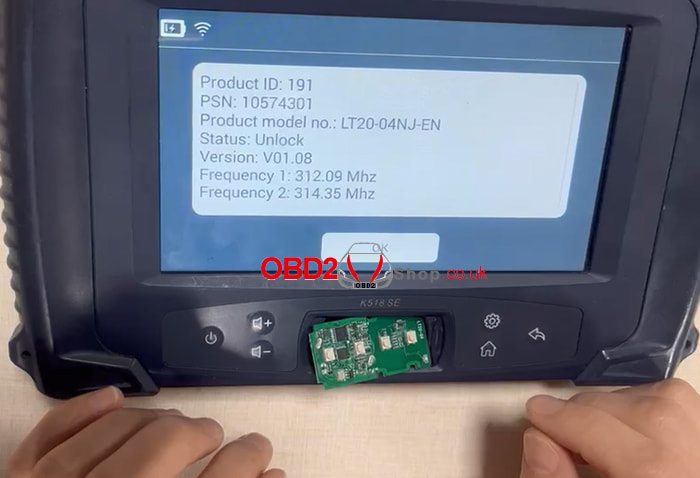 Next, we choose the "Convert smart key type" function to test. 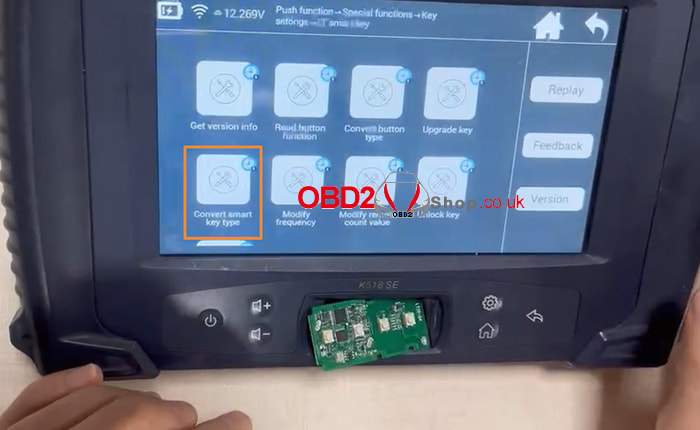 Follow the prompts to insert the smart key into the card slot. This feature requires an internet connection. Note: During the key reading process, the error message "Failed to obtain key data" may appear. Try adjusting the Smart Key position more. 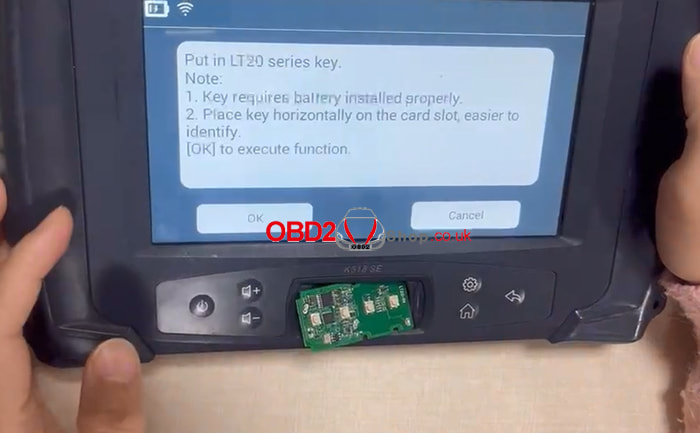 The smart key type has "8A" and "4D" to choose from, here we choose "Generate 8A". 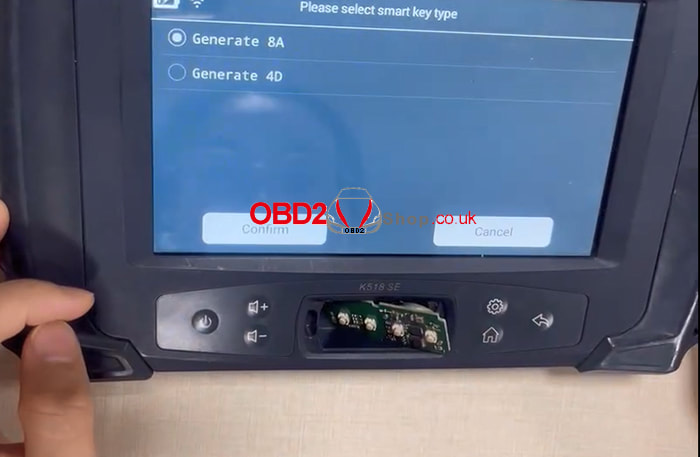 Select "2110 (P4: 00 00 A8 A8)". 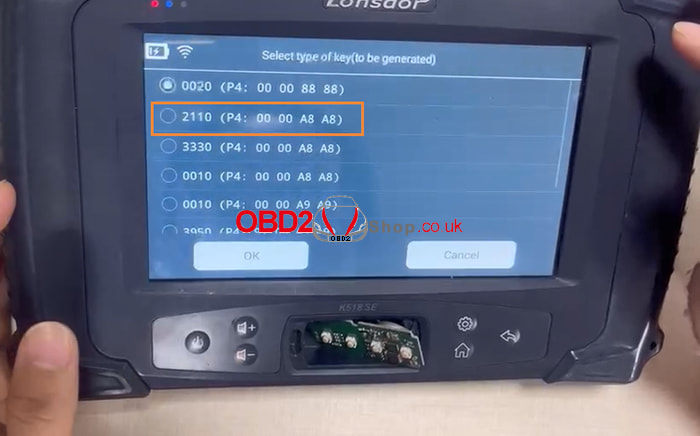 Select the PKE frequency and convert the button type to complete the test of this function. 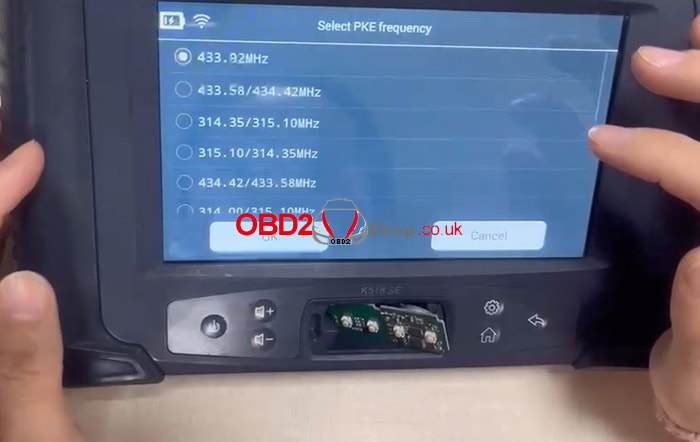 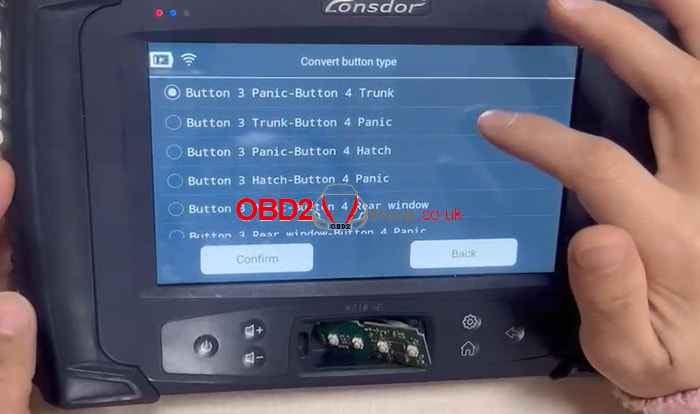 For more information about Lonsdor LT20-04NJ Smart Key, please check https://www.obd2shop.co.uk/wholesale/lonsdor-lt20-8a-4d-smart-key-pcb-for-toyota-lexus.html
FoxFlash Update on 15th, Mar: added to perform FCA group Continental GPEC2, GPEC3, GPEC4LM, GPEC2A ECU on boot.  New Added Functions: Boot Read Boot Write New Added ECU List: Continental GPEC2, GPEC3, GPEC4LM, GPEC2A Chrysler 200 Continental GPEC3 BOOT Chrysler 200 Continental GPEC3 BOOT Chrysler 300 MK2 Continental GPEC2A BOOT Chrysler 300 MK2 Continental GPEC2A BOOT Chrysler Aspen Continental GPEC2A BOOT Chrysler Grand Vojager Continental GPEC2A BOOT Chrysler Town & Country Continental GPEC2A BOOT Dodge Avenger Continental GPEC2A BOOT Dodge Avenger Continental GPEC2A BOOT Dodge Challenger Continental GPEC2A BOOT Dodge Challenger Continental GPEC2A BOOT Dodge Charger Continental GPEC2A BOOT Dodge Charger Continental GPEC2A BOOT Dodge Dart Continent GPEC3 BOOT Dodge Durango Continental GPEC2A BOOT Fiat Tipo Continental GPEC4LM BOOT Fiat Toro Continental GPEC3 BOOT Fiat Toro Continental GPEC4LM BOOT Fiat 500X Continental GPEC3 BOOT Fiat 500X Continental GPEC4LM BOOT Jeep Cherokee Continental GPEC3 BOOT Jeep Cherokee Continental GPEC4 BOOT Jeep Compass Continental GPEC3 BOOT Jeep Cherokee Continental GPEC4LM BOOT Jeep Gladiator Continental GPEC2A BOOT Jeep Gran Commander Continental GPEC4 BOOT Jeep Renegade Continental GPEC3 BOOT Jeep Wrangler Continental GPEC4 BOOT  How to update FoxFlash Software?
Run the FoxFlash Manager, and click the "Download" button until all is done. www.obd2shop.co.uk
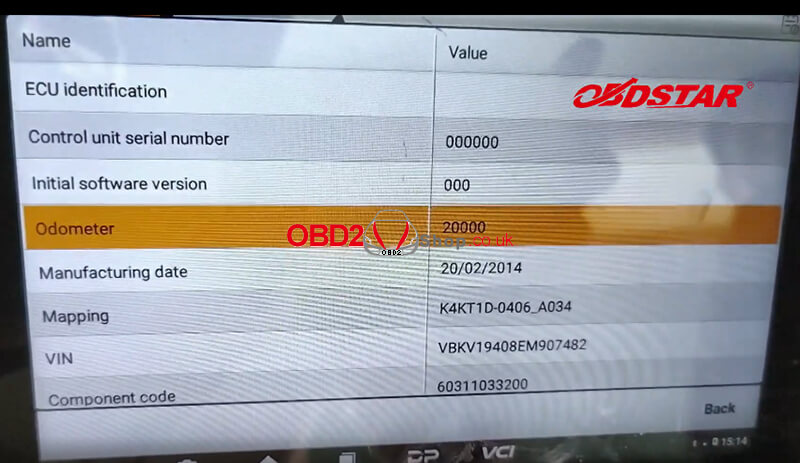
This article will show you how to use OBDSTAR MS80 motorcycle diagnostic tool to adjust the mileage for the KTM 1190 Adventure 2014.

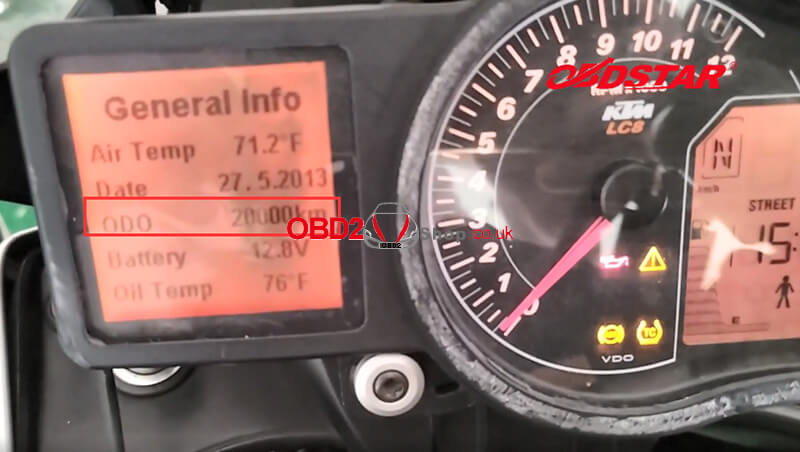
First, we can see that the mileage displayed on this motorcycle's instrument is "61000" KM.

We can also check the current mileage of the motorcycle through the MS80 tool, the operation path is as follows:
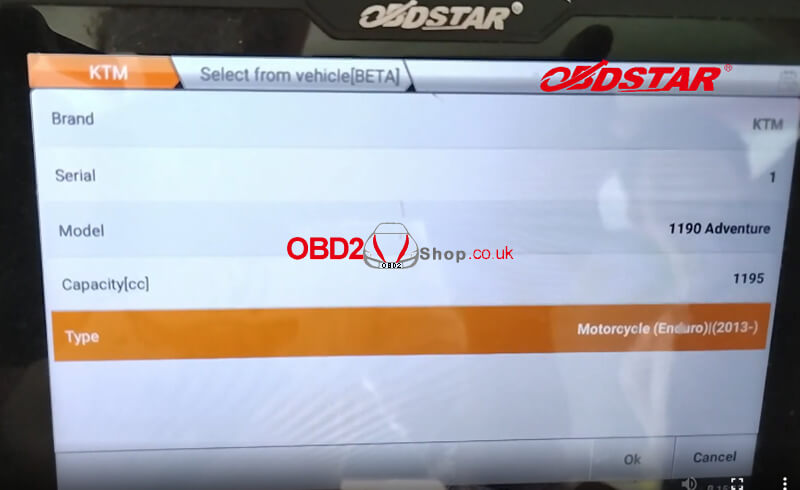
Enter MOTO Diag, enter "KTM" in the search box, and select "KTM V31.18" >> "Diagnosis" >> "Select from vehicle". Select "1190 Adventure" and click "OK" to continue. 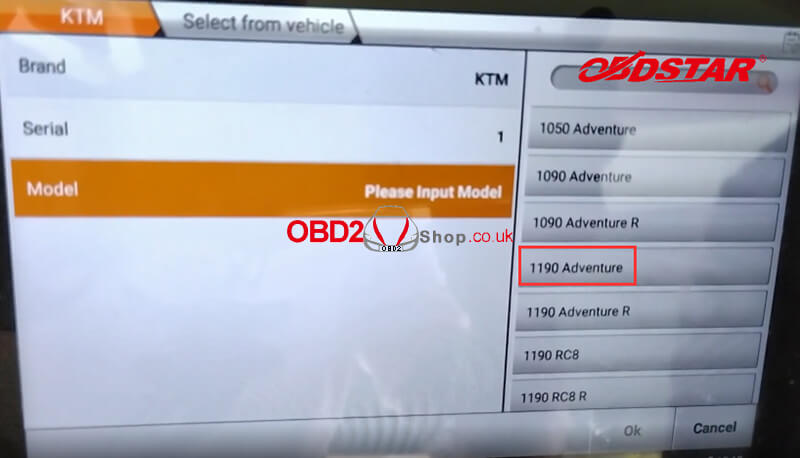
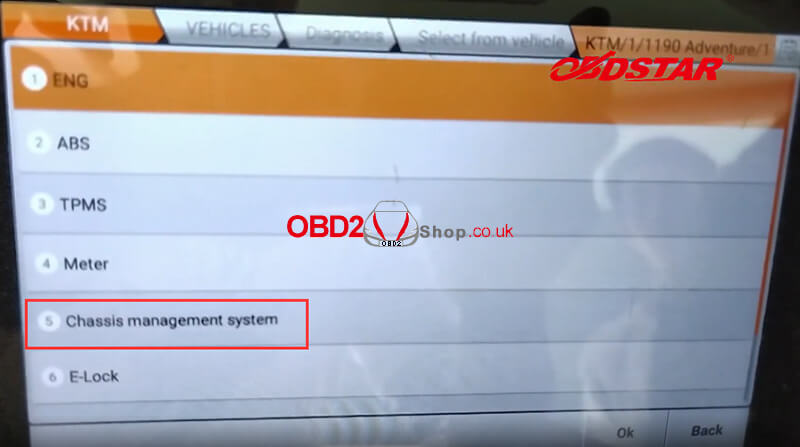
Select "Chassis management system">>"Eldor MCU(2013-)>>"ECU information".
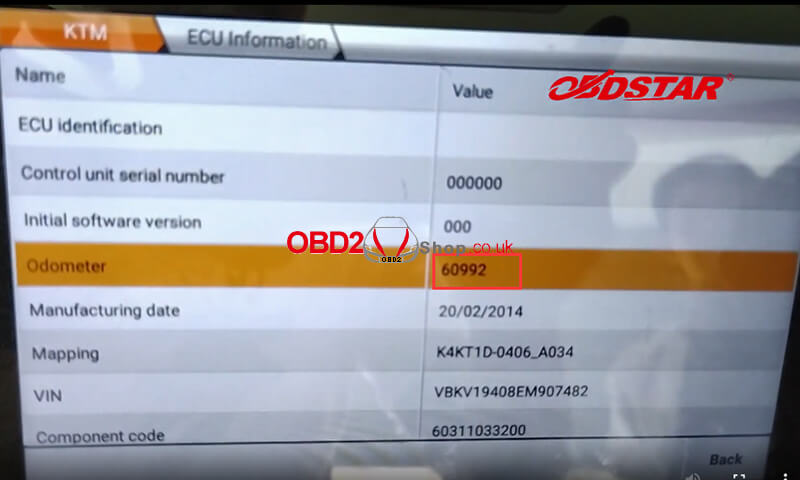
Here you can see that the current mileage of this car is "60992".
Next is the mileage adjustment process.
Click "Back" to go back to the main interface, click "ODO Meter" >> "KTM V31.04" >> "Select from vehicle (BETA)". 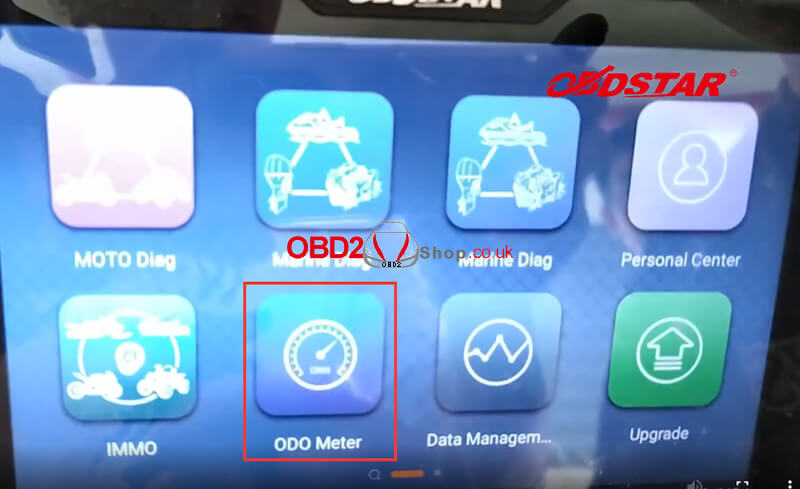
Also, select "1190 Adventure" and click "OK" to continue.
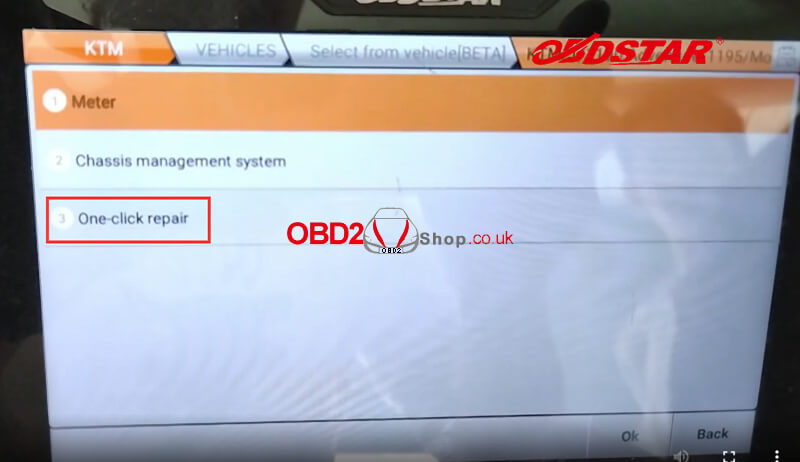
Select "One-click Repair" and enter the new mileage, here we enter "20000".
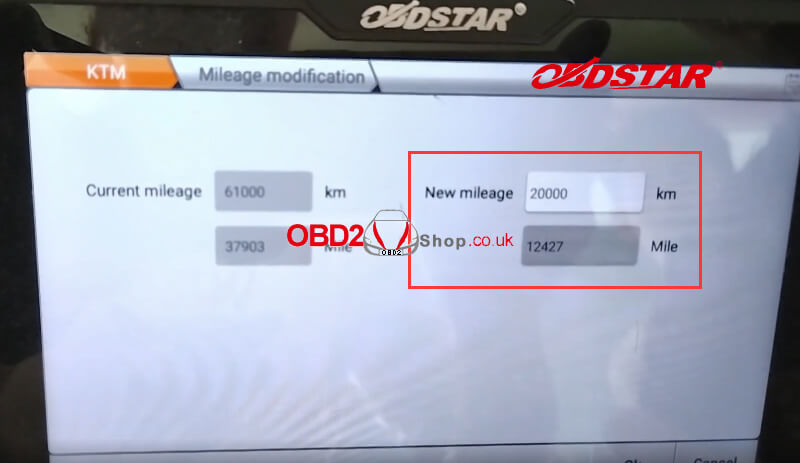
The mileage has been set successfully!
The video for reference:
This post will demonstrate how to use the immobilizer data processing function of Maxiim KM100. First, you need to upload immobilizer data from your vehicle using IM508 or IM608, this post won't show that process but you need to upload that data to your computer and import it into KM100 key tool using a USB cable. So now we can tap on the "Special Function" and then the "Immobilizer Data Processing" at the top. 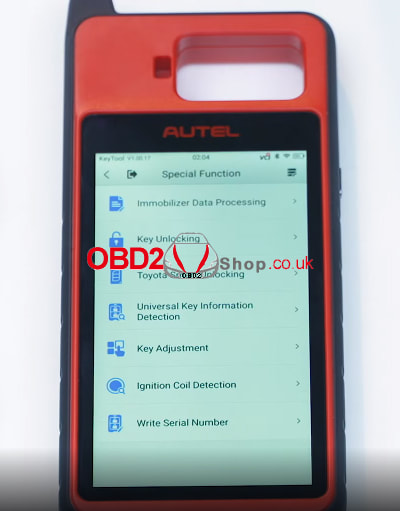 Find your vehicle by selecting the region and finding the make. "Europe" >> "Fiat" >> "Bravo" >> "2009-(95160)" Once you have your vehicle selected the screen will display some information. 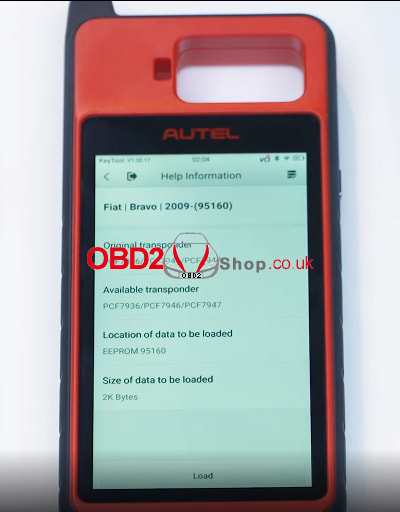 Tap "Load" to load the data you imported into the KM100, this file will pull up your vehicles and mobilize your data information and help you generate a new key with it. 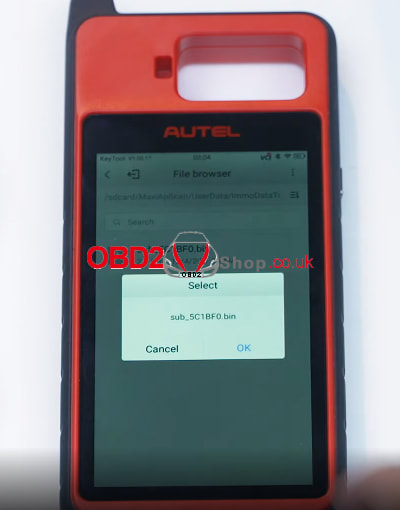 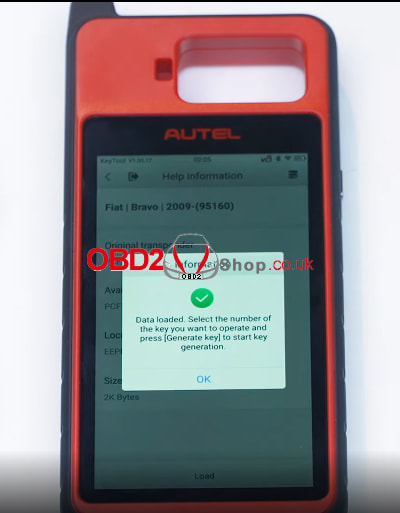 Place a blank key in the slot at the top of the device. Tap one of the unused key locations on the screen and press "Generate key" to start the key generation. 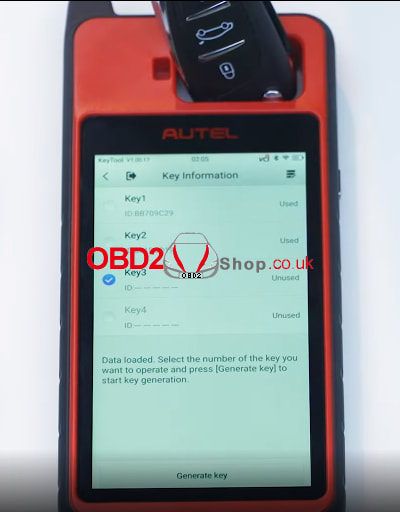 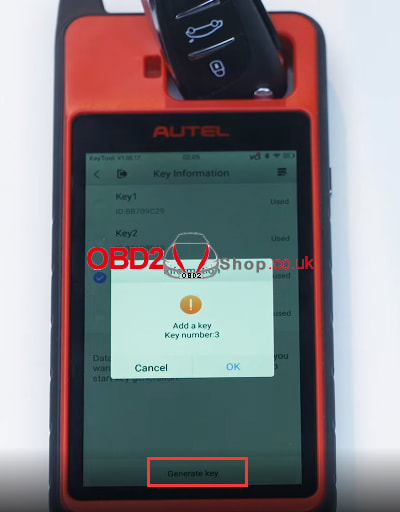 Save the newly generated key file by renaming it. 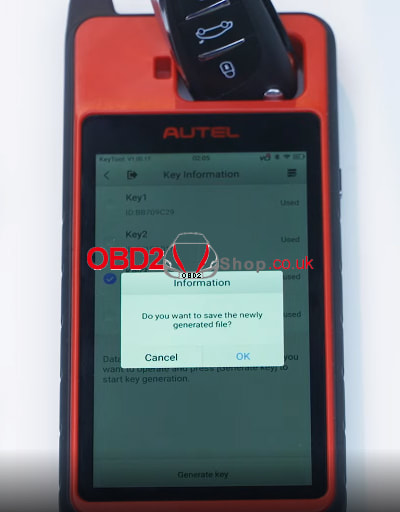 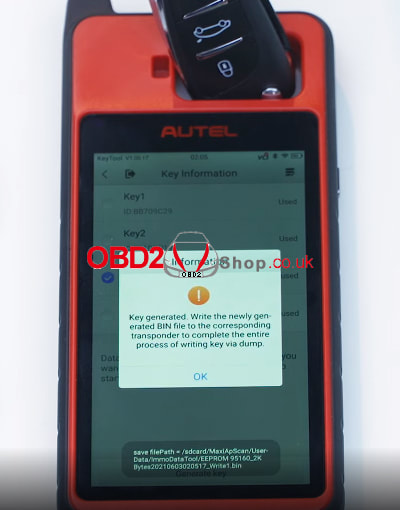 Now we can use the KM100 key tool to pair the newly generated key with your vehicle.
For more technical support about Autel Maxiim KM100, please follow http://blog.obd2shop.co.uk/ |
