|
How to use Xhorse Dolphin XP005 Key Cutting Machine to duplicate a 2014 Nissan Versa NSN14 key? Now I’m gonna make a quick demo to show the steps. First of all, it requires an original key & a key blank. Fix the original key flat on M1 clamp. 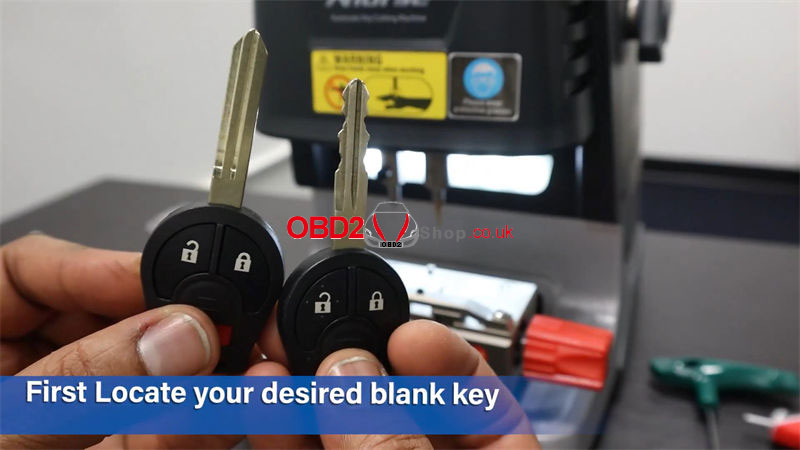 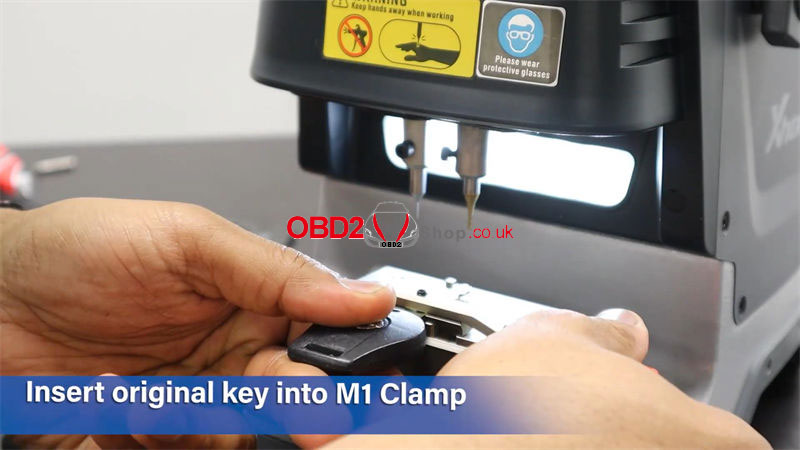 Open Xhorse app to connect Dolphin XP005 via Bluetooth, press Vehicle database >> Nissan >> Versa >> E12(After 2013) >> NSN14 >> OK Install M1 clamp tip align position 4. This type recommend use 1.5mm to cut. Decode key >> Continue 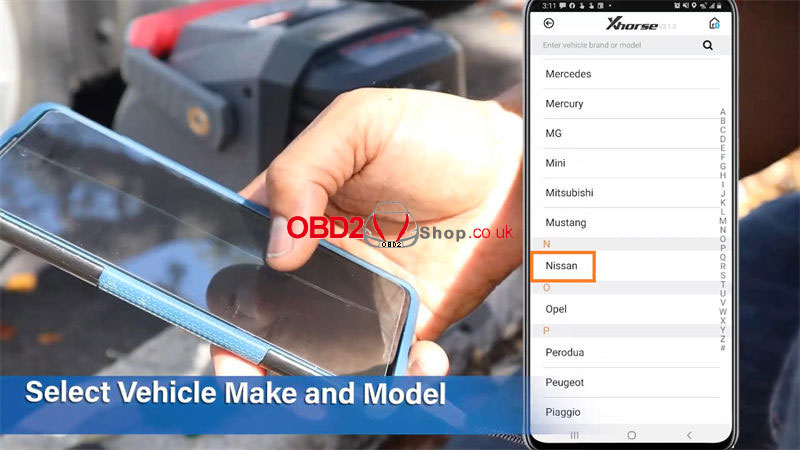  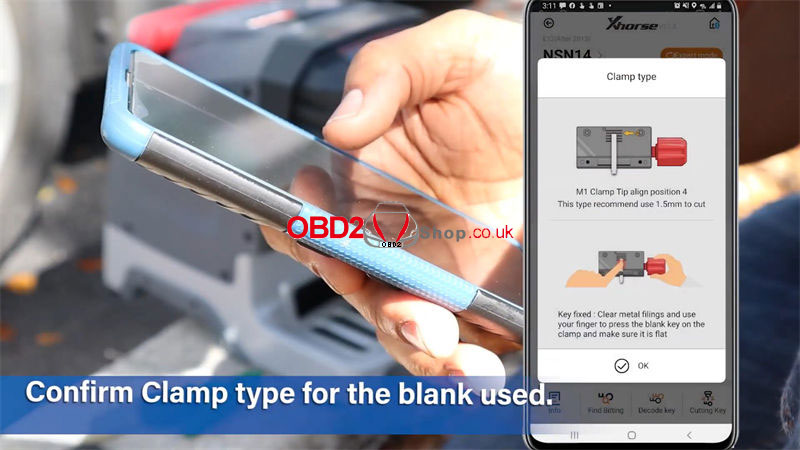 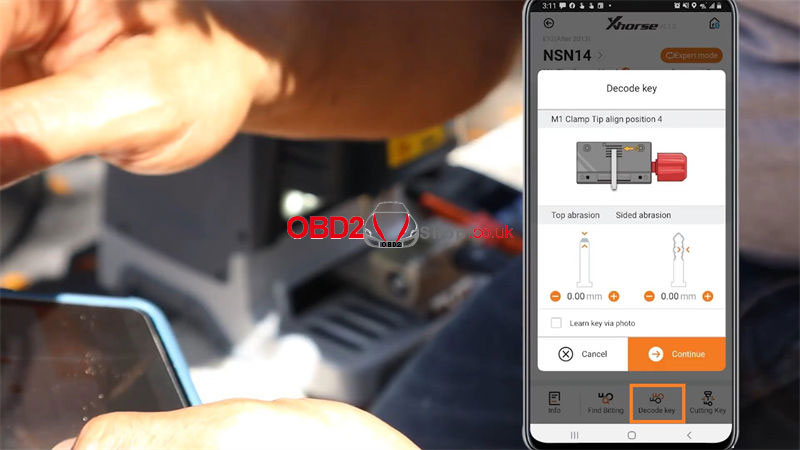 Dolphin XP005 machine starts to decode... (The duplicator will check to make sure alignment and position are good before cutting, if you get an error, adjust and retry.) Decode key success. It will tell the bitting codes of original key, confirm if the cut matches original key. If it is correct, remove the original one to insert key blank on M1 clamp. Press cut to duplicate. Dolphin XP005 machine starts cutting key... 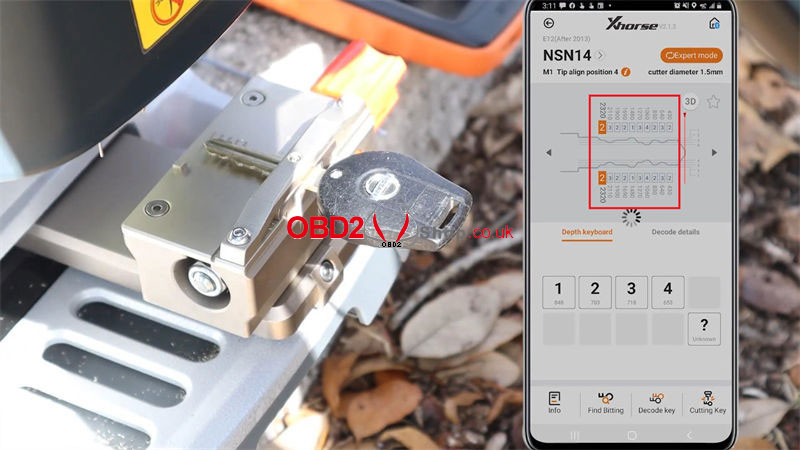 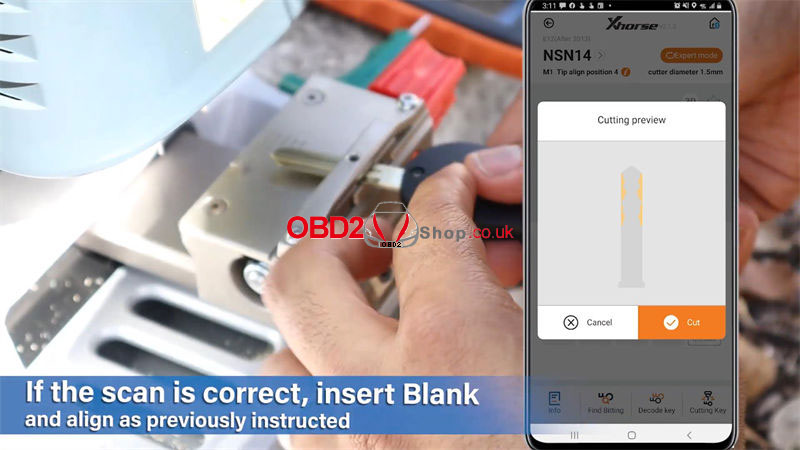 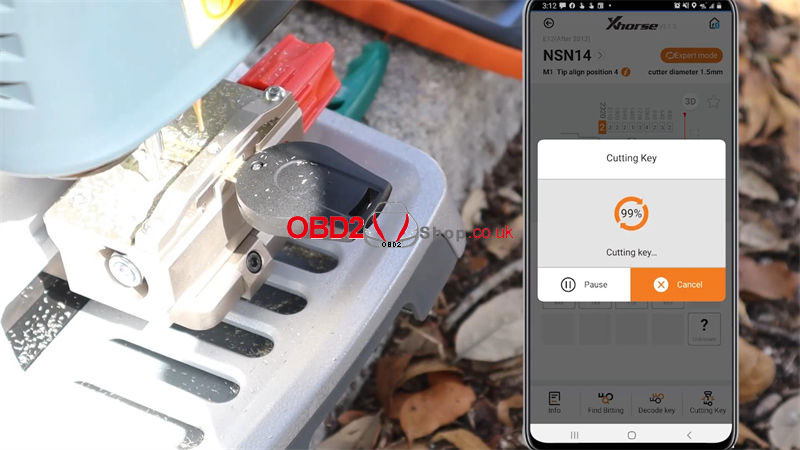 Wait processing until 100%. Cutting key complete! Brush off the new key and take out to have a test. It looks pretty good, it can switch the ignition. 2014 Nissan Versa NSN14 key duplication is successful! 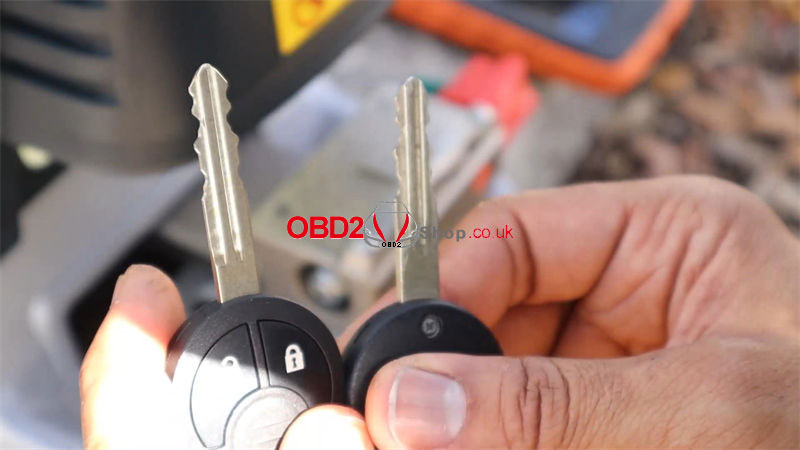 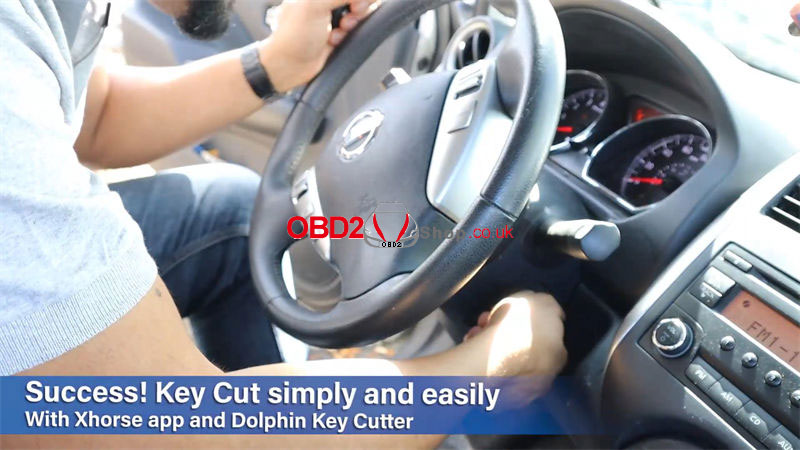 Key cutting is such simple and easy with Xhorse app &Dolphin XP005 Automatic Machine.
https://www.obd2shop.co.uk/
0 Comments
Buy V84 Iprog Pro ECU Programmer now can upgrade to V85 Iprog latest version. Where to download latest version V85 Iprog version: https://share.weiyun.com/puRcPZ6G Password: oipqga Operating systems: Windows 7 How to install V85 Iprog in Win7? 1. Unzip “iprogV85” to C disk; 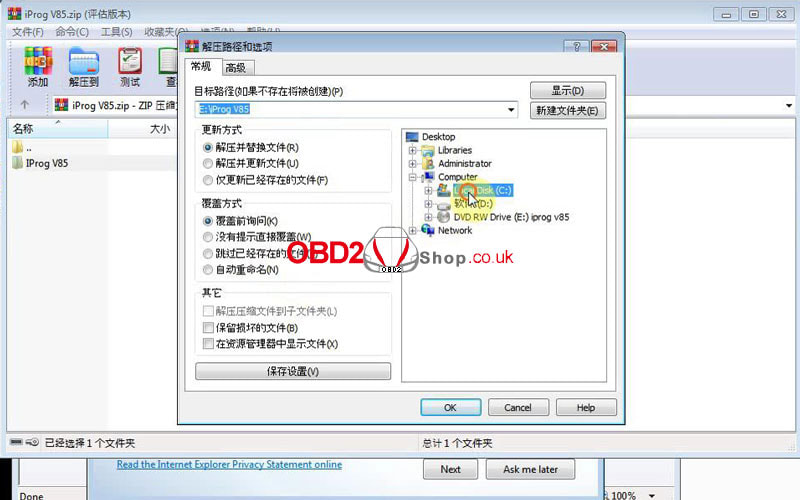 2. Computer >> Manage >> Device manager >> Other devices >> Iprog universal programmer >> Update driver software >> Browse my computer for driver software >> Select “iprog_win2k_win7_x86-x64_version2”, click “OK”>> Next >> Install this driver software anyway; 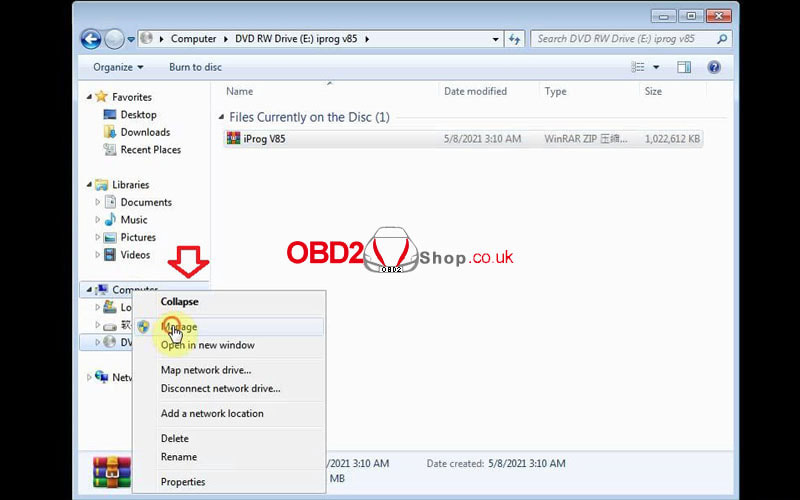 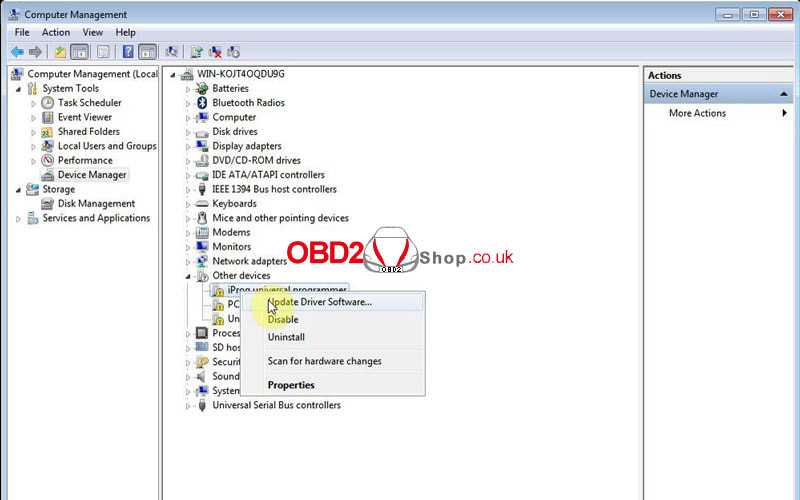 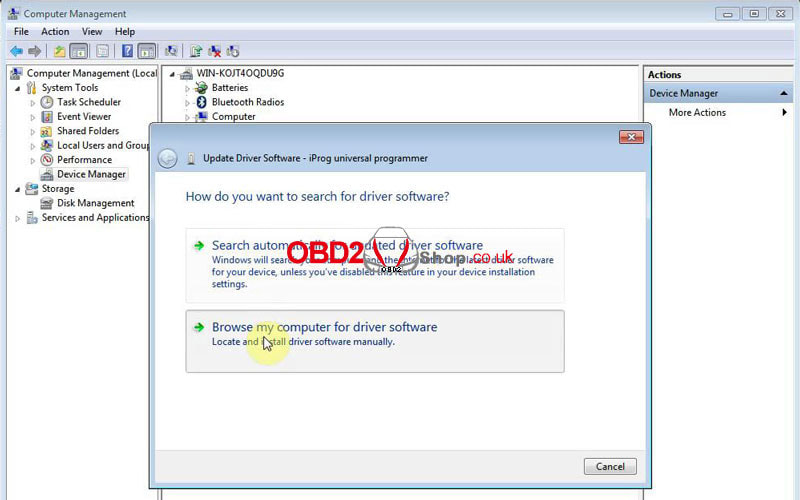 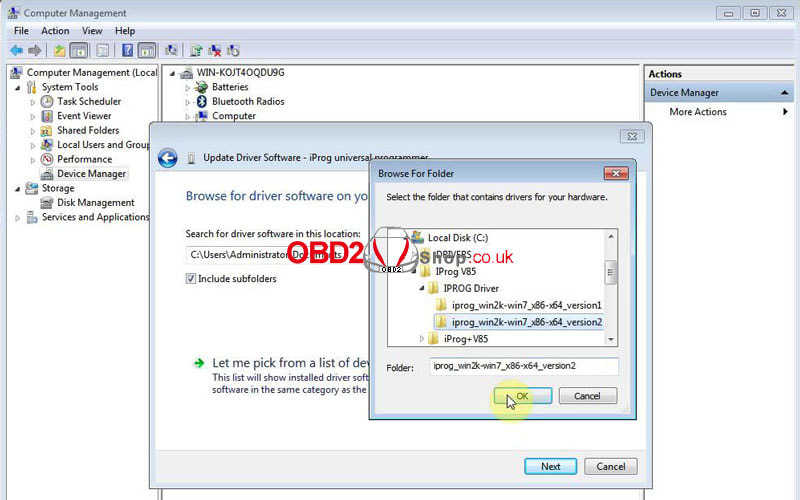 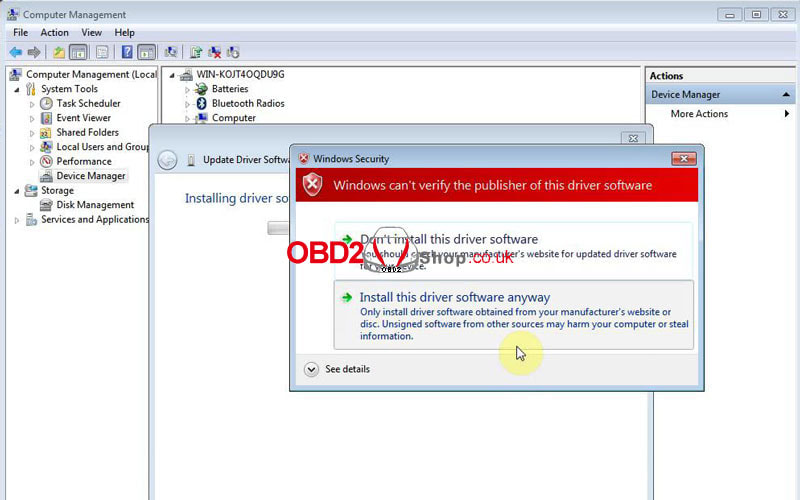 3. Open “IprogProV85” after installation completed, now you can start to program. 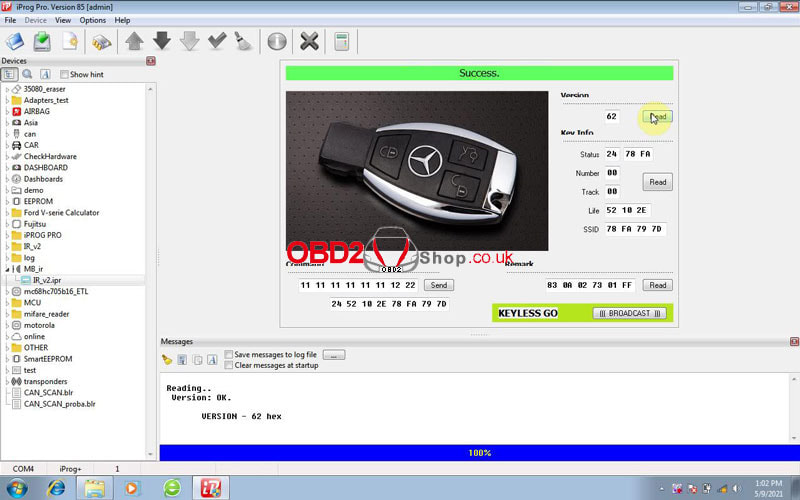 How to use Iprog Programmer + PCF79xx SD-card Adapter to read & write key? 1. Insert PCF79xx SD-card Adapter to Iprog programmer, connect with a key & computer via cable; 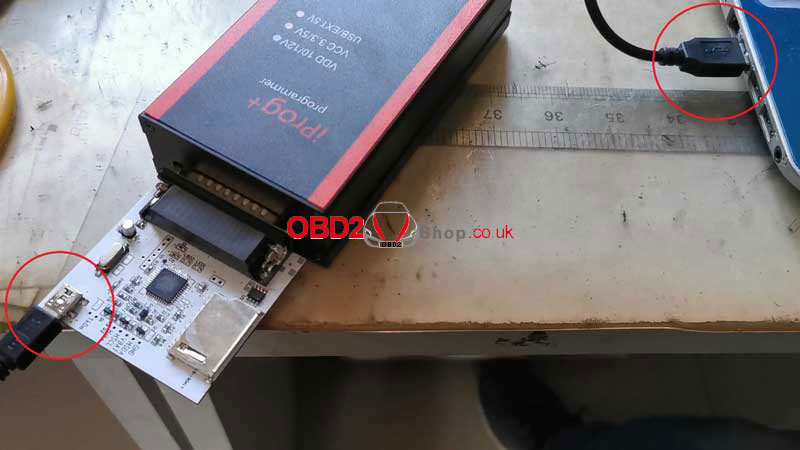 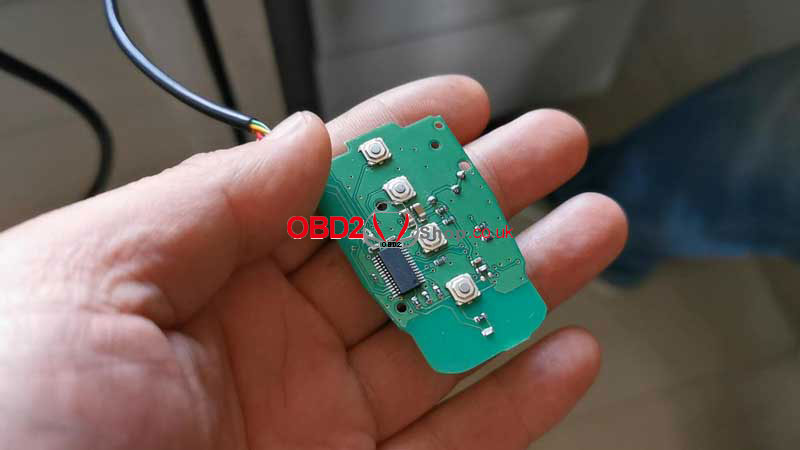 2. Start Iprog software, follow the path to select: MCU>> PCF79xx + SD; 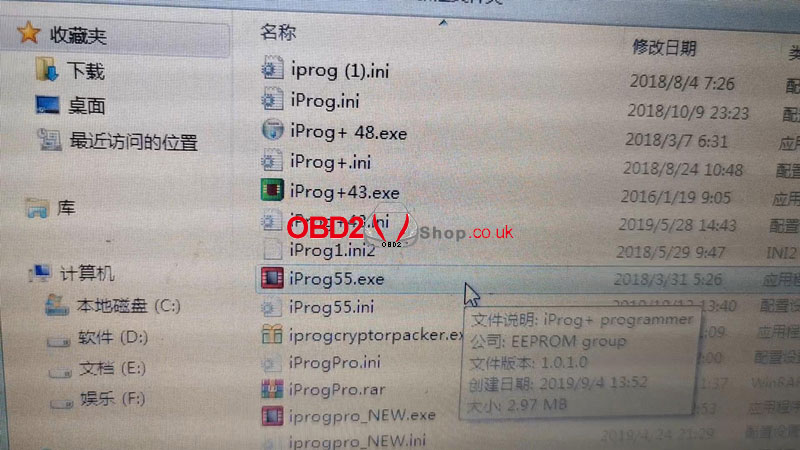  3. Select PCF type, click “Connect”, the green light of adapter will be on, which means connection is successful. 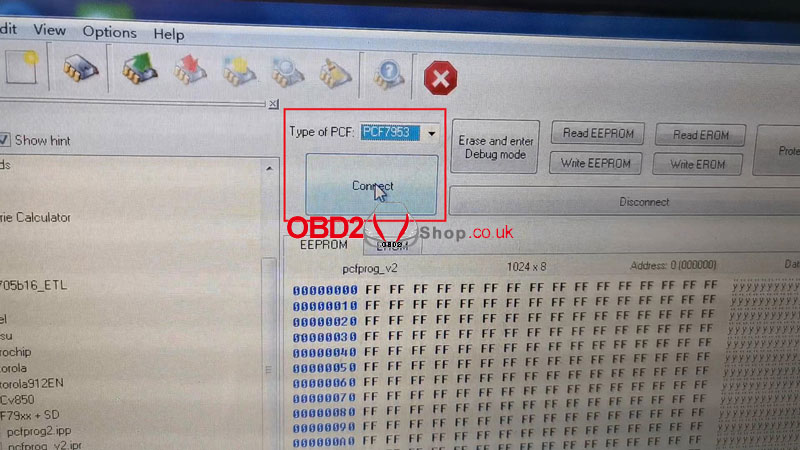 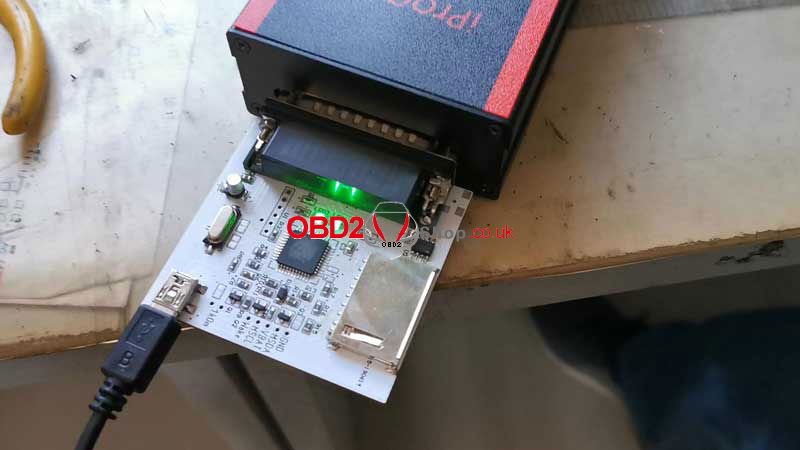 Now you can continue to read & write EEPROM.
This is how to install & use Iprog Programmer + PCF79xx SD-card Adapter. https://www.obd2shop.co.uk/ There is a check engine warning light coming on the Hyundai i30 dashboard. So I’m gonna use Launch X431 V Diagnostic Tool to find out the problem. 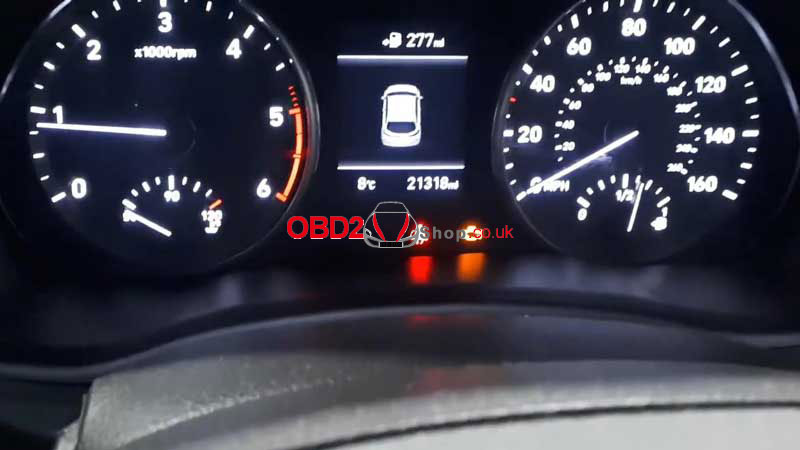 Connect Launch X431 V with OBD, press Local diagnose >> Hyundai >> OK >> 16 PIN DLC >> Automatically test >> OK >> System selection >> ECM(engine control module) >> Read fault code It tells a fault code: P014C, 02 sensor slow response - rich to learn bank 1 sensor 1. 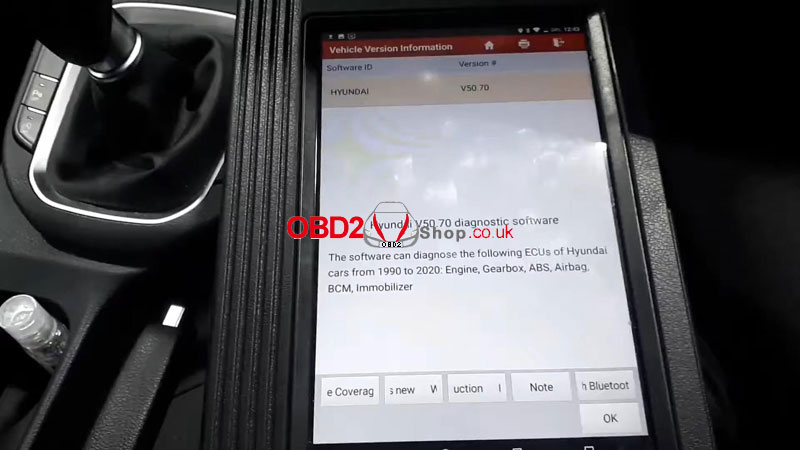 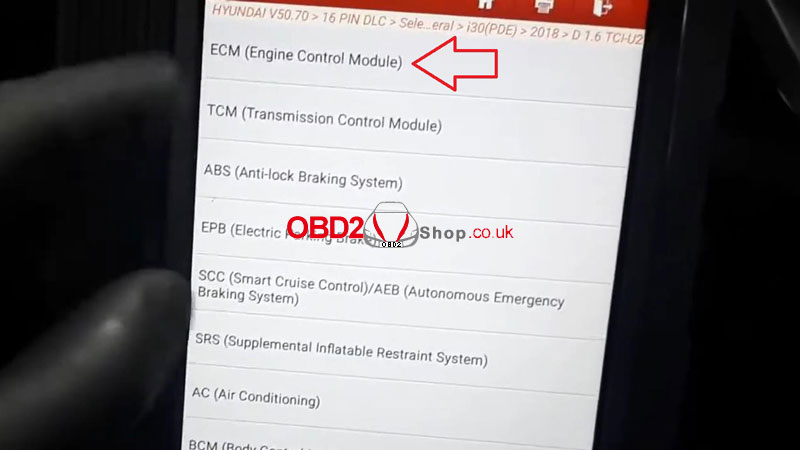 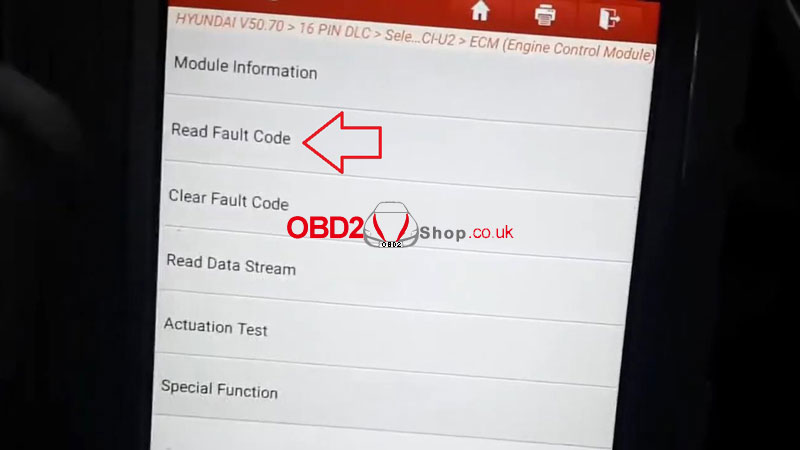 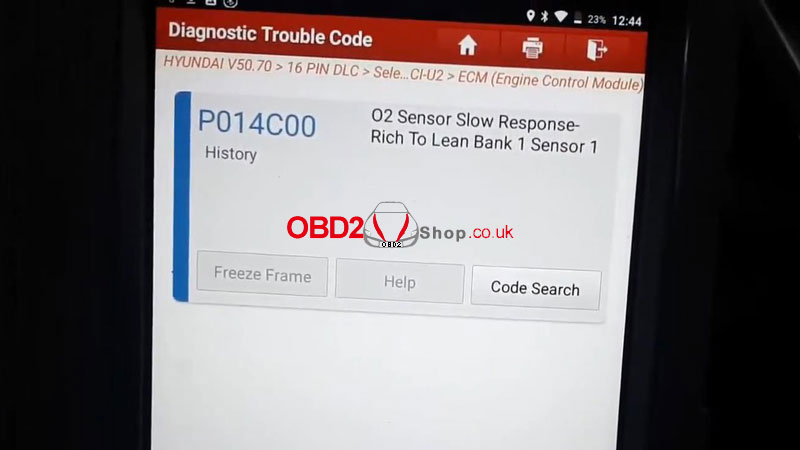 It means the oxygen sensor is responding very slow passing description and usually this is due to a faulty sensor or a clogged sensor. So I’m gonna go under the bonnet and take the oxygen sensor out. As you can see, the oxygen sensor is absolutely clogged, so I’m gonna blow it with air gently. When it’s clean, it’s a massive difference, refit it back into the car. 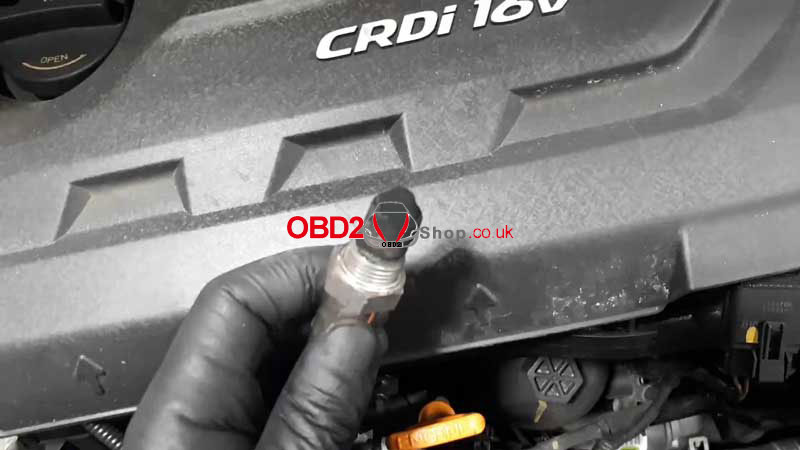 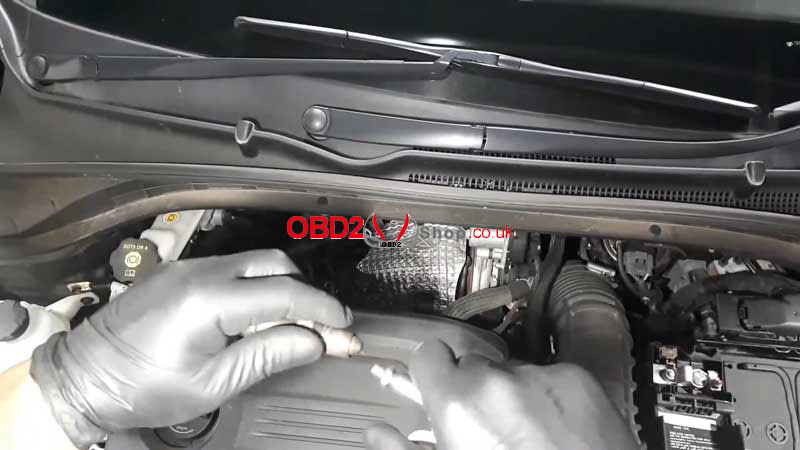 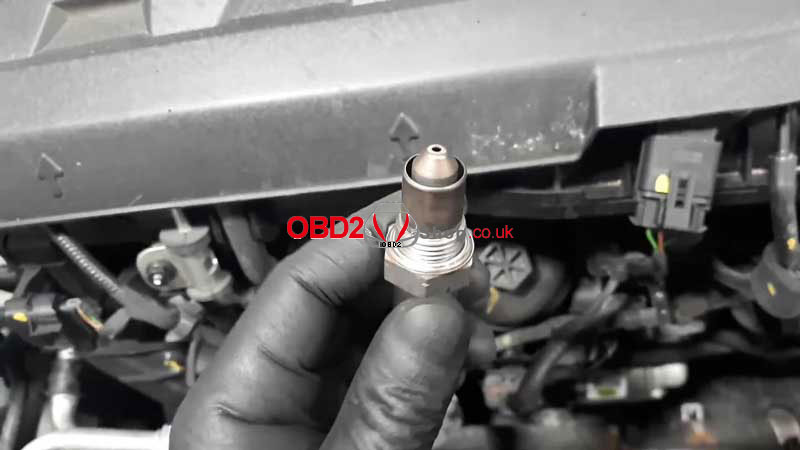 Let’s go back to erase the fault code and have a road test. Clear fault code >> Yes >> OK Clear fault code completed. After 30 minutes road test, it’s about half an hour and 36 miles. Let’s try read fault code again to see if it’ll come back. Alright, there is no trouble code, and the check engine light has gone. 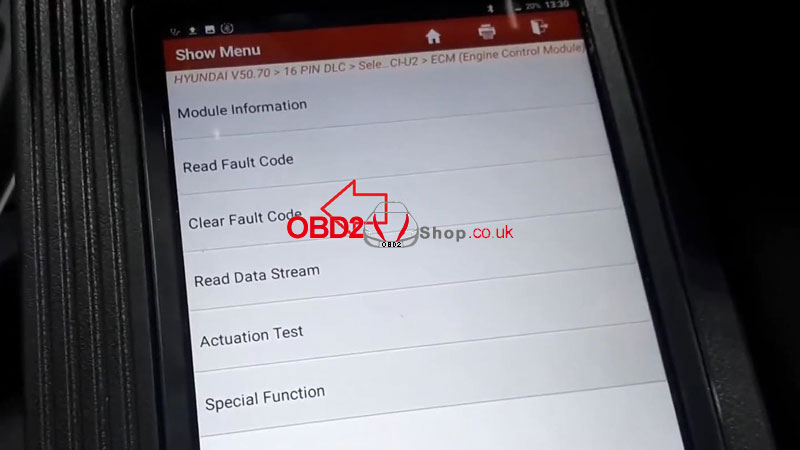 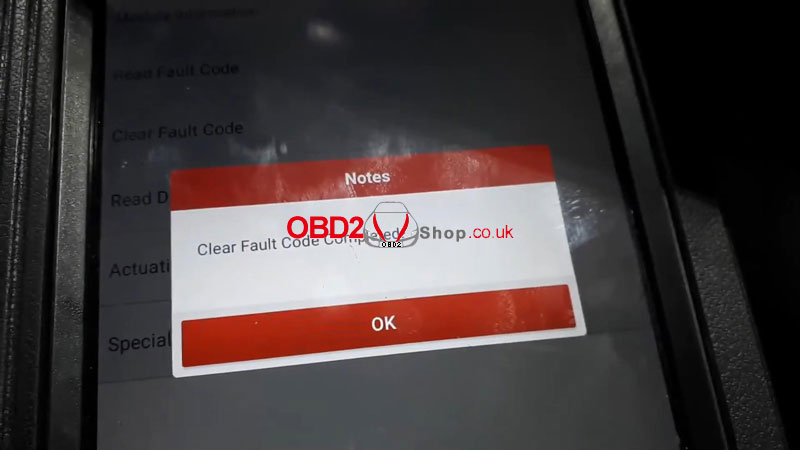 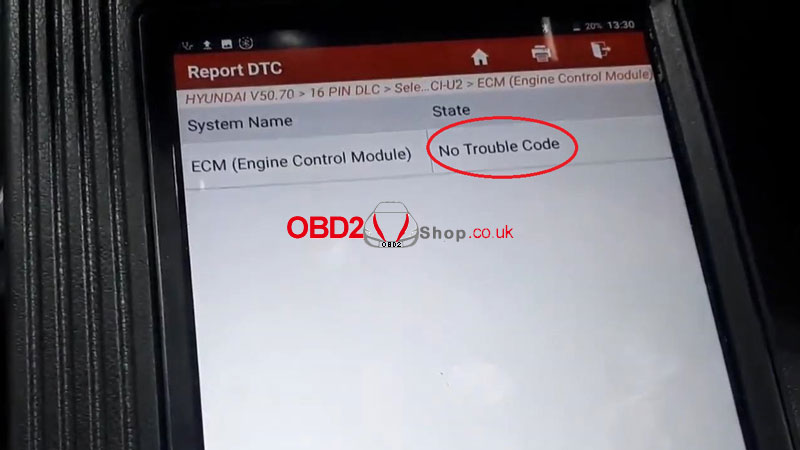 Problem was solved!
This is using Launch X431 V Scan Tool to solve P014C fault code for a Hyundai i30. https://www.obd2shop.co.uk/ This is a tutorial of how to start Yanhua Mini ACDP Programming Master, including registration, activation, language switch & operation learning. How to register & activate? Download Mini ACDP app on smart phone, go to Me >> Login >> Register >> Input info (phone, password, name & mail) Note: the password must include letters, numbers & symbols. The ACDP ID & SN code are right on the device, you can scan the OR code directly or manually input it. Remember to select “Agree software licensing and service agreement”. Press “Sign up now”. Congratulations! Registration succeeded. Now ACDP device was activated, you can start to use. Please keep in mind the info you registered. 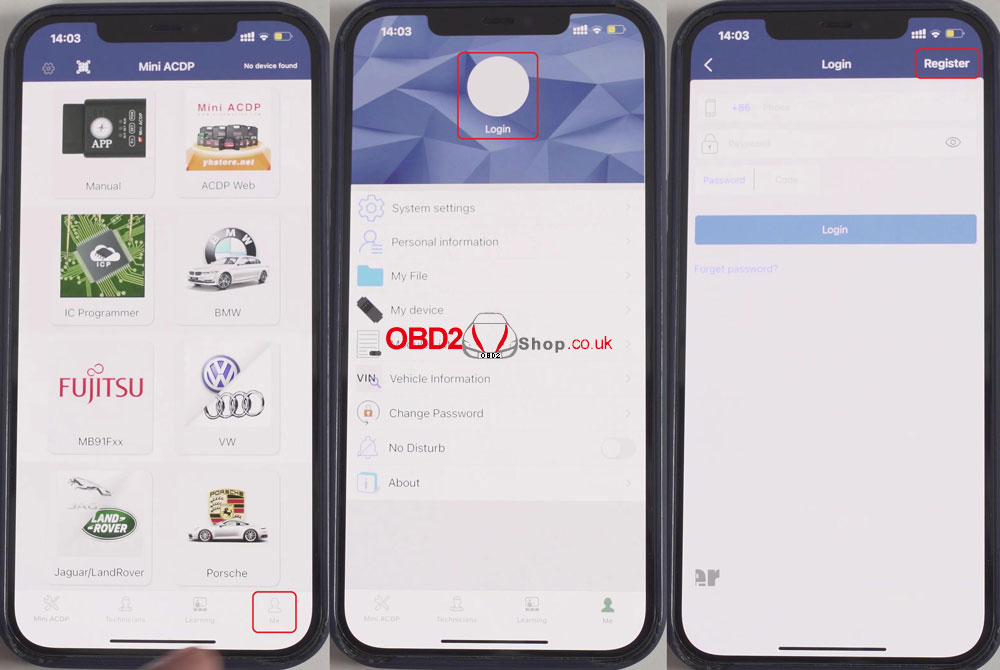 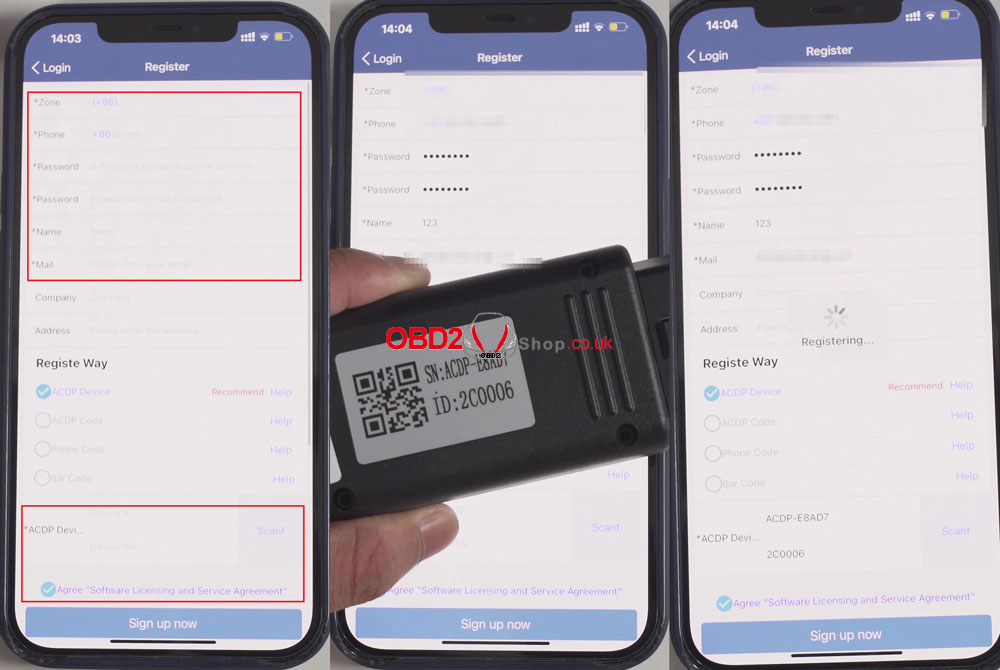 How to switch language? System settings >> Language It supports English & Chinese. 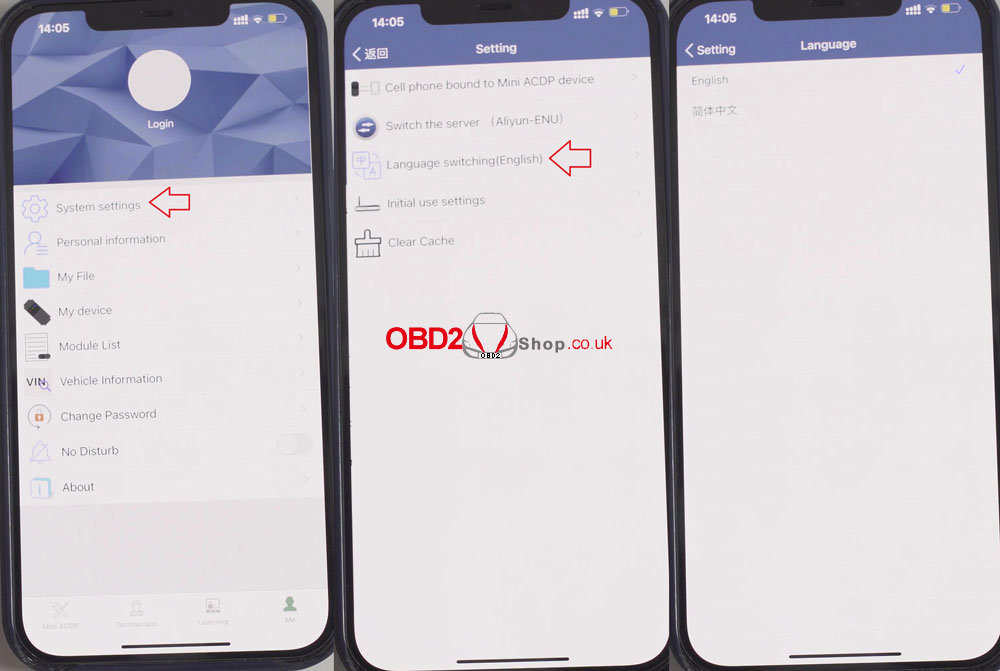 How to start ACDP? 1. Check FAQ Technicians >> ACDP sales FAQ/ ACDP technical FAQ 2. Press “Learning”. Here are a lot of videos about ACDP operation you can learn from. 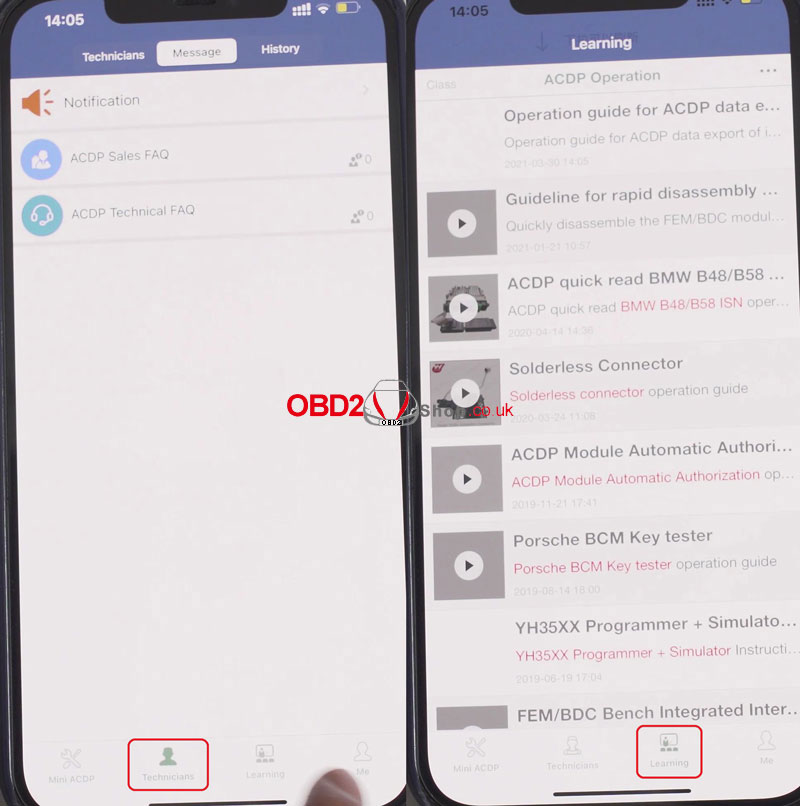 Yanhua Mini ACDP car key programming no longer need soldering iron, supports to program module on BMW, Mercedes Benz, Audi...etc. For full configuration, please choose Full Set YANHUA Mini ACDP.
https://www.obd2shop.co.uk/ This post is going to show how to bind a Lonsdor SKE Smart Key Emulator to K518ISE Key Programmer. SKE Emulator is used for all keys lost scenarios mainly with Toyota & Subaru, which allows to do key programming via OBD. Steps - How To Bind 1. Open up the emulator outer shell to put a 2032 battery in. Once done, you can see a power light on pcb when pressing the button. Put main board back inside to the shell. 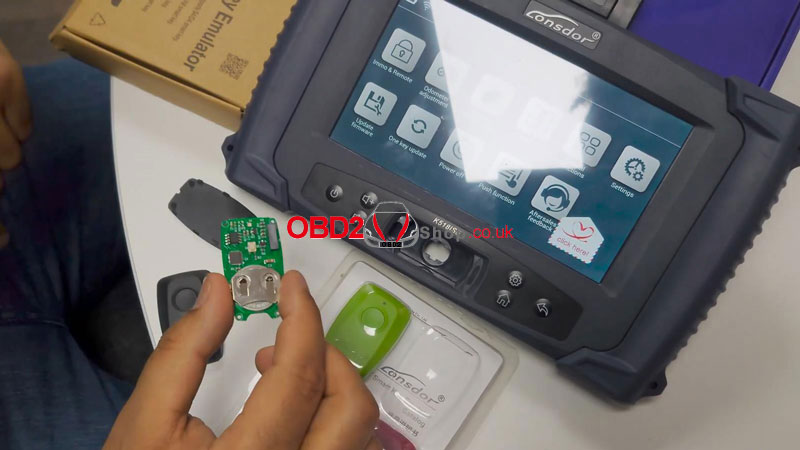 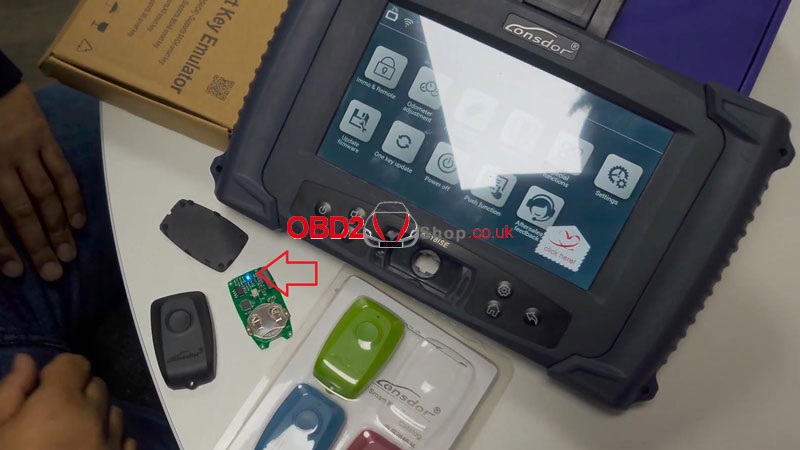 2. Go to Lonsdor K518ISE scanner, press Immo & remote >> Toyota >> Select from type >> All smart key lost >> All key lost >> Bind SKE >> OK 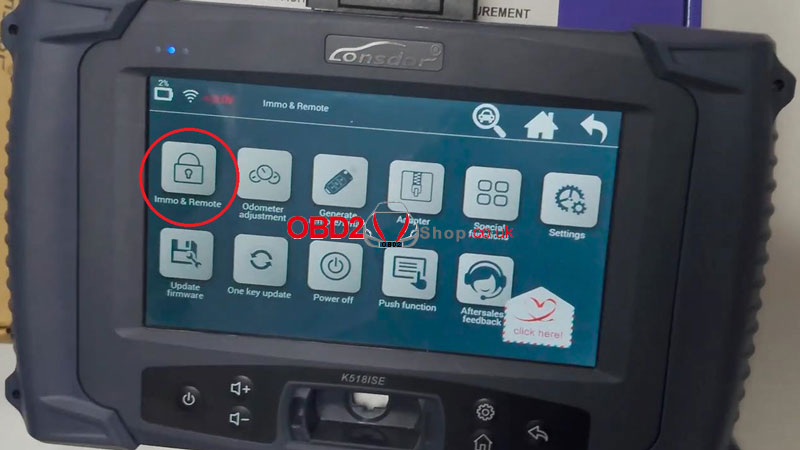 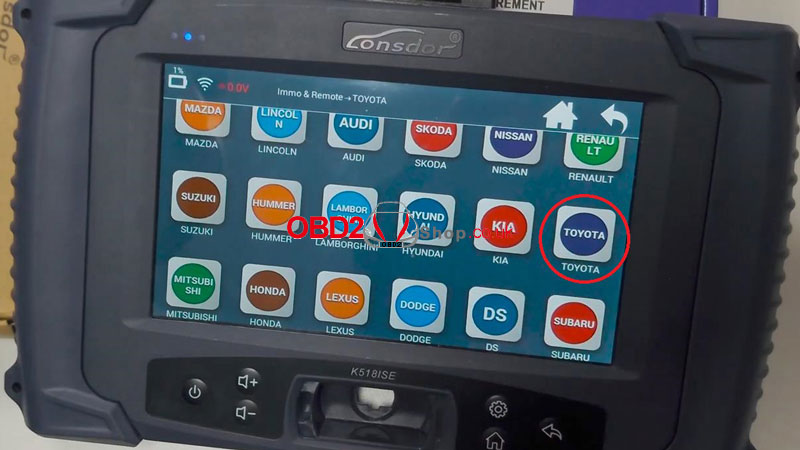 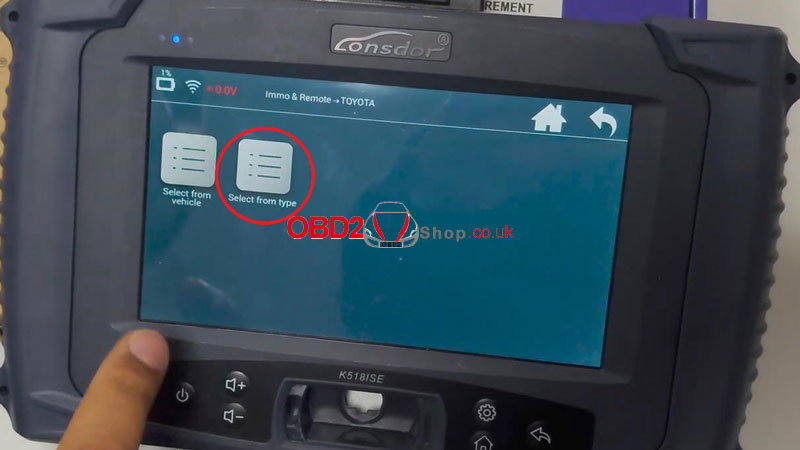 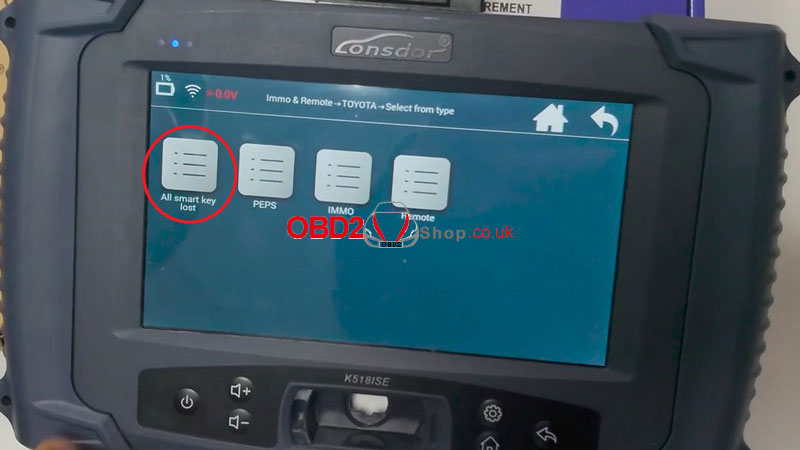 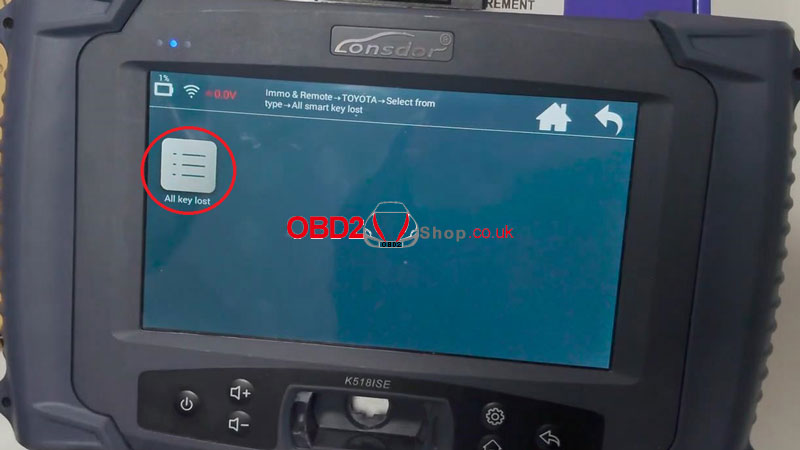 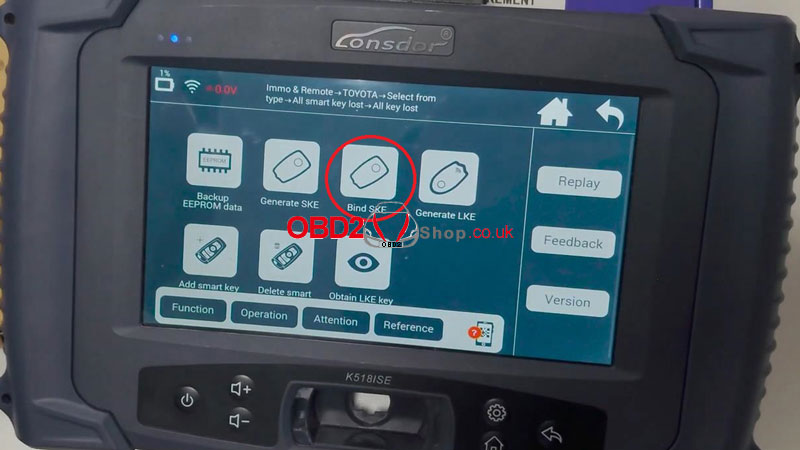 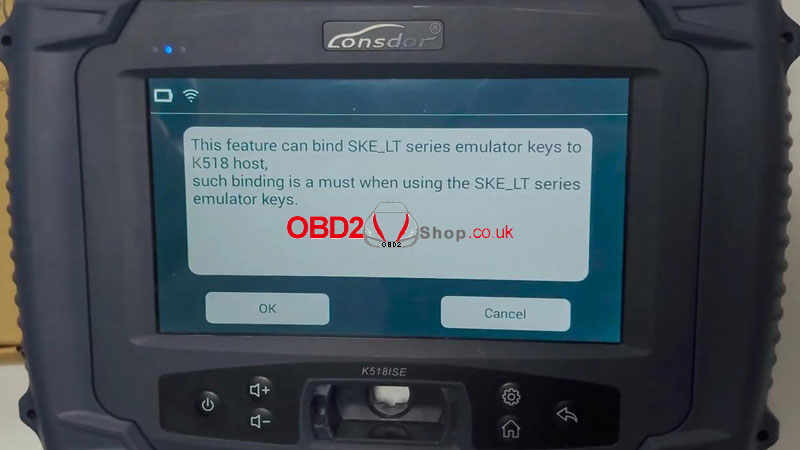 Put the SKE Emulator into K518 key slot, press “OK”. 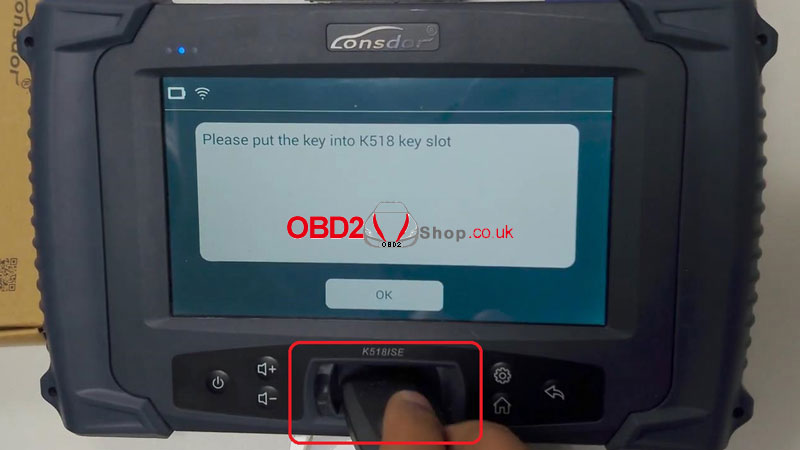 Key binding success, this key is available to program for all key lost. Press “OK”. 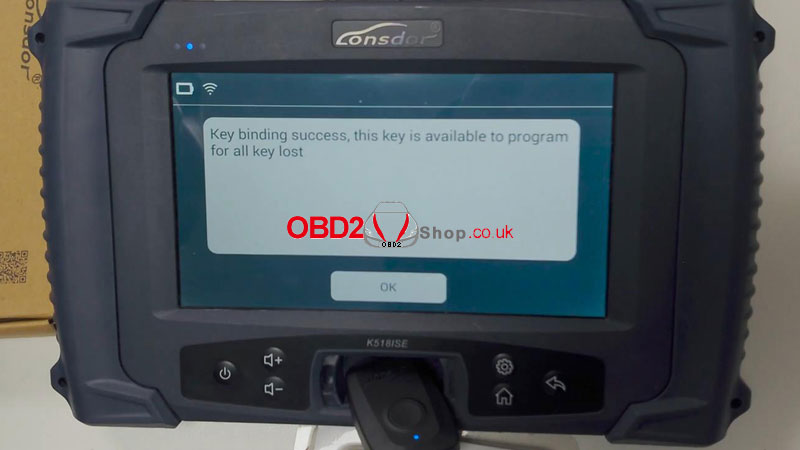 Done!
Now you can use Lonsdor K518ISE + SKE Emulator to program for all key lost. https://www.obd2shop.co.uk/ Today I’m going to use the Thinkcar ThinkDiag device to do some bi-directional tests on a 2015 Chevrolet Suburban. Following I’ll demonstrate how to perform cylinder test & engine speed test. Plug ThinkDiag into OBD2 port, we’ll hear a beep and see the green light indicating that is connected. 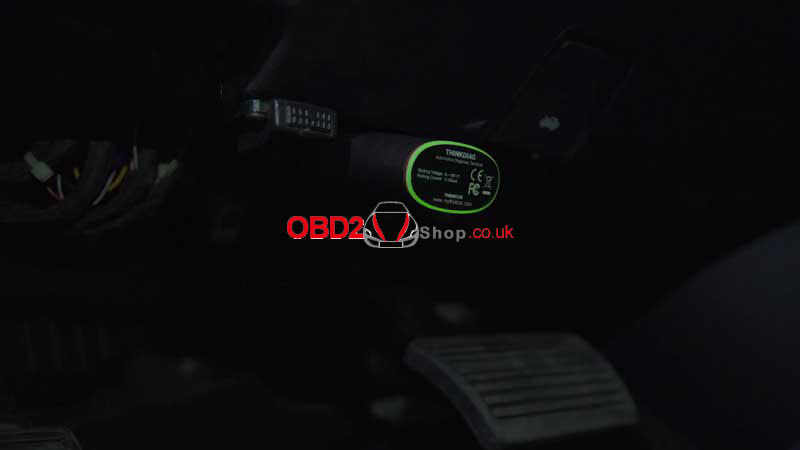 Turn ignition on, press All systems full function >> Next step >> System selection >> Engine control module(ECM) >> Actuation test >> Cylinder deactivation We can test each cylinder individually here. Turn it on to start the test, the vehicle will turn off automatically. Cylinder 1 >> On 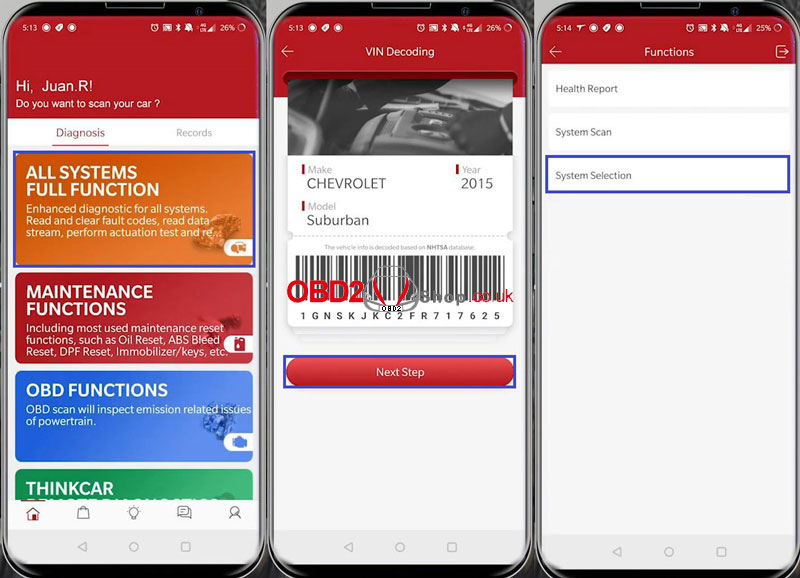 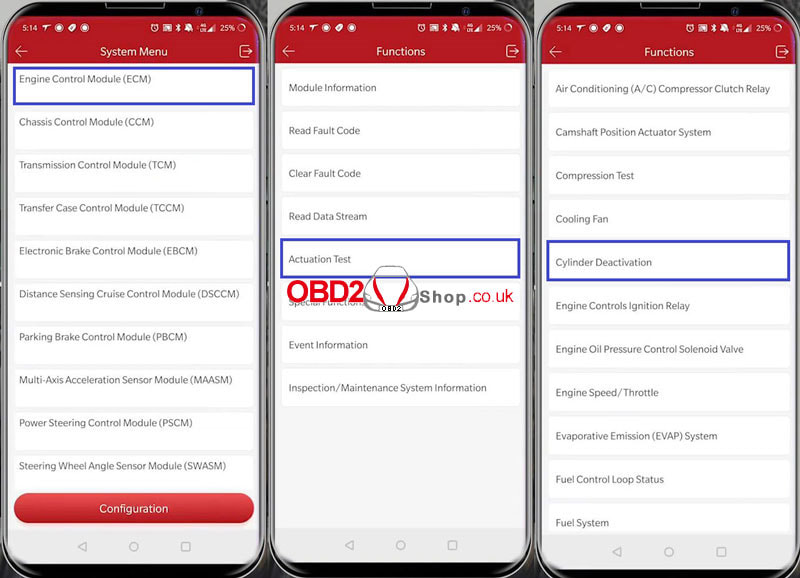 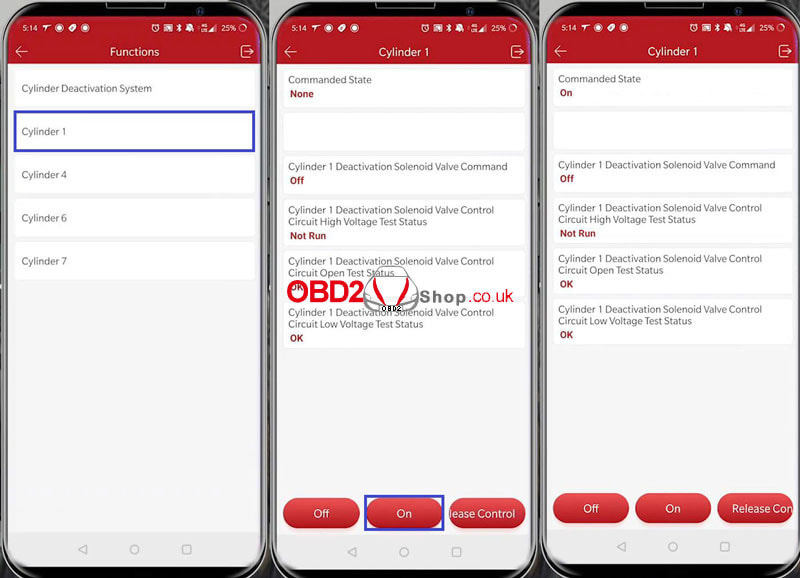 We can go to test all cylinders here. Cylinder deactivation system >> Enabled >> Disabled Let’s go to test the engine speed now. We’re able to do is actually increase the engine speed at idle, so you can hear it revving up to 2000rpm. Press “Release control”, it will just go back to default position. Engine speed/throttle >> Engine speed >> OK >> Increase >> Release control   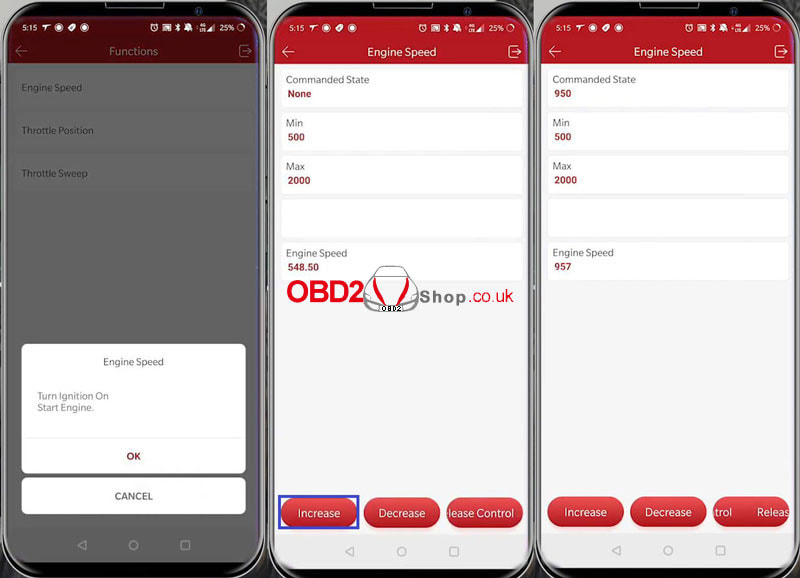 This is using ThinkDiag OBD2 Scanner to do bi-directional tests which is one of the 15 special functions. The powerful & professional functions make it worth the money.
https://www.obd2shop.co.uk/ How to update the firmware of VCI(vehicle connector interface) for Autel scan tool devices? The process is the same irrespective of the kind of Autel products, it applies to MaxiVCI Mini, MaxiVCI100 & Wireless Diagnostic Interface. This tutorial will take the MaxiVCI Mini as example, which is used for Autel MK808TS, MX808TS, MP808TS, etc. Besides, MaxiVCI100(supports Autel MS906BT, MS908TS etc.) & Wireless Diagnostic Interface(supports Autel MK908, MK908P, etc) are all the same process for updating. 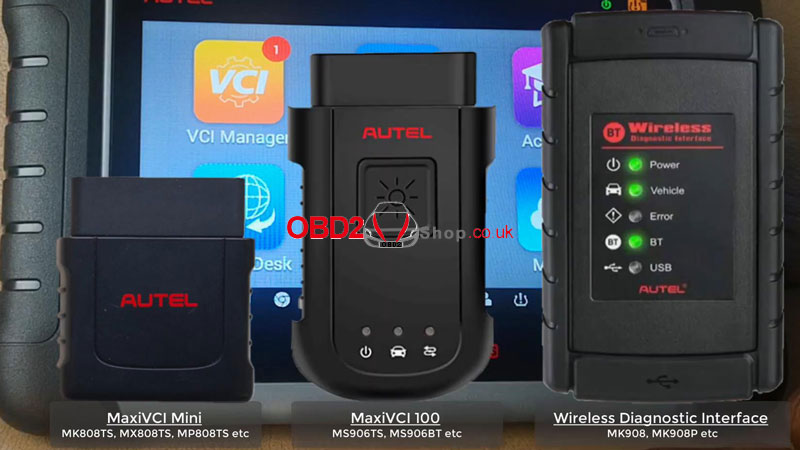 It is absolutely essential that beyond keeping the Autel scanner itself updated. You also need to ensure that the VCI firmware is updated so that the tool has the latest firmware for connecting to different vehicles that you may work on. Note Before Update:
4 Steps Of VCI Firmware Upgrade 1. Use charging cable to connect VCI & Autel device. 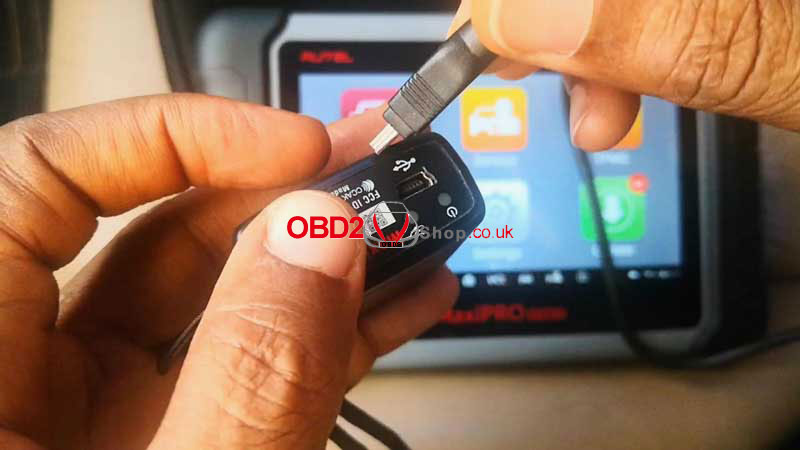 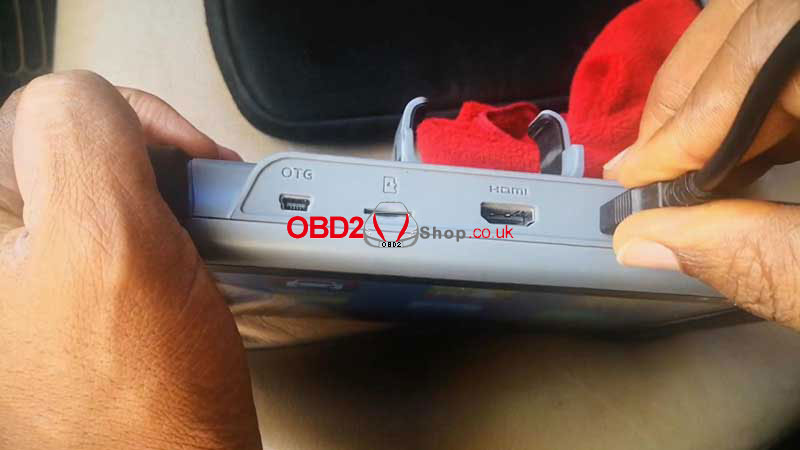 2. 2 Green lights on VCI will come on, which means connection is successful. The VCI green tick on screen also shows it works. 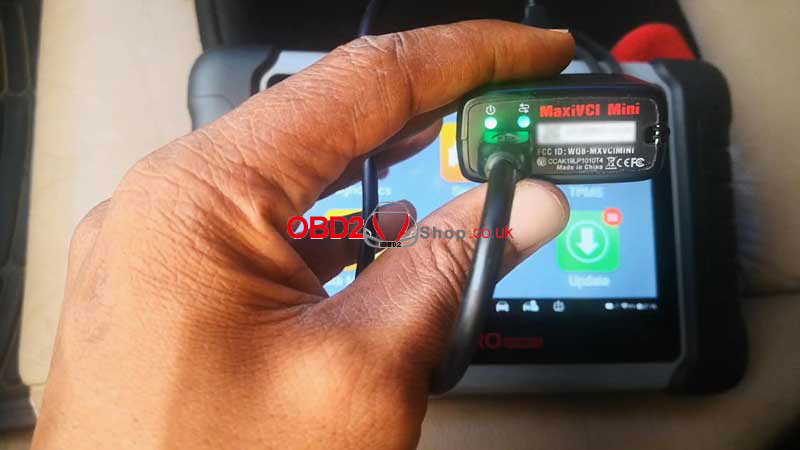 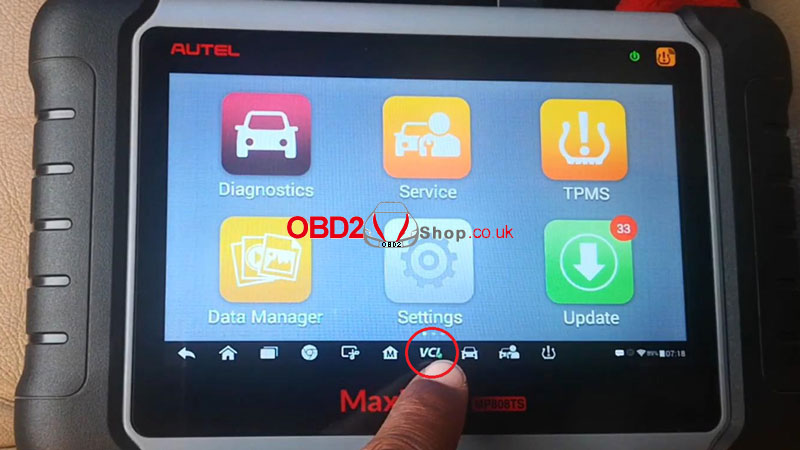 USB connection indicators on various VCI 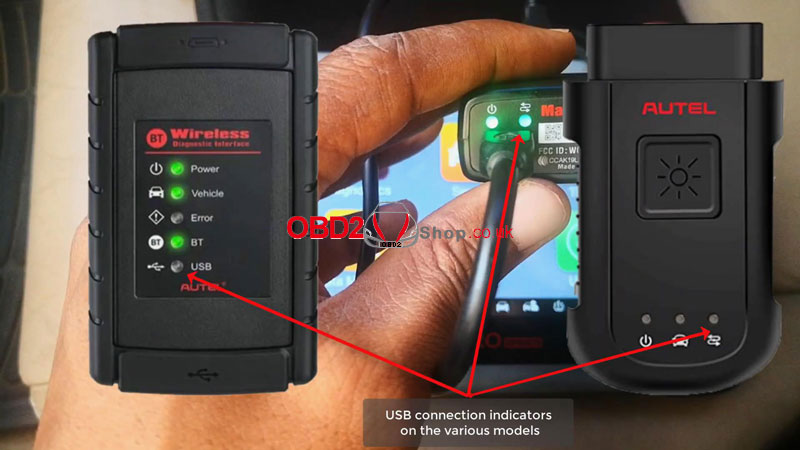 3. Connect device with WIFI, press VCI Manager >> Update >> Update now (Note: Do not disconnect the VCI. Do not leave this page during upgrade!) 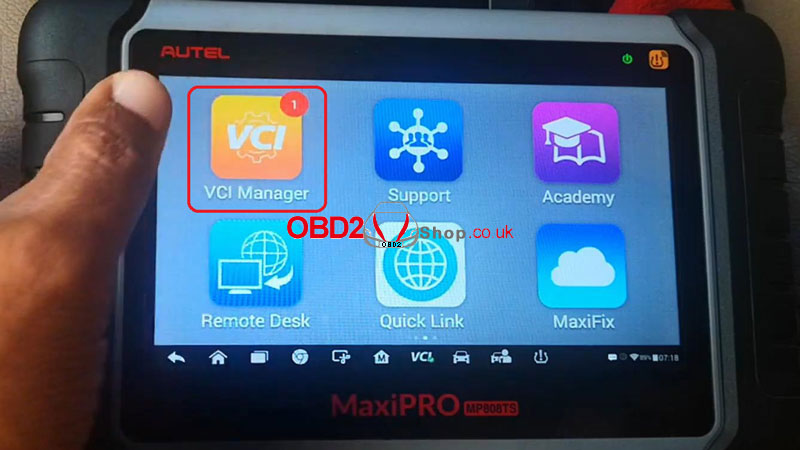 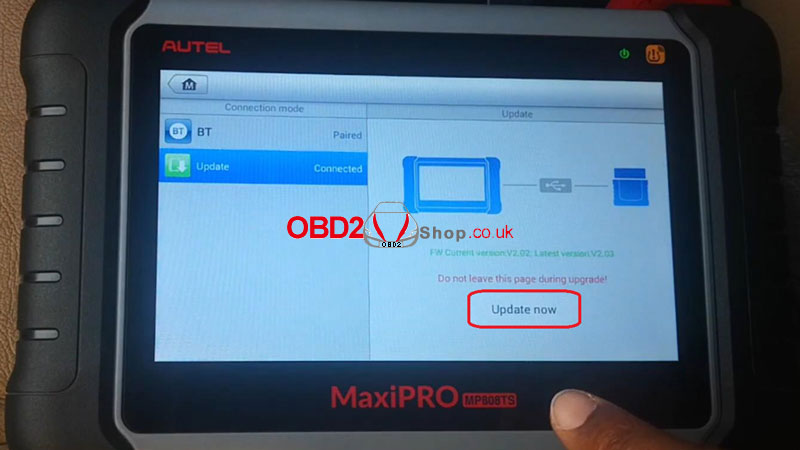 4. Reboot your VCI to complete update. 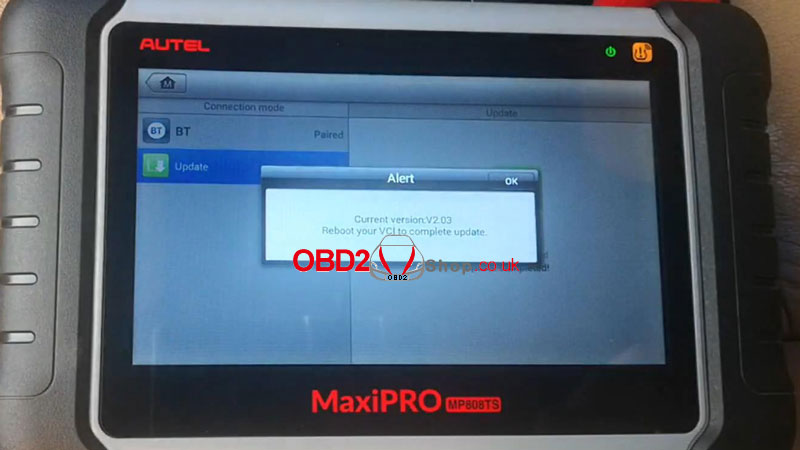 Done!
VCI firmware upgrade is easy and fast, it guaranteed normal running of Autel device with latest stable version. https://www.obd2shop.co.uk/ |
